E-commerce Website Testing Guide: Ensuring Conversion-Optimized Experiences
Online shopping is now a standard part of daily life. E-commerce has reshaped how people buy products, and the market is expected to grow past $6.4 trillion by 2029. But with this growth comes higher expectations and stronger competition. For new or growing online stores, even small issues can turn visitors away.
Slow websites, broken links, vague error messages, and payment problems are common reasons people abandon carts. These problems hurt conversions, raise acquisition costs, and damage trust. Just a few seconds of delay can cut your conversion rate in half.
This e-commerce website testing guide explains how to test the key parts of your site from product pages to checkout so everything works the way it should. A well-tested store doesn’t just look good. It loads quickly, works on any device, and gives shoppers the confidence to buy.
Functionality Testing for E-commerce
Imagine a coffee shop where you cannot buy coffee? Pretty frustrating, right? The visitors can get the same feeling if any functional aspects of your e-commerce are not working correctly. From production browsing to payment, functionality testing involves testing every feature of the e-commerce platform, ensuring everything works as anticipated. Performing functionality testing on your e-commerce site consists of analyzing the following parts:
Product Catalog Testing
When people land on your site, they’re there to shop. Your product catalog plays a huge role in whether or not they stick around. It needs to be accurate, easy to browse, and up to date:
Product Display Accuracy
The product catalog is the first touchpoint between your business and the buyer. Inconsistency in product information, filtering, inventory display, or navigation can hamper the initial impression and trust of your potential customer.
Product display accuracy ensures each of the product details, such as name, price, description, images, specifications, and availability, are correctly shown on product listings as well as detail pages, which align with your backend data, like CMS or database.
Let’s start by exploring the key areas involved in testing product catalog functionality:Text fields: product name, SKU, description, price
Visuals: primary images, variant thumbnails, zoom functionality
Contextual info: ratings, stock status, labels
Once you’re clear of the areas you need to focus on, it is time to perform the tests:Validate Product Details: To ensure correct product details are displayed, you need to use browser inspection tools such as Chrome DevTools to compare the details shown on the website with the backed data store on your database. For instance, SQL queries can be executed to fetch backed data and verify it with the frontend.
Test Dynamic Content: Sections like “Recently Viewed Products” and “Customers Also Bought” change based on how users interact with your site. These are powered by dynamic content and need to reflect what users actually do.
Use Selenium or a similar automation tool to mimic user behavior and make sure these sections update accurately without bugs or outdated data.Localization Testing: If your store serves different regions, localization testing is a must. Product names, prices, descriptions, and discounts should automatically adjust based on the visitor’s location.
Check that currencies and languages are switching properly, and that region-specific promotions or offers show up correctly.
Category Navigation Functionality
Not every customer lands on your site knowing exactly what they want. Sometimes, they just have a general idea like “t-shirts” or “running shoes” and they rely on categories to help them browse. That’s why category navigation needs to be accurate. If someone clicks on “T-Shirts” and ends up in the “Laptops” section, they’ll likely leave and not come back.
Category navigation testing checks whether your menu structure is working the way it should. It’s about making sure categories are properly linked, filters make sense, and users can move around the site without getting lost or misdirected. Here’s what to look at:
Verify Category Hierarchy: Use a browser to manually go through each category and subcategory. Each click should lead to the correct page. For example, clicking Home > Clothing > Women > Dresses should take you to a page that actually shows women’s dresses not something else.
This also helps confirm that your site’s taxonomy how categories are structured matches what users see.Validate Category-Specific Filters: Each category should come with filters that make sense for that product type. If you’re in the “Shoes” section, you should see filters for size, brand, or color not unrelated options. Try testing filters manually, or use automation tools to run through them and check whether results are updating correctly.
Test Breadcrumb Navigation: Breadcrumbs is a way to keep track of the user's journey on the website or what the user would take to reach a specific page. By testing breadcrumb navigation, you ensure that the user will be taken to the page on which they clicked the breadcrumb. All you have to do is click on the breadcrumb link (eg: Women’s in Home>Clothing>Women’s>Dresses) to confirm that they redirect to the right category.
Filter and Search
It’s not necessary for the user to search for every product in a category. Sometimes, they know what they’re looking for and will search for it directly using the search functionality. Combining search with filters can narrow their search, offering them the desired product.
Both search and filters play a big role in how easily people can find products. That’s especially true for stores with large catalogs. Testing them helps make sure they return accurate, useful results.Test Filter Accuracy: Start by applying filters manually. After choosing a category like “Shoes,” try filtering by brand, size, or price. Only the matching products should show up. If they don’t, or unrelated items appear, something’s off.
Validate Search Relevance: Try different kinds of search terms full product names, partial matches, misspellings, and synonyms. The results should still make sense and be ranked in a way that feels logical. Popular or exact matches should show up at the top.
- Product Variant Selection
To cater to the needs of various customers, brands offer the same product with multiple variants like a t-shirt in multiple colors or a phone with more storage. The product page should make it easy to switch between those options without leaving the page or restarting their search.
- Verify Variant Options: Go to a product that comes in different variants. Make sure all the available options are shown clearly color, size, style, etc. When you click a variant, the page should update with the right price, image, stock level, and other details.
- Backend Validation: It’s not just about what users see. Use SQL queries to check that the data behind each variant is accurate in your backend. You can also test API endpoints with Postman to ensure the correct variant data is sent to the front end.
- Verify Variant Options: Go to a product that comes in different variants. Make sure all the available options are shown clearly color, size, style, etc. When you click a variant, the page should update with the right price, image, stock level, and other details.
Shopping Cart and Checkout Testing
Adding products to the cart and checking out are among the key features of an e-commerce website. Here, users review their selections, apply discounts, confirm the delivery address, and make payment. And if there is the slightest issue within these features, you may face cart abandonment, lost sales, and frustrated customers.
Ultimately, your revenue is going to take a toll. That’s why it’s essential to understand how to test the e-commerce checkout process thoroughly. The following shopping cart tests will ensure that your e-commerce has a stable cart and checkout process:
Add-to-Cart Functionality
As the name suggests, the add-to-cart functionality testing guarantees that users can add products to their shopping cart from product pages. Being the first step in the purchase, any failure here can derail the entire transaction.- Add to Cart Feature: Begin this shopping cart functionality testing by heading to the product page on any browser and hitting the ‘Add to Cart’ button. As soon as you click, the cart icon should update with ‘1’ or the number of units added. Make sure to click on the cart icon to verify if the correct product, variant, and quantity are added to the cart.
- Quick-Add: If your e-commerce platform offers add-to-cart functionality from search results, then you need to test that process to ensure that the right product is added to the cart from the search results.
- Add to Cart Feature: Begin this shopping cart functionality testing by heading to the product page on any browser and hitting the ‘Add to Cart’ button. As soon as you click, the cart icon should update with ‘1’ or the number of units added. Make sure to click on the cart icon to verify if the correct product, variant, and quantity are added to the cart.
Cart Modification
Almost every e-commerce lets users update their cart by adjusting quantities, removing items, or adding more products. Testing these features verifies that these modifications are accurately reflected in the UI and backend.- Quantity Update: Test whether the cart allows the user to adjust the quantity by manually increasing or decreasing the number in the cart. Every change should be reflected instantly along with the price.
- Removing Items: Remove one or more items from the cart and ensure that they disappear along with the price adjustment. If your cart has a ‘Clear Cart’ button, then hit that and monitor whether it removes all the items from the cart or not.
- Add More Products: Once you’ve added products to the cart, try to add another product and ensure that different items are displayed on the cart without any errors. The pricing should be adjusted according to the products added.
- Session Persistence: If the user is logged in, the cart should remain unchanged after the user logs out and logs in again. Test this by using Chrome DevTools to inspect session storage or cookies. In addition, you can use Postman to validate cart API responses and ensure that the cart remains unchanged even after the user logs out and logs in.
- Quantity Update: Test whether the cart allows the user to adjust the quantity by manually increasing or decreasing the number in the cart. Every change should be reflected instantly along with the price.
Discount and Promotional Code Application
One of the best ways to attract customers is by offering discounts. But this can backfire if the claimed discount does not work. You can avoid this by performing discount and promo code application testing, where the tester will verify that any discount, coupon, or promotional code is applied correctly and the final amount or the claimed discount is reflected accurately.- Basic Discount Application: To test this, you need to enter a valid promotional code during the checkout process and ensure that the correct discount is applied to the eligible product. Take this testing one step further by entering the wrong code and monitor whether it applies the discount or not. You need to do the same with an expired code or a code with limited usage. Also, confirm that the right message is showcased to the user in case of an error (expired code, limit reached, or invalid code applied).
- Multiple Codes: Try adding multiple codes to check whether your website stacks up the discount or gives an error. If you have a policy of one code at a time, then either it should first give the option to remove the existing code before letting the user enter another code, or it should display that a code is already applied.
- Conditional Discounts: Some discounts come with specific conditions that should be met before the code becomes active. For instance, if you have code for a flat 10% discount on orders above $100, then test that by making the cart value over $100 and verifying if the code is applied. Also, try this test with a cart value less than or equal to $100 to check whether the code is applied.
- Basic Discount Application: To test this, you need to enter a valid promotional code during the checkout process and ensure that the correct discount is applied to the eligible product. Take this testing one step further by entering the wrong code and monitor whether it applies the discount or not. You need to do the same with an expired code or a code with limited usage. Also, confirm that the right message is showcased to the user in case of an error (expired code, limit reached, or invalid code applied).
- Shipping Calculation
Shipping fees should be calculated based on product type, customer location, and delivery method. Mistakes here can lead to confusion or lost sales.
- Shipping Cost: Begin this test by entering a delivery address and selecting a shipping method (express or standard). Based on the input, your website should showcase the shipping cost according to your policies. By using automation testing tools, you can automate address entries and cost validation to attain an accurate outcome.
- Free Shipping: If your e-commerce offers free shipping under specific conditions, then you need to test this by placing orders just below, at, and above the free shipping threshold. Make sure that the shipping cost is adjusted as per the factors.
- Backend Test: Not just the frontend, but you need to test the backend of your e-commerce. Tools such as Postman can help you test your shipping calculation API.
- Shipping Cost: Begin this test by entering a delivery address and selecting a shipping method (express or standard). Based on the input, your website should showcase the shipping cost according to your policies. By using automation testing tools, you can automate address entries and cost validation to attain an accurate outcome.
Tax Calculation Verification
Tax rates vary based on product category and shipping location. You need to make sure your system applies the right tax to the right item, in the right location.- Add addresses from different states or regions to test location-based taxes.
- Try taxable and non-taxable items (e.g., groceries vs. electronics) to check if tax rules are applied properly.
Order Summary Validation
Instead of directly heading to the payment after calculating tax, it is best to display the order summary to the customer, allowing them to cross-check the products they are ordering along with their price.- Here, you need to test that the order summary involves the correct products along with the breakdown of the charges, such as product cost, shipping cost, taxes, platform fees, and discounts, and is displayed correctly.
- TestCafe, Katalon, and Cypress are top end-to-end testing tools that you can pair with database verification to confirm that values in the UI match the persisted records.
- Here, you need to test that the order summary involves the correct products along with the breakdown of the charges, such as product cost, shipping cost, taxes, platform fees, and discounts, and is displayed correctly.
Payment Gateway Testing
The last and arguably most important step in the shopping journey is payment. If this part fails, nothing else matters. Customers expect the process to be smooth, fast, and secure. It also needs to meet compliance standards, especially when handling sensitive payment data.
Payment gateway testing helps you catch issues early so payments go through without errors, and customers can use the method they prefer.
Payment Method Integration Testing
Your e-commerce store should support more than just one way to pay. Credit cards, debit cards, digital wallets like Apple Pay or Google Pay, and third-party services like PayPal or Stripe each customer has a preference. Limiting them means you’re leaving money on the table.
Start by checking that all available payment methods show up properly on the checkout page.
Then test each one:
- Card fields: Make sure input fields validate the correct format. For example, a Visa card should accept 16 digits, while an American Express card takes 15. Letters or special characters should trigger an error.
- External gateways: If you're using PayPal or Stripe, test the full redirection flow. The site should send users to a secure interface, then bring them back after the payment without losing their session or cart.
This type of testing ensures every customer has a working, familiar payment option and that the system can handle each correctly.
Transaction Processing Validation
What happens after someone hits “Pay Now” matters just as much. If your platform charges the wrong amount or charges them twice you’ll lose that customer for good.
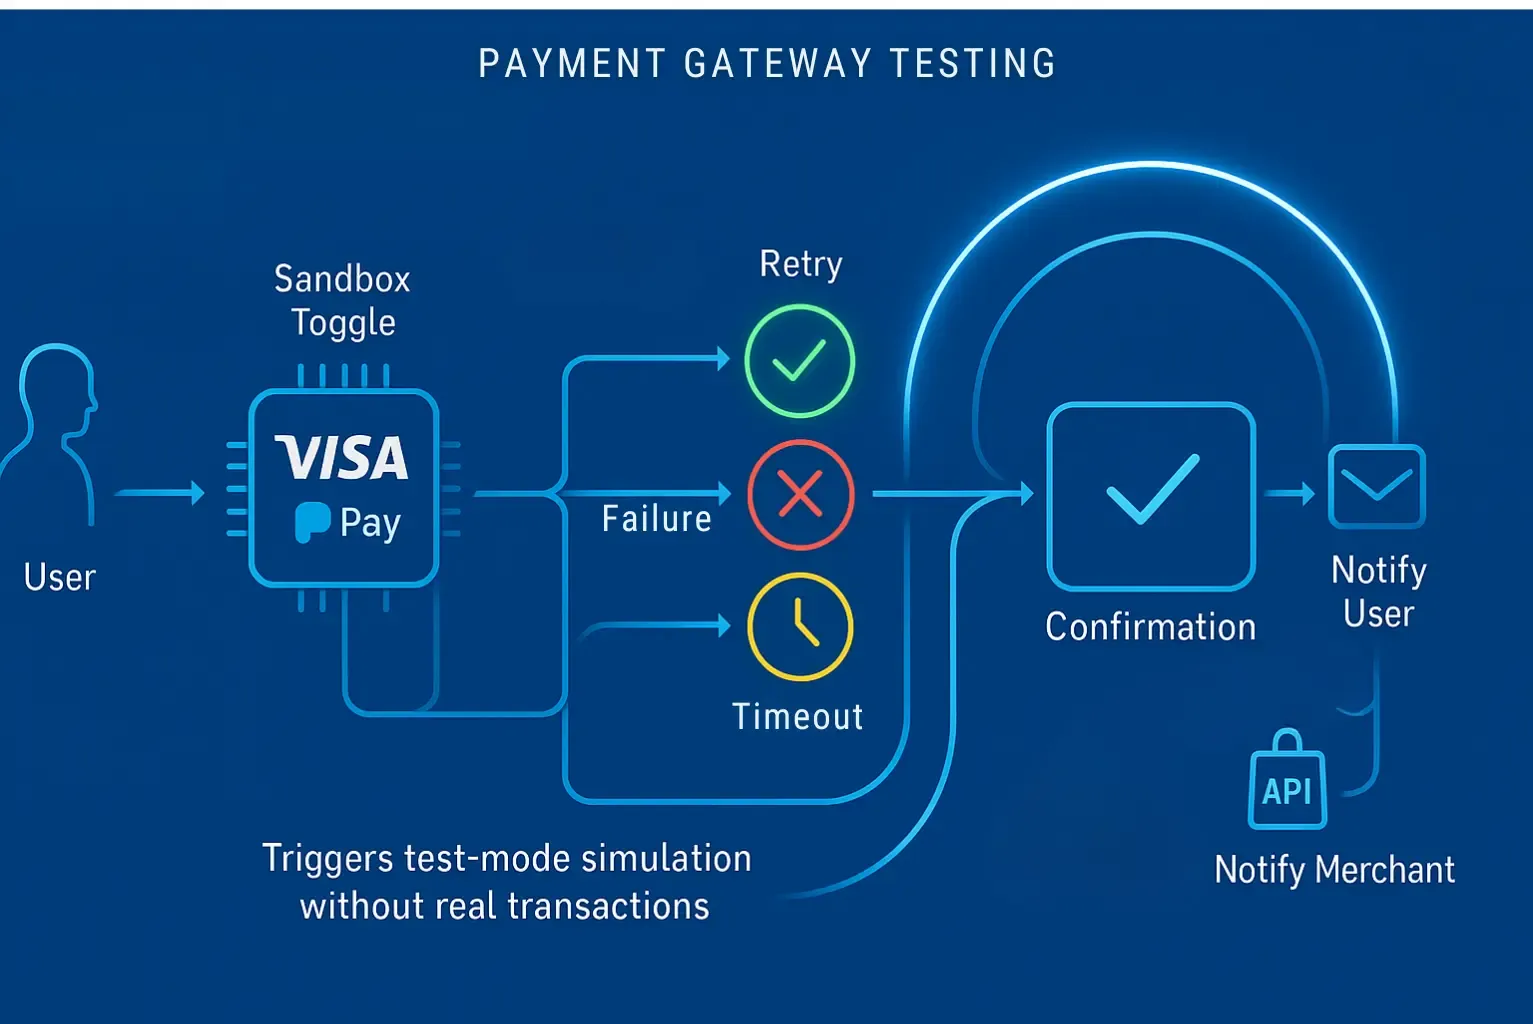
To avoid issues like overcharges or failed payments, test your transaction flow using a sandbox environment. This lets you simulate payments without using real money.
Here's what to check:
- Successful payments: Run test transactions using valid credentials. Confirm that the payment goes through, the right amount is debited, and the transaction shows up properly in your system.
- Edge cases: Use sandbox tools to simulate timeouts or interruptions like a customer losing connection mid-payment. Then monitor the backend to confirm that it doesn't charge the customer multiple times.
This step also ensures the merchant receives the correct amount and that the payment data is logged accurately. Don’t skip testing each method separately even small variations can cause unexpected bugs.
Error Handling for Payment Failures
Payment errors are bound to happen. A card might be expired, the CVV could be wrong, the customer’s bank may block the transaction, or the gateway could time out. Whatever the reason, your payment system should handle these situations gracefully and keep the user informed without creating more friction.
Most gateways offer test card numbers to simulate different kinds of failures. Use those to check how your site handles each error type without needing to run real transactions. After a failed payment, a few things should always happen:
- The user sees a clear message explaining what went wrong (e.g., “Card declined” or “Incorrect CVV”).
- The shopping cart stays intact, so users can try again without having to re-add everything.
- The checkout page should let them switch payment methods easily.
- It’s also worth testing what happens after multiple failures. Can the user try again without getting locked out or triggering duplicate orders? This is where negative testing with tools like Selenium can help. Automate retry flows and confirm that error handling stays smooth and bug-free.
- Finally, make sure failed transactions are logged correctly. Each log should include the error code, time, and a bit of context to help developers investigate. But be careful logs should never include full card details. Keeping that data out is not just best practice; it’s a compliance requirement.
PCI DSS Compliance Verification
If your site accepts card payments, Payment Card Industry Data Security Standard (PCI DSS) compliance isn’t optional. It’s a baseline for handling customer card data securely and protecting your business from data breaches or legal trouble.
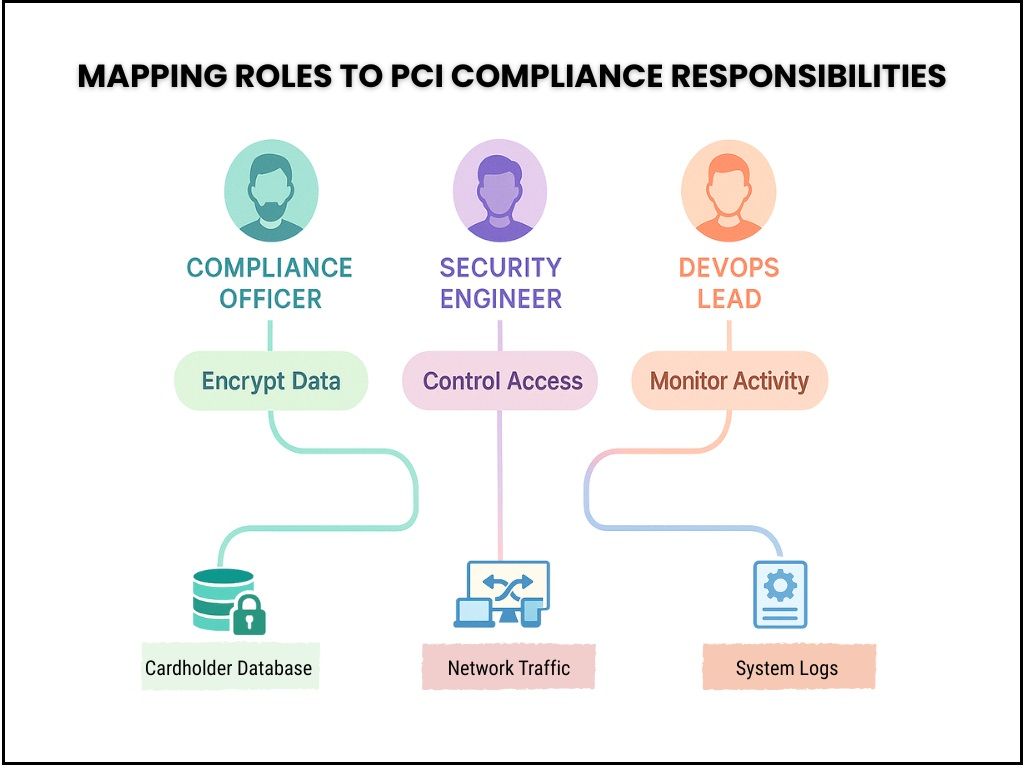
- Start by reviewing the core requirements of PCI DSS. These include:
- Encrypting cardholder data.
- Controlling access to payment systems.
- Managing vulnerabilities and patching systems regularly.
- Enforcing security policies across your team.
- Test data encryption by inspecting network traffic and verifying that cardholder data is encrypted during transmission using TLS 1.2 or higher. Burp Suite can help you analyze requests, apply security testing to confirm sensitive data is not exposed, and simulate attack scenarios for enhanced testing.
- SQL injection, cross-site scripting, or other vulnerabilities can penetrate your security layers. Leveraging vulnerability scanning tools such as Qualys can allow you to scan your environment for any vulnerabilities. Furthermore, you need to conduct compliance audits frequently to maintain adherence after each update or new integration.
- Employing access controls is among the mandates in PCI DSS. With that in mind, you need to implement stringent access controls along with role-based controls, allowing only authorized personnel to access payment-related systems, logs, or databases. Furthermore, using tools such as OWASP ZAP can help you identify vulnerabilities, helping you strengthen your defenses.
- Not only your system, but you also need to test third-party integrations. Make sure to review the Attestation of Compliance (AoC) from payment gateways you’re using to confirm their adherence to PCI DSS.
Order Confirmation Functionality
Upon placing the order, the user should receive a confirmation that the order has been placed successfully. Testing the order confirmation mechanism allows you to ensure that the system provides accurate order information to the customer as well as to the merchants.
After a customer places an order, the confirmation step is where everything should come together. It’s their reassurance that the order went through, and your system’s way of showing that all the right details were captured.
To test this, focus on both what the customer sees and what happens in the backend.
- Start with the order confirmation page. It should clearly show the order number, a summary of purchased items, total cost, shipping address, and an estimated delivery date. These details must match what the customer selected at checkout no surprises.
- Then check how notifications are handled. Customers should get a confirmation through their preferred channel email, SMS, or both shortly after placing the order. Tools like Mailtrap can help you inspect emails and test how these messages look in different languages or regions.
- But don’t stop at the customer side. Merchants need updates too. They should receive key info about the payment status, customer details, and what was ordered so they can begin fulfillment right away. To confirm everything’s in sync, run data consistency tests:
- Match the frontend confirmation with the backend order records.
- Validate that API calls return the expected values.
- Check that notification systems are triggered at the right time with accurate content.
This step helps ensure your order pipeline works smoothly and builds trust on both ends of the transaction.
User Experience and Conversion Testing
Once you’re done with functional testing, the next part of the e-commerce QA checklist is to focus on your site's user experience. A great UX positively influences your website's overall performance and conversion rate, whereas a poor UX might confuse and force the user to switch to an alternative.
While functional testing was more about whether the function works, user experience testing is more about enhancing the overall UX of your website. From the initial introduction until users leave the website, UX testing ensures that they never face any hindrance or confusion while browsing the products.
Apart from enhanced user experience, you can witness increased conversion rates, better customer engagement, improved experience across devices, and a positive brand image.
How to Test UX in Real Ways?
Primarily, there are three methods of performing UX testing:
- Usability testing: It involves letting real users use the website to recognize any usability issues.
- A/B testing: Here, two different versions are tested by users, and metrics are calculated to understand which one performs better.
- Heatmaps: Using heatmaps, you can evaluate the user behavior on your e-commerce site, allowing you to customize the elements for a better user experience.
Must Read: Usability Testing Guide
Map the Customer Journey (Conversion Funnel)
Understanding the customer journey is as important as testing, allowing you to evaluate the steps the customer takes on your website. Conversion funnel helps you understand the entire customer journey from the moment they discover your e-commerce to making a purchase. It can help you identify the areas where customers may leave your e-commerce, allowing you to focus on those areas for better conversion rates. Key stages involve:
- Awareness -They discover your store.
- Interest - They start exploring products.
- Consideration- They read reviews or compare options.
- Action - They go through checkout and make a purchase.
What to Watch Closely
When it comes to different tests on your e-commerce, you need to know the aspects that affect the overall experience. These aspects include page speed, mobile responsiveness, Cross-browser compatibility, and Navigation and layout, among others. Though it may sound intimidating at first, these are explained in detail below for easier understanding.
1. Page Load Optimization
As mentioned earlier, a faster loading e-commerce website has a higher conversion rate than a slow website. Not only that, but faster websites rank higher on the search engine result pages (SERPs). Considering that fact, your goal is to minimize loading speed to two seconds or less for the best outcome.
- Improve performance: To improve loading speed, you must understand the factors that influence it. The primary elements include the large hero image, navigation bar, product grids, third-party scripts(like chat widgets or trackers), and the user’s physical location. This falls under e-commerce user experience validation, ensuring your customers experience a seamless, fast interaction with your site.
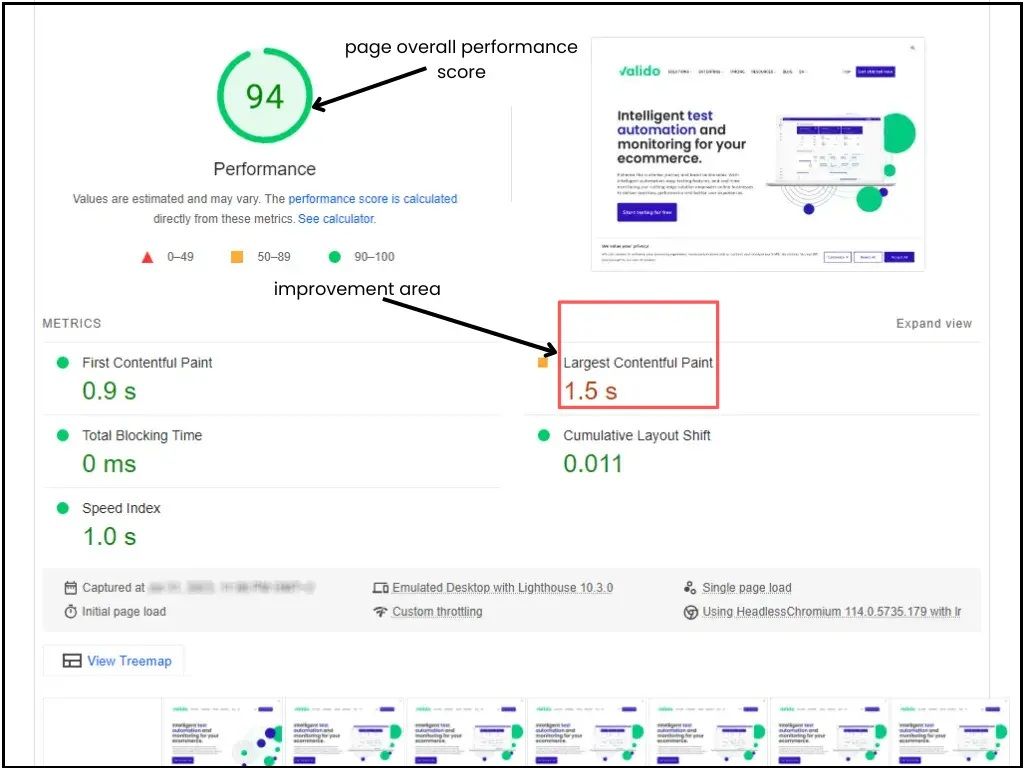
- Test and Measure Performance: Now that you’re aware of the elements, it is time to test the website using Google PageSpeed Insights. Using this tool, you can attain a performance score for desktop and mobile devices. It highlights the elements that you can optimize, including images, JavaScript, CSS, and server responses. Moreover, you can also review metrics such as time to first byte, first contentful paint, largest contentful paint, and cumulative layout shifts.
- Quick Wins for Speed: Furthermore, you can leverage caching and lazy loading to load media files faster on the user’s device to enhance loading speed.
2. Mobile Responsiveness Validation
Out of the entire internet traffic, over 63% comes from mobile devices. With a responsive e-commerce, you ensure that you cater to this massive chunk of potential customers, increasing the possibility of conversions.
Mobile responsiveness validation verifies that your website adapts to varying screen sizes from desktops, mobiles, televisions, tablets, and even watches.
- Start With a Testbed: Before you begin testing, you need to create a testbed that will be your blueprint for tests. This will include various test elements, including OS and browser versions, browsers, screen size, devices, Estimated setup and testing time, and backend systems involved (e.g., server, database). The following is a sample of a mobile responsiveness testing testbed.
| Test Requirenments | Servers | Database | Operating System | Browser | Version | Estimated Time for Setup | Estimated Time for Testing |
| Test 1 | |||||||
| Test 2 |
- Use the Right Tools: To test mobile responsiveness, the best approach is to use dedicated tools such as BrowserStack or LambdaTest. Using these tools, you can emulate thousands of real mobile devices, allowing you to expand your testing. These tools will help you evaluate how your layout adjusts at different breakpoints, whether fonts and buttons stay readable, Scroll and swipe behavior, touch interactions, especially in key parts like menus and checkout, and the overall customer journey on your shopping portal.
- Don’t Skip Real Device Testing: Even with great emulators, it’s still worth checking your site on a few actual phones or tablets. Why? Because some things are easier to catch on a real screen like unresponsive taps, laggy animations, or buttons that are hard to reach with a thumb. Manual testing helps you catch those tactile, real-world issues that tools can sometimes miss.
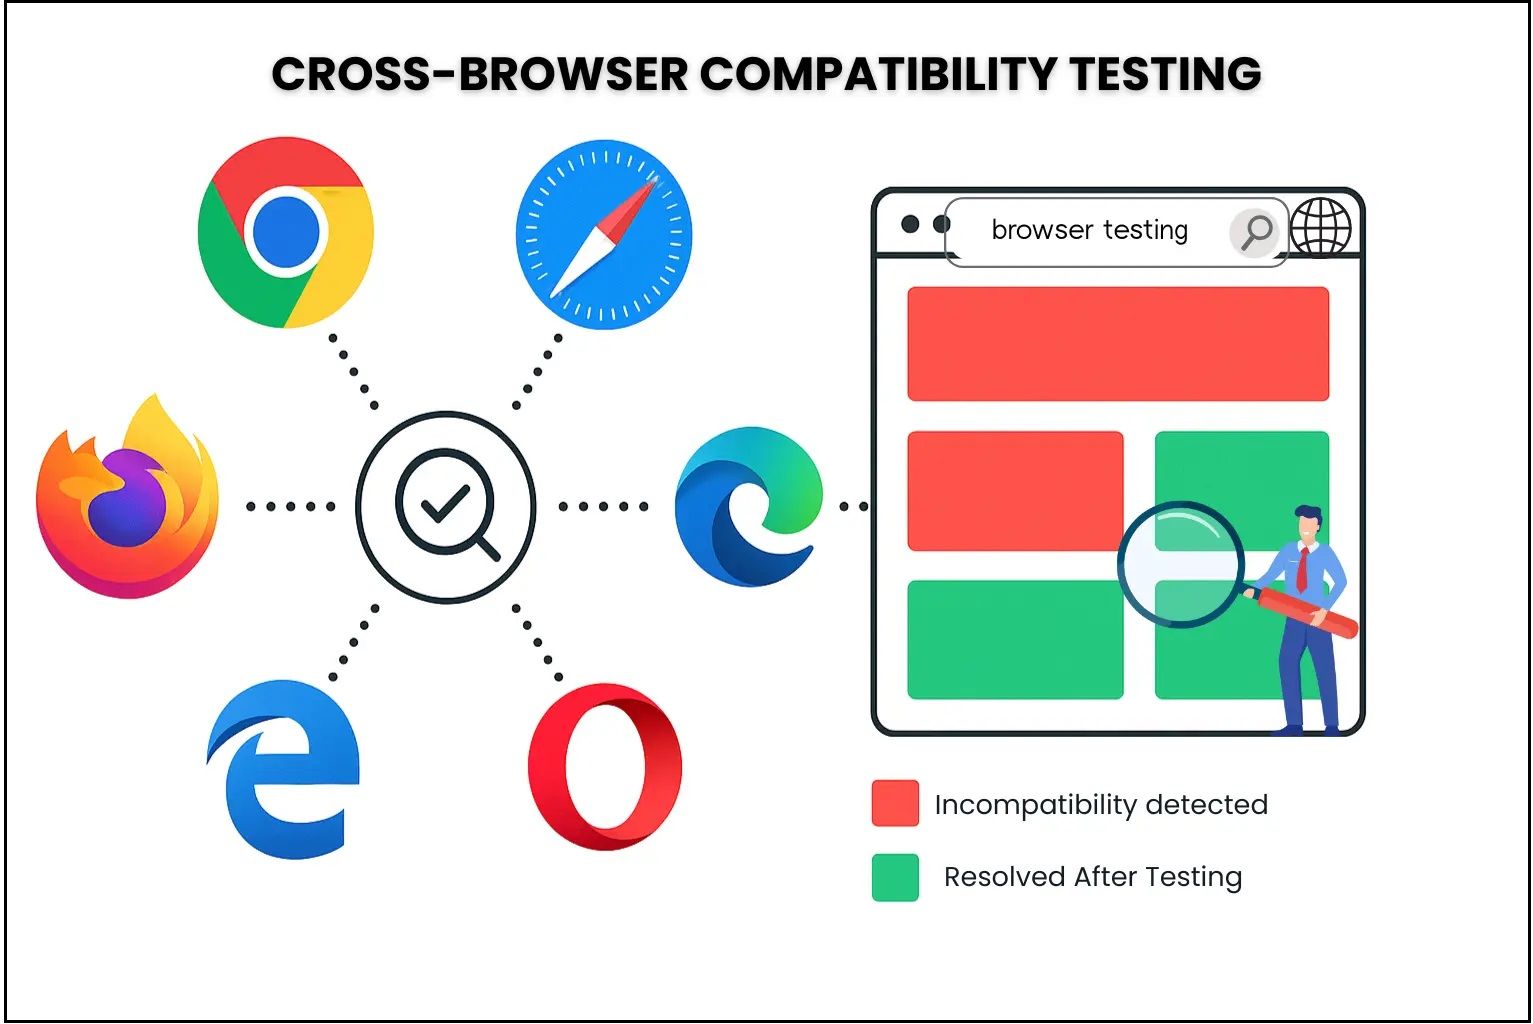
3. Cross-Browser Compatibility
Google Chrome, Mozilla Firefox, Microsoft Edge, Apple Safari, and Opera are the top web browsers. Some customers might be using Chrome while the others may prefer Firefox,etc. Your e-commerce site should be compatible with every browser so that users can shop no matter which browser they use.
- Start With Clean Code: Before you begin compatibility testing, you need to make sure that there are no underlying errors within your code.
- Test Across Major Browsers: Once you’ve done that, it is time to test your e-commerce on several different browsers to identify any rendering issues, misaligned layouts, inconsistent font sizes, broken buttons, overlapping elements, and checkout errors. In addition, make sure to browse for a product and place an order to ensure everything is working without any hiccups.
- Use Browser Testing Tools: You can also use BrowserStack or Sauce Labs tools to test your site on a broad range of browsers across different devices and operating systems.
4. Form Validation and Error Messaging
Whether it’s a feedback form, address submission, or even a login page, if the user encounters an error, they should receive a correct error message. However, if they don’t receive the error message, they might end up believing that something is wrong with the website and close the tab. You can prevent any such issue from happening by testing form validation and error messaging.
Client-Side Validation
Client-side validation means that the data is validated locally on the browser before it’s submitted. For instance, invalid emails or phone numbers should be flagged in real-time, eradicating the delay caused by sending them to the server-side.Use browser dev tools (Inspect>Network>Console tabs) to observe validation errors triggered before form submission.
Disable JavaScript temporarily (in browser settings) to ensure validation isn’t purely client-side.
Check usage of HTML5 validation attributes like required, pattern, type, and JavaScript-based checks in the code.
Server-Side Validation
As client-side data can be bypassed, the data is also sent to the server-side to block malformed data, SQL injection attempts, and identify invalid formats. To test this, you need to:- Use API testing tools like Postman or Insomnia to send raw POST requests to your form endpoint, bypassing the frontend.
- Submit invalid data directly and inspect HTTP 400 or 422 responses for validation enforcement.
- Review backend logs and unit tests (if available) to verify schema validation with libraries like Joi, Express Validator, or Laravel's Validator.
Also, you need to verify that the same rules exist on both ends. You can test this by disabling JS in the browser to force server-side validation and by using tools like Postman to bypass client-side logic and submit malformed data to the server.
Error Messaging Quality
Correct error messages will let the users identify the issues in form submission. You have to monitor if error messages are descriptive, clearly linked to the desired field, helpful, and visible.
Instead of telling ‘Invalid Input’, the message should clearly state an actionable error, such as ‘Phone number field cannot have alphabets’.
5. Trust Indicators Functionality
When someone visits your site for the first time, they’re likely asking themselves: “Can I trust this store?” That’s where trust indicators come in. Elements like product reviews, verified purchase tags, clear return policies, and SSL badges help reduce that hesitation and give new visitors the confidence to buy.
But simply tossing these trust signals onto the page isn’t enough. If they’re buried or poorly placed, users might not even notice them.
- Start by making sure key trust elements appear in the right places your homepage, product pages, cart, and checkout. These are the spots where people are making decisions, and your trust signals should support them there.
- Do a manual walkthrough of your site and check:
- Are badges visible near the product image or price?
- Can users see return/refund info before they buy?
- Are customer reviews loading correctly and quickly?
- You can also use tools like Cypress or Playwright to test how users interact with review filters. Simulate real actions, like sorting by star rating or clicking “verified purchase,” to confirm everything works as expected.
6. Checkout Flow Usability Testing
Cart abandonment remains one of the costliest pain points in e-commerce. While some drop-off is inevitable, a confusing checkout experience is fixable. The motive is to ensure a fast and trustworthy checkout experience.
Checkout is where many sales are won or lost. Cart abandonment is a common issue in e-commerce, but a lot of it comes down to a clunky or confusing checkout experience. The good news: this is something you can fix.
- One key improvement? Don’t force users to create an account. If someone isn’t registered yet, offer them a clear guest checkout option. It should be easy to spot and just as smooth to use. During testing, ask users if they noticed this option and how they felt about the process.
- Another area to watch is payment gateway performance. If your checkout page lags while the gateway loads, users may bail out. You can test this by simulating slower network speeds using tools like Chrome DevTools or WebPageTest. It’ll help you see how well your checkout flow holds up under real-world conditions.
- And finally, use A/B testing to compare different versions of your checkout process. You might find that one layout leads to a higher conversion rate, a lower drop-off, or a better average order value. Use that data to keep refining what works.

Security Testing
People often say that the internet is dangerous if you’re not prepared. Without a doubt, numerous attackers are indeed looking to find vulnerabilities to exploit, and taking the right security measures is the only way forward.
Having a secure e-commerce will not only generate confidence among the users, but also protect you from attackers as well as legal fines levied due to non-compliance.
With security testing, you can identify weaknesses in your e-commerce infrastructure, ensuring prolonged protection from cyberattacks.
1. Customer Data Protection
Protecting customer data should be your priority at all costs. In fact, if you’re handling data of European residents, you have to comply with the General Data Protection Regulation. Actions such as data encryption, data access control, and leak prevention should be applied to comply with GDPR and enhance security. Here’s how you can do that:
- SSL/TLS encryption ensures that data collected from users is served over HTTPS, ensuring it’s encrypted and not shared with the owner. You can assess this certification with the SSL Test tool by SSL Labs.
- Not only that, but data at rest should be encrypted so that it remains protected even in the case of a data leak. For that, you need to review your authentication backend and verify if the passwords stored are hashed using bcrypt, Argon2, or any other modern algorithm.
- Your e-commerce should have role-based access control enabled, allowing only authorized personnel to access sensitive data. All you have to do is log in with a regular user account and attempt to visit admin URLs or APIs. If access is granted, you know your e-commerce is vulnerable and needs fixing. A functioning RBAC will return a 403 Forbidden error. Make sure to do that with each role’s permission for utmost isolation.
2. Secure Checkout Process Validation
Being associated with online payment, the checkout process is often the target for attackers, which is why it demands rigorous transaction security testing. Customer data, including card numbers, CVV, name, and more, should be highly secure and transferred only post-encryption for maximum security.
These are core aspects of e-commerce security testing guidelines, which aim to protect both customer information and transactional integrity. Furthermore, this testing protects from price manipulation.
Because it deals with sensitive payment details, the checkout process is one of the most targeted areas in any e-commerce platform. That’s why it needs strong security testing.
Details like card numbers, CVVs, and user information must be encrypted and protected at all stages from input to transaction logging.
This part of e-commerce security testing also guards against things like price manipulation and unauthorized access.
- Test with Dummy Transactions: Most payment gateways offer test cards for simulating transactions. Use these to place a mock order and check:
- Does the gateway respond correctly?
- Is the user securely redirected?
- Does the order show up in your backend?
A successful flow should record the transaction, show the correct amount, and protect all user details during the process.
- Check for Price Tampering: Attackers can use tools like Burp Suite or OWASP ZAP to intercept requests and try to change the product price, shipping fee, or discount values before they hit the server. You should do the same during testing.
Try modifying these values mid-checkout. If the server accepts the altered prices without any validation, it’s a serious security flaw.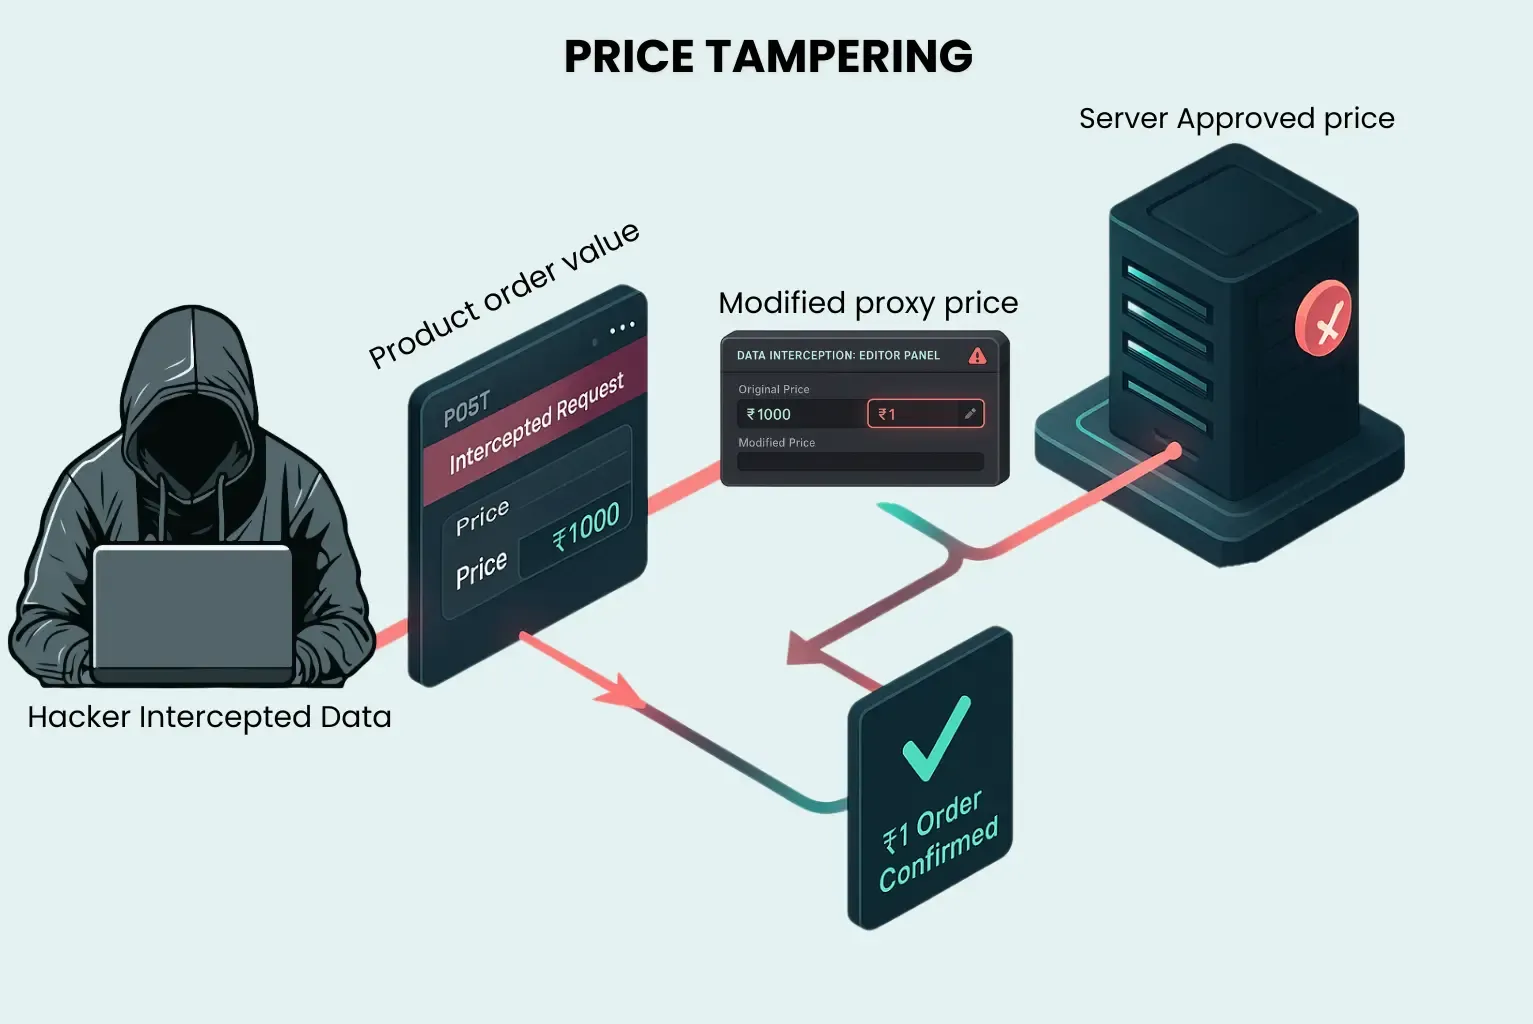
- Session Timeouts and Token Handling: If a user stays idle on the checkout page, your site should automatically log them out or redirect them to the cart after a certain period. To test this:
- Start the checkout process.
- Leave the session idle.
- Check if the timeout behavior works as expected.
Also, after logging out, pressing the browser’s back button shouldn't take users back into an active session. If it does, that means your session tokens need to be fixed.
- Transaction Logging: Every transaction, whether successful or failed, should be logged properly. Test by completing one valid and one invalid transaction. Then go to your admin panel and confirm that both appear in the logs, including details like:
- User ID.
- Status (success/failure).
- Amount.
- Timestamp.
3. Account Security Features Testing
User accounts are a common entry point for attackers. Weak passwords or poorly designed login flows can leave order history, personal data, and even saved payment info exposed. That’s why strong account security isn’t just a nice-to-have it’s essential.
- Password Strength Enforcement: Your platform should have a strong password policy in place. Try creating weak passwords like 123456 or password1.
The system should reject them and provide feedback on what’s required (e.g., minimum length, use of uppercase, numbers, and special characters). Also test how your site handles brute-force attempts:- Enter the wrong password multiple times.
- The account should lock temporarily or prompt for extra verification.
- Multi-Factor Authentication (MFA): If your site uses multi-factor authentication, test both the normal and edge cases:
- Go through the full login process with MFA enabled.
- Try entering incorrect verification codes or bypassing steps.
- The system should stop any unauthorized attempt before login is complete. It shouldn’t allow access unless both the password and second-factor verification are correct.
- Password Reset Security: Password reset is another point attackers often try to exploit. When a user requests a reset:
- The system should send a unique, short-lived reset URL to their registered email.
- Open the link after a few hours to see if it expires properly.
- Use Postman to inspect the reset token it should be random, secure, and time-bound.
After resetting, try logging in with the old password. It should no longer work.
4. Vulnerability Assessment
Even when your e-commerce functions perfectly, it may still be susceptible to attacks. Having a clear idea of the commonest attacks allows you to stay protected. For that, the first action is to know about the OWASP 10, which is a list of the top security vulnerabilities.
This list is updated frequently with new data so that users can prepare for the top attacks before they happen.
- Use the Right Tools: One of the best ways to identify vulnerabilities is by using vulnerability scanners such as OWASP ZAP, Burp Suite, and Niko. These tools can identify any underlying issues within the security of your e-commerce.
Some issues, such as price manipulation and bypassing multi-step workflows, cannot be tested effectively through automated tools. In that case, a tester has to perform checks manually. However, Postman, Fiddler, or other similar tools can be used for manual testing. - Rerun Tests After Fixes: Once the identified vulnerabilities are fixed, it is time to rerun the tests, ensuring that your fixes are applied and working correctly. Not only that, but vulnerability assessment should be performed periodically so that you can fix security issues before they become a problem.
Performance Testing for Peak Traffic
Building a secure e-commerce platform is surely a pivotal element, but testing doesn’t end there. Your e-commerce should be prepared to handle a traffic surge whenever it happens.
Securing your e-commerce platform is a must but that’s not the end of testing. Your site also needs to handle heavy traffic, especially during big sales or promotions. If it can’t, all your hard work could fall apart at the worst possible time.
In 2014, Flipkart, an e-commerce giant in India, announced its Big Billion Day sale. However, their dreams turned into a nightmare. When the sale went live, the e-commerce failed to handle the traffic, and 90% of users were unable to place orders. Everything crashed completely from their product pages to payment, leading to frustrated users and missed opportunities. It turned into a PR disaster and cost them both revenue and trust.
That’s exactly why performance testing for online stores matters. You want to know how your site behaves under pressure before your customers find out the hard way.
Also read: 5 essential performance testing type
1.Traffic Spike Handling
In times such as promotional sales, launch of a new product, restocking of a popular product, or a big reveal, your online shopping portal may experience a sudden surge of users. If your site is unprepared, users may fail to access it, leading to a poor public image and a reduction in customers. Performing spike testing ensures your website is prepared for traffic spikes and recovery between surges whenever required, which is a crucial part of high-traffic e-commerce testing.
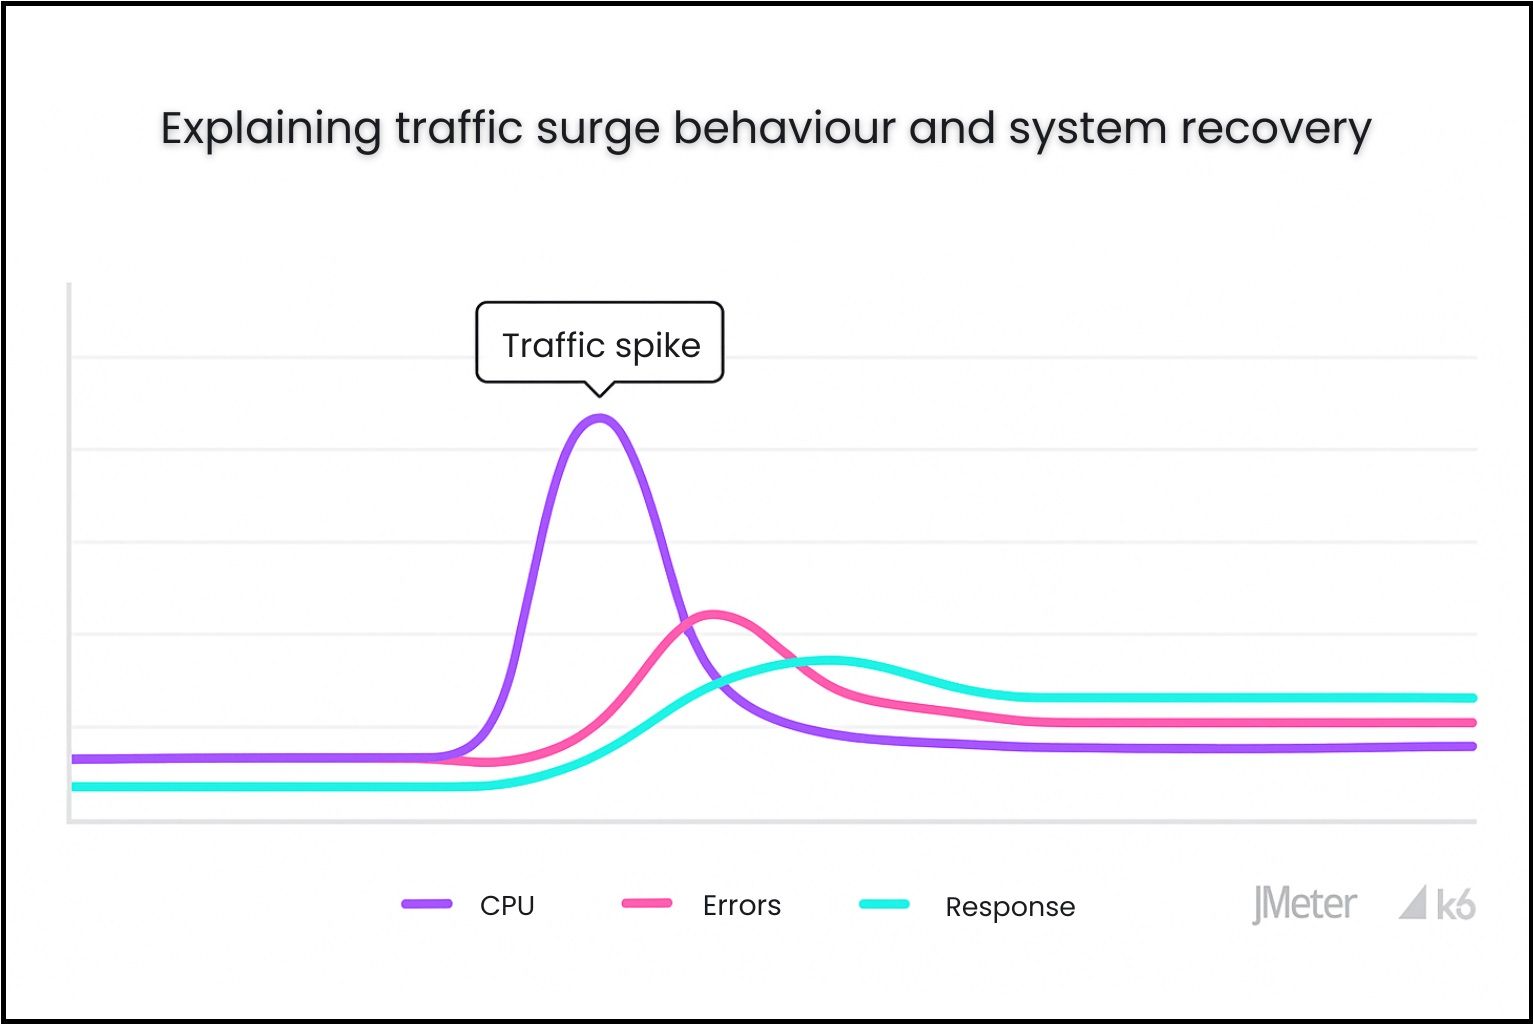
- Begin spike testing by simulating thousands of users suddenly in a short period on your website using Apache JMeter, k6, or any other load testing tool. Here, you need to create realistic scenarios such as landing on the homepage, product searching, adding a filter, adding items to the cart, and more.
- Moreover, spikes should not be predictable. Rather, the first spike can occur within a minute, then hold for a few minutes, and reduce again. Doing so not only allows you to identify how well your e-commerce handles spikes, but also tells you how well it recovers.
- Apart from regular metrics such as traffic data, you need to measure server and CPU usage, page response time, error rates, timeouts, and throughput.
2. Concurrent User Testing
Identifying the number of concurrent users your e-commerce can handle helps you increase efficiency, scale as per requirements, and manage users accordingly. Performing concurrent user testing helps you identify how effective your e-commerce is in handling users at the same time without degrading the performance.
- Where to Focus: Before you begin concurrent testing, you need to consider the areas that you want to test, including the checkout process, product pages, search bar, and offers, among others. Also, you need to set the benchmarks, such as the number of concurrent users and response times.
- Tools and Test Setup: Gatling, Apache JMeter, LoadView, and Taurus are the top tools you can use for this testing. Using these tools, you need to create test scripts that outline users' actions. Moreover, add the number of users and the duration of the test to the test scripts as well. Make sure that you increase the number of users in phases (100, 300, 500, 1000), so that you get to know the breaking point.
- What to Monitor:Now execute these tests using the desired tools and monitor the outcome. The results will provide you with CPU usage, performance, response times, and errors, if any.
After the test, review the reports. They’ll show whether your system handled the load within your benchmarks or if something needs to be fixed or optimized before your next big traffic spike.
3. Database Performance Testing
Every product search, login attempt, cart update, payment request, and filter goes through the database of your e-commerce. If the database fails under peak demand, then your online shop could come to a halt. Testing your database performance under load allows you to identify the load it can handle so that you can determine whether it’s sufficient or you need to make changes to it.
- Simulate Real-World Load: Akin to other performance testing, database performance testing also involves simulating real-world scenarios, but to identify the performance of the database. Here, you need to simulate a high volume of traffic using JMeter, SQL Server Profiler, LoadRunner, HammerDB, or any other performance testing tool to generate a blend of read and write operations.
- What to Watch For: As the tests run, you need to monitor whether the database queries are executed correctly and without errors or hindrances. Look out for issues in order processing and inventory updates, which showcase errors in data handling.
- Measure Key Performance Metrics: Measuring KPIs such as average transaction per second, number of active connections, query response time, and average SQL query time using MySQL Workbench, PostgreSQL, or MongoDB allows you to identify any performance issues and fix them before they hamper UX.
4. CDN Effectiveness Validation
One of the simplest ways to speed up your e-commerce site is by using a content delivery network (CDN). CDNs store cached versions of your site on servers closer to the user, which reduces latency and improves load times. This doesn’t just improve the shopping experience it can also boost your SEO rankings and increase traffic. But for any of that to work, your CDN needs to be doing its job properly.
- How to Test Your CDN: Start by checking load times with and without the CDN. Disable it temporarily, then load your site and record the speed. Reactivate the CDN and compare the results. If there’s no real difference, that’s a red flag your CDN might not be configured correctly.
Another thing to watch: where your traffic is going. If most of your HTTPS requests are hitting your origin server instead of the CDN, there’s likely a misconfiguration possibly a DNS issue causing browsers to skip the CDN entirely. - Test From Multiple Locations: The goal of CDN is to ensure faster loading speeds at all locations where your e-commerce is serving. A good CDN should reduce load times for users in all regions you serve, not just a few. Tools like: Pingdom, Google PageSpeed Insights, Key CDN Tools, and CDNPerf can help you test CDN performance from different geographic locations. Check the reports for latency. If some regions are consistently slower, you may need to optimize your CDN settings or switch providers.
5. Third-Party Service Integration Stability
E-commerce platforms rely on third-party services for everything from payments and maps to reviews and shipping estimates. These services often run through APIs, and testing their stability is key to ensuring users have a reliable, seamless experience.
- Top-Down Testing: The first approach towards third-party service integration testing is a top-down approach. Here, high-level modules such as the checkout flow and shopping cart functionality are tested, even when backend services are incomplete. The missing services are then replaced by stubs, which are mock components that simulate the responses. The goal is to understand how the top modules behave while interacting with third-party services. With this approach, testing teams can validate the frontend login and user interactions early in the development cycle.
- Bottom-Up Testing: Flip it around by testing the lower-level modules first things like authentication, internal APIs, or payment processors. Use drivers to simulate higher-level components. This helps isolate bugs at the service level before they affect the user experience.
- Big Bang Testing: You can also run Big Bang integration testing, where all modules frontend and backend are tested together as a full system. This method helps surface integration conflicts quickly. But keep in mind: if something breaks, it can be harder to trace the source.
Each of these approaches has its place. The best testing strategy often combines all three to catch different types of issues before they reach your users.
E-Commerce Integration Testing
E-commerce systems are not isolated systems that function solely from their internal elements. Rather, they involve integration with several systems that provide specific functionalities. From inventory management to payment, all these systems work together to complete a single order. Integration testing ensures that every system works perfectly and without any hurdles.
1. Inventory Management System Testing
The entire e-commerce business revolves around managing inventory. But inventory synchronization should happen automatically by your system after each order placement or cancellation to avoid misinformation on your website. Here’s how you ensure your inventory management system is in perfect sync with your e-commerce.

- Simulate Orders to Test Real-Time Updates: Start by placing test orders for a product with limited stock. Whether you're using Shopify, WooCommerce, or another platform, manually set a low stock count in the admin panel to mimic a near-sellout scenario.
For example: If an item has 10 units and 4 orders are placed, your system should show 6 units remaining right away both in the frontend and backend dashboards. - Test High-Demand Scenarios: Popular items often get ordered at the same time by multiple users. Your system should be able to:
- Process these orders without overselling.
- Update stock in real time.
- Prevent purchases when stock runs out.
To test this, use tools like Selenium or Playwright to run browser automation scripts. You can simulate several test users placing orders simultaneously. You can also use Apache JMeter to mimic multiple users targeting the same product at once. After running the test, check whether:
- Orders are queued properly.
- Out-of-stock items are blocked or flagged.
- Inventory counts update without errors.
- Validate Cancellations and Returns: Inventory should also update when orders are canceled or returned. To test this
- Place a test order.
- Simulate a return and process a refund through your admin panel.
- Confirm the item is either restocked automatically or flagged for review.
For extra accuracy, check your API logs or database records. Make sure they include:
- Correct product IDs.
- Updated stock quantities.
- Accurate status changes.
- Proper timestamps.
This level of testing ensures your inventory is always in sync whether customers are placing new orders, making returns, or buying the same hot item at the same time.
2. CRM System Data Flow
Customer Relationship Management programs help manage customer data, track orders, drive personalized engagement, and maintain overall customer relationships. However, the data flow between CRM and e-commerce should be seamless, allowing businesses to deliver exceptional experiences to customers. Integration testing for CRM ensures that the connection is reliable, secure, and scalable so that you can have accurate customer data.
- Test Account Data Sync: Start by creating a test user account on your store. Fill in all fields name, email, phone number, address and check whether this data syncs correctly to the CRM.
You can use Postman to inspect API payloads and verify that the CRM receives the right data. A mismatch here could lead to issues with marketing campaigns or confuse your customer service team. - Validate Profile Updates: Changes made on the e-commerce side like updating a phone number or shipping address should be reflected in the CRM instantly. Make edits in your test account and confirm those updates show up in real time within the CRM dashboard or logs.
- Test Event-Driven Workflows: CRM integrations power key workflows, such as creating customer sign-up contacts or triggering marketing emails from abandoned carts. Here, you need to log in to a test user account, add a product to the cart, and abandon checkout. The CRM should receive accurate cart details, including product, quantity, and value.
- Simulate Bulk Imports: Your CRM should handle a high number of customer records effectively. For testing bulk scenarios, you need to import a CSV file with hundreds of customer records into your store or CRM. You can use Blazemeter or any other rate-limiting tool to simulate a real-world import scenario. Once the import is done, keep an eye on how your CRM system manages a large dataset. An ideal CRM should process the data without any downtime and log errors.
3. Marketing Automation Tool Integration
Marketing is among the key drivers of revenue in e-commerce, with 32% of e-commerce traffic coming from paid search. Integrating marketing automation tools such as HubSpot, Zoho, Klaviyo, and ActiveCampaign helps you enhance the reach of your e-commerce platform. However, the desired outcome is only achieved when the integrated tools work as anticipated.
- Identify Key Integration Points: Before you can test marketing automation tool integration, you need to identify the touchpoints where these tools should connect with your store. Account creation, product views, cart additions, purchases, and email interactions are the common touchpoints here. Every action should send structured data to your automation tool through APIs and trigger desired workflows, such as welcome emails or win-back campaigns.
- Create Realistic Test Cases: Upon mapping the integration touchpoints, the next step is to create test cases. For instance, register as a new user and determine whether a welcome email is sent or not. The best practice here is to create both typical and edge cases to enhance the test coverage.
- Use the Right Testing Tools: Execution of test cases can be done through Postman or other tools, which can trigger API calls manually and verify payloads. However, for real-time behavior testing, Charles Proxy, Fiddler, or other proxy tools can help you capture requests and inspect headers, authentication tokens, and data structures. If your store uses JavaScript SDKs or tag-based events, browser developer tools can help ensure events are firing correctly and reaching the destination without lag.
- Check Data Flow and Accuracy: Use test accounts with unique, traceable emails and product names. Complete actions like adding items to the cart or making a test purchase, and then review how the data shows up in your marketing platform:
Are all fields populated correctly?
Are events recorded under the right campaign or workflow?
Are the user details and behaviors aligned with what was triggered?
Some tools offer activity logs or debugging panels use those to your advantage.
Test Full Automation Journeys: End-to-end flow testing is the final step. Simulate full customer journeys to verify whether marketing automation responds appropriately:
Abandon a cart and check that a reminder email is sent.
Complete a purchase and confirm that the “Thank You” series triggers.
Shorten delays between flow steps for faster testing.
Also, test for failure scenarios:
- What happens if the user unsubscribes mid-flow?
- What if the webhook or API key is disconnected?
- Do fallback processes kick in?
Intentionally break connections to test how gracefully the system recovers and whether it logs the error for review.
Properly tested marketing automation ensures your campaigns reach the right people at the right time with minimal friction. When everything runs smoothly, your tools work harder, and your conversions go higher.
4. Analytics Tracking Validation
When it comes to improving traffic, performance, search engine ranking, or revenue, analytics tools are your best friend. Google Analytics, Adobe Analytics, Mixpanel, and Woopra are the top names you can use to track analytics, but they should parse the information about your website accurately and showcase the outcome so that you can determine the modifications you need to make.
- Start by Verifying the Integration: Before you can test your analytics tools, you need to ensure that they are integrated correctly with your e-commerce. To do that, you can use Google Tag Assistant or Facebook Pixel Helper to ensure that scripts are firing.
Now open your web browser’s incognito mode, and interact with the product elements. Your analytics dashboard should showcase events in real-time, validating the implementation of analytics tools.
- Validate Events and Parameters: Analytics will tell you about the user interactions with your e-commerce. You have to validate that meaningful user actions are tracked through properly configured events by using Google Tag Manager’s Preview Mode. Perform an action on your e-commerce and check if the correct parameters are passed.
Analytics are not limited to user actions, but they involve custom events such as newsletter signups. Each custom event performed should be logged within the desired parameter in the analytics tools with accuracy and without any duplication.
- Troubleshoot with Debugging Tools: Apart from that, you can use the Google Analytics Debugger Tool to identify any issues within your analytics tool. All you have to do is install its extension on Google Chrome and head to the page you want to test. Now open the Inspect Page and click on the Console button. Here, you can monitor analytics tracking your website and identify any issues.
5. Social Media Platform Integration
Initially introduced as a way to communicate with each other, social media has evolved into an excellent medium of marketing as well. Using social media platforms such as Facebook, Instagram, and Twitter, you can promote your products, run various ads, allow users to share your products on their social media handles, and simplify the login process.
All these aspects build trust, enhance user experience, increase traffic, and ultimately contribute to improving conversions. However, for it to work reliably, social media integration with your e-commerce should be tested thoroughly.
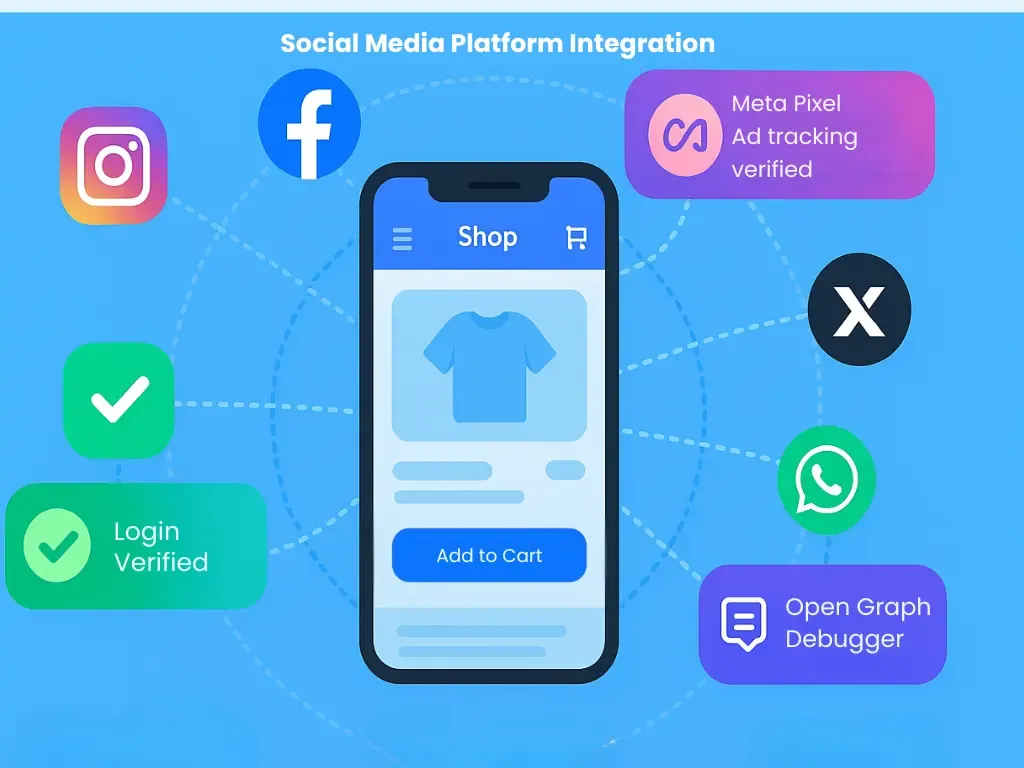
- Test Social Login: Logging in is among the most essential features of e-commerce, allowing users to track their orders, check history, create wishlists, and sync carts across devices.
Allowing users to sign in with their social media handles improves signup rates. Testing this functionality involves creating test accounts on each platform and performing login attempts on various devices and browsers. When the social media login functionality is working correctly, the authentication page should redirect properly, pull the correct user data, and create a user account without errors. - Verify Social Sharing Features: Every e-commerce allows users to share the product on social media. By using tools such as Facebook Sharing Debugger or Twitter Card Validator to identify that your e-commerce uses the correct title, image, price, and description. These tools can help you preview and troubleshoot Open Graph and Twitter Card tags.
- Validate Ad Tracking Pixels: Running ads on social media is one of the strongest and effective strategies to boost the visibility of your e-commerce. Social media platforms leverage tracking pixels, small codes used to track user activity, to collect behavioral data for targeting ads. To ensure that pixel scripts are firing correctly, you need to use Meta Pixel Helper. Using this tool, you can verify that each event involves the right parameters, matching the campaign dashboard.
Post-Purchase Flow Testing
The post-purchase experience is your chance to turn one-time buyers into loyal customers. Once someone places an order, they’re no longer just looking for the product they’re watching how well your e-commerce store follows through.
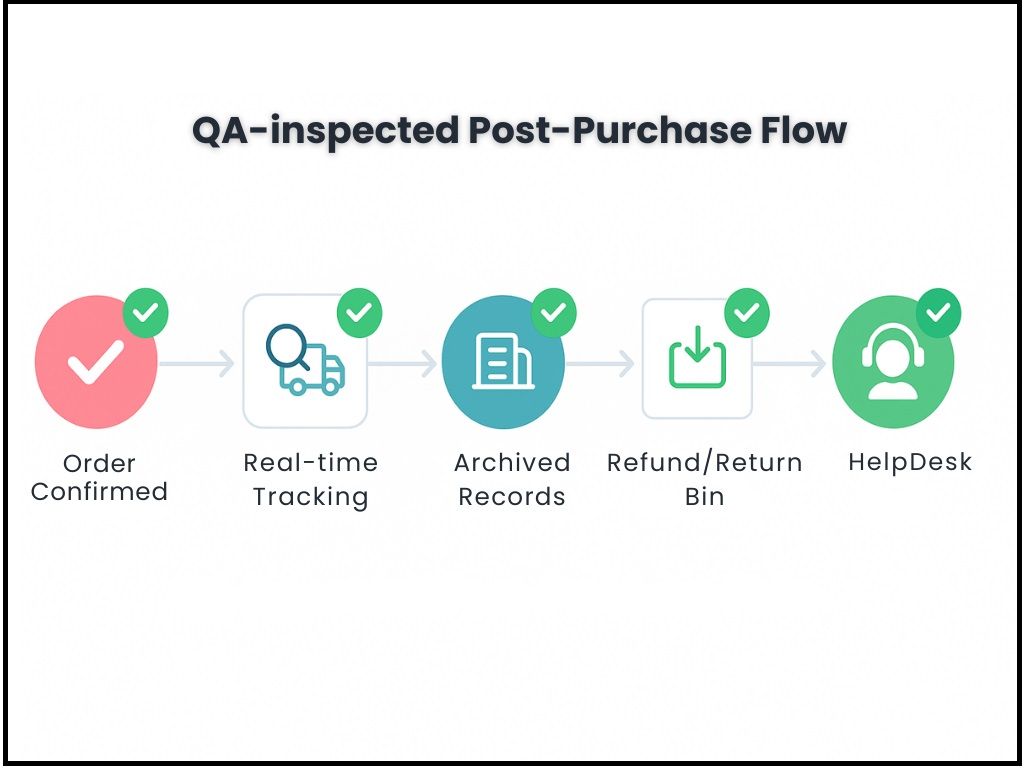
From confirmation emails to order tracking, your post-purchase workflow plays a big role in how customers feel about your brand. Testing this flow helps ensure a smooth, reliable experience after checkout.
1. Order Confirmation Emails
Sending an order confirmation email is equivalent to handling the physical receipt of purchase. Not only does it let the user know that the order placement is successful, but it also gives them a sense of relief.
An effective order confirmation should include user details, product details, amount, estimated delivery date, address, shipping method, and CTA. Also, you can add related products or discount codes to motivate them for their next orders. Testing this involves you performing the following tests:
- Testing order confirmation emails begins by ensuring that the recipient receives the email. To do that, you need to simulate real-world orders by placing different types of orders to cover customer journeys, including from abrowser guest user, a logged-in user, a discount coupon application, and a failed payment, followed by a successful retry. All this can be done using Magento sandbox or Shopify’s test mode. Make sure that the desired recipient receives the correct email.
- The information received in the email should be accurate as well to maintain transparency and the transfer of correct information. It should list the correct items, quantities, prices, shipping details, taxes, and more.
- Email servers use SPF, DKIM, and DMARC records to prove that your store is allowed to send emails. When these are missing, it is likely that your email will end up in the spam folder of the receiver. These records say which servers are authorized to send emails, ensure a digital signature to verify unaltered emails, and tell the receiver the course of action if the other two fail, respectively. By using Mailtrap or MxToolbox, you can view the email headers and ensure that these protections are enabled.
2. Order Tracking
The majority of buyers want to know the whereabouts of their ordered product to remain available to receive it or to ensure that they’re going to receive it on time. In that case, order tracking functionality is like GPS for the buyer, allowing them to track details on every move. An effective tracking system should act as a guide for the users and sync data smoothly to keep customers in the loop.
- After placing a test order, head towards your admin panel to update shipping status to processing > shipping > out for delivery > delivered. At each step, you need to monitor that the customer-facing tracking interface is updated correctly with the right stage.
- The customer receives a tracking URL via email or SMS. This URL contains a unique and non-guessable tracking ID. To test this, you need to open the URL in both logged-in and guest sessions to ensure that only the logged-in user can see confidential customer information. Also, validate the estimated delivery date, shipping provider, and package contents match what’s in your backend database or third-party shipping system.
3. Customer Account History Accuracy
Sometimes, customers want to reorder the same product they ordered six months prior. The best way to do this is by visiting their order history. Apart from reordering, having an accurate order history allows customers to check pricing, access billing information, check return policies for the specific product, and perform other actions.
However, inaccurate or missing information can cause confusion, support issues, a lack of confidence, and even legal issues, especially when discrepancies appear in the order fulfillment workflow.
- To test this, you need to place orders using new and returning user accounts with edge cases, including payment using wallet, credit card, gift card, or coupon codes, failed to successfully order retry, and using a number other than the one associated with the account. Afterward, head towards the user account dashboard to make certain that each transaction appears with correct item details, status, quantity, and amount. Combine this with BrowserDevTools to evaluate the API responses that fill the history section.
- To make this easier, many e-commerce platforms use an Order Management System (OMS) tool that showcases order history to the front end. With that in mind, testing OMS becomes crucial. All you have to do is use Postman to trigger the same GET API calls used by the front-end to validate that data matches the database. If you find any inconsistencies, such as a wrong amount or an incorrect order fulfillment status, you know that your OMS system needs to be fixed.
- For platforms that archive old data, check how long the order history remains accessible. Temporarily modify the account creation date or order age in the database and observe if older entries are still accessible.
- Some orders may be cancelled fully or partially, and these should be updated in the order history as well. You have to cancel a few test orders and monitor how they’re reflected. The dashboard should be updated with the cancellation notice and refund timeline. However, a partial refund is a different story. Here, the refund should reflect item-wise rather than the entire order amount.
4. Return and Refund Process Testing
Customers may not be satisfied with the product, or they may no longer need it. In such a scenario, the customer will raise a return request and wait for the refund to be credited. Without a doubt, a smooth return and refund process enhances the trust of your customers, making them your brand’s advocate. However, if the process is rocky and takes a lot of time to complete, then they’ll not think twice before posting negative reviews online. With that in mind, it’s necessary to ensure that the return and refund process is bug-free and functions as expected.
- When the customer wants to return an item, they’ll simply head to their account and raise a return request. For performing the test, you can use Selenium to run a test script that will simulate the return request. However, you need to diversify these test cases by including various scenarios, including different reasons, partial order return, raising a request post the return window, or for the non-returnable product.
- Once the request is raised, you need to test the backend system by sending a request to the return API and confirming you get a successful response with the return number.
- After requesting a return, the system should approve it and give the customer instructions on the next steps and details, including the return ID or RMA number.
- Now you need to simulate the return of an item in acceptable condition and ensure that the system records the successful inspection. In addition, run tests where the item does not meet the return quality standards, and the system should mark it as a failed inspection. The system should send the relevant message to the refund API to move forward with the refund or convey the failed inspection to the customer.
- The refund API should begin the refund process, where the script will include the order number and refund amount along with the refund ID. Cross-check the successful refund with your test payment system. Test different cases, such as refunding only part of an order or trying to refund a cancelled order, to ensure that the system catches mistakes and shows errors.
- The customer’s account page should showcase the return approved or refund issues method if the return is approved and action is required, or the return should be rejected due to quality issues if the return is rejected. With Mailtrap, you can check whether the system sends a return confirmation email and a refund email with the right details.
5. Customer Service Accessibility
Whenever a customer faces an issue, the first step they will take is to reach out to customer support. But imagine their frustration when they fail to connect with customer support seamlessly. Not only will they be frustrated, but their trust in your e-commerce will be hampered, leading to higher customer churn.
Customer service accessibility testing ensures that reaching out for support on your e-commerce is seamless, even for people with disabilities.
- The process begins by ensuring that your customers can locate the support options quickly. In a test environment, you need to manually navigate to the homepage, order confirmation, account, and product pages, among other key pages, using a browser to check for visible and clickable support elements, including contact us links, live chat buttons, or help center.
- With WAVE or other accessibility scanning tools, you can ensure that all these elements are accessible and comply with accessibility standards. Missing alt text, inadequate color contrast, or lack of keyboard navigation support are the commonest issues faced here, which you need to fix for better accessibility.
- Whenever a customer submits a support request, they should receive a prompt confirmation. Testing this involves completing a contact form with test data and starting a live chat. Here, you need to fill out the form using various scenarios, including guest user, logged-in user, and logged-in via social media. Now submit the form and review the backend ticket management behavior through API calls or admin panel logs. The requests will be correctly categorized and assigned if everything is working perfectly.
- With each support ticket raised, the customer should receive proper communication through email. Leveraging Mailtrap or Mailosaur can help you in sending test emails. Make sure that each email includes a support ticket number, estimated response time, and links for users to check their case status.
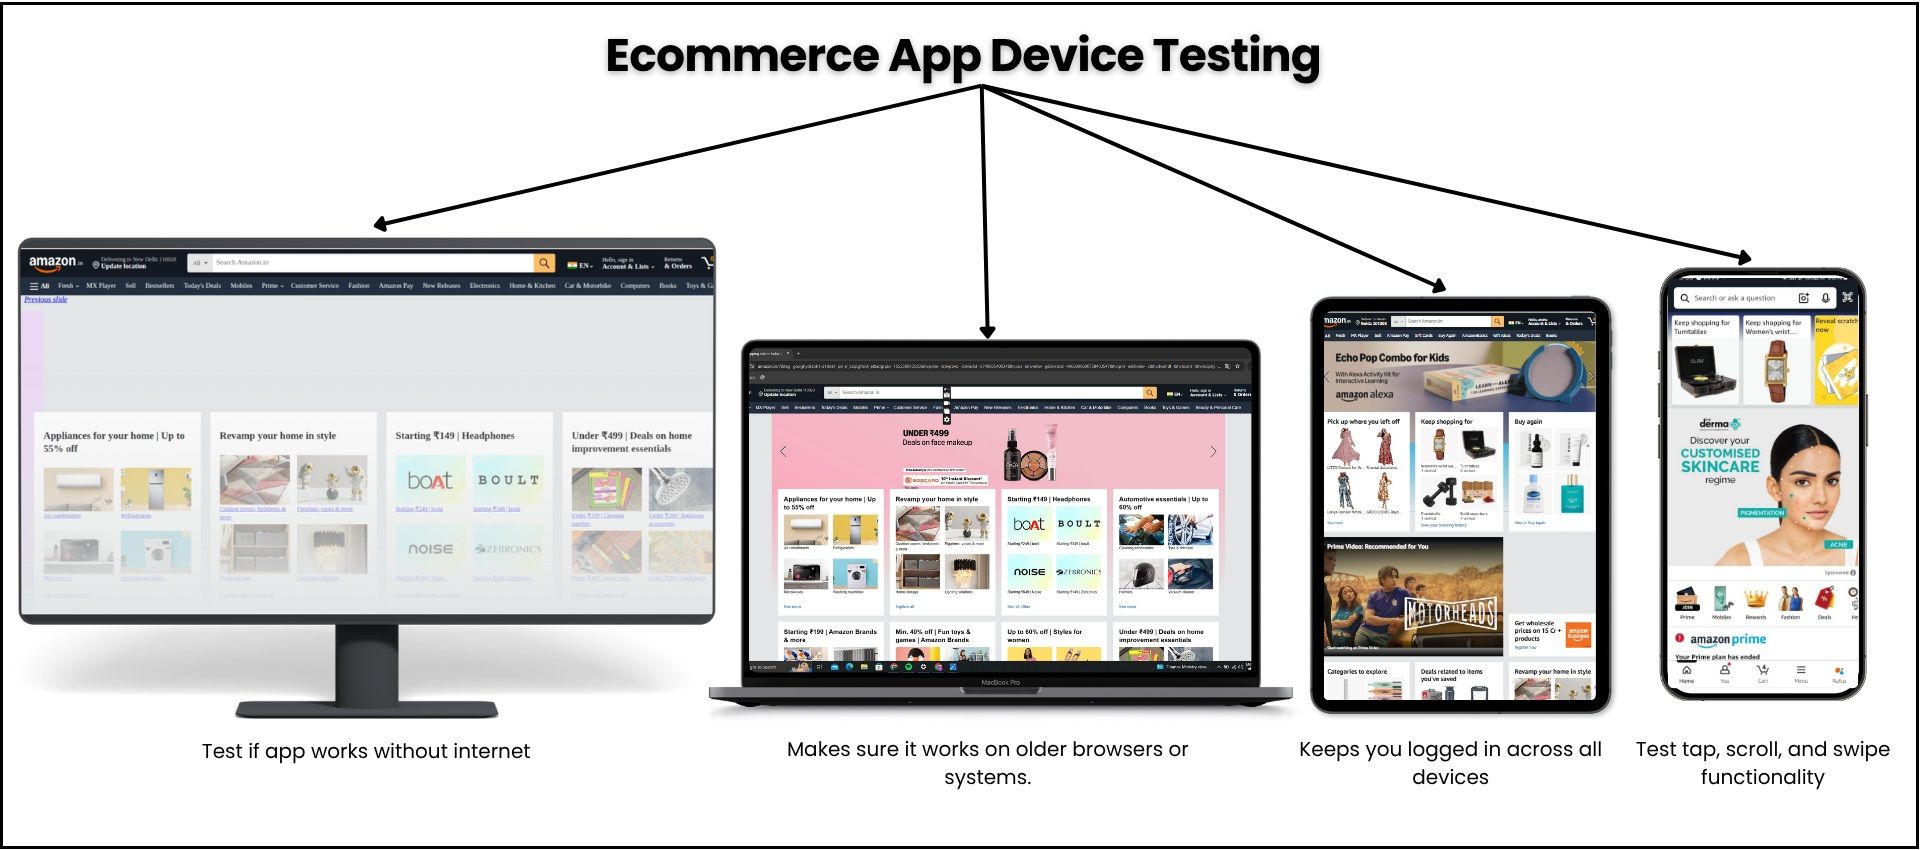
Cross-Device and Cross-Platform Testing
Your e-commerce will not be used on just a single device or platform. From large screens of desktops and laptops to portable devices like smartphones, your customers can be using any device. Not just the latest devices, but some of them might also be using old or legacy systems. If you’re leaving cross-device and cross-platform testing, you’re losing a major chunk of users.
1. Desktop Browser Compatibility
With dozens of popular web browsers flooding the industry, users have several choices to pick from. Your e-commerce should perform the same on every browser, catering to the preferences of your customers. From functional buttons to responsiveness, testing every element is part of desktop browser compatibility testing. With that in mind, here’s how you can perform the test.
- The first step you need to take is to draw a baseline of what is accepted and what is not. Your e-commerce should be capable of performing basic functionalities, including working menus, correct form fields, handling cookies, and functional buttons that work, design aspects such as fonts, images, and layout are visible as anticipated, responsiveness aspects are functional, and accessibility features are functional.
- Once you’re clear of what you’re going to test and the outcome you expect, it is time to begin testing on stable versions of popular browsers, including Google Chrome, Mozilla Firefox, Microsoft Edge, Apple Safari, and Opera. Make sure to test all the above aspects and features of your e-commerce.
- If your e-commerce is working as expected, you can move on to testing on all modern desktop browsers or your target browsers. Moreover, you can test on pre-released versions of web browsers to prepare your e-commerce for any new issues that may occur with a newer version.
- For effective test coverage, you need to perform testing on various devices running on different platforms and browsers. The best way to do that is by using an emulator and virtual machines, which can create a virtual environment similar to a physical device. These environments will allow you to test various permutations and combinations of devices and platforms for better test coverage.
- Relying solely on manual testing takes a lot of time and leaves room for human error. You need to have a blend of manual and automated testing for better efficiency. Using tools such as Selenium, SauceLabs, and BrowserStack can help you automate tests and run numerous test cases quickly and effectively.
2. Mobile Device Testing
Over 70% of website traffic comes from mobile users, making it the most valuable customer base. The two most dominant mobile platforms are Apple’s iOS and Google’s Android. Both these platforms have legions of devices with varying screen sizes, hardware, and software, making the testing tedious. Here is how you can effectively perform mobile e-commerce testing.
- For the best outcome, you need to identify the most commonly used devices using Google Analytics and prioritize these devices for testing. Even though these devices will be your priority, you cannot leave other devices behind.
- The most effective mobile e-commerce testing method is testing on real devices. And you can do that by using testing tools such as BrowserStack and LambdaTest. Using these tools, you can test your e-commerce on mobile browsers on real smartphones using the cloud. Your coverage should include various versions of Android (15, 14, 13, 12, 11, 10) and iOS (18, 17, 16,15, 14).
- For Android, make sure to test on devices with brand-customized skins, including One UI, Oxygen OS, ColorOS, Funtouch OS, and MIUI.
- During testing on real devices, make sure to test core flows like product browsing, adding to cart, and completing purchases. In addition, you need to test touch interactions such as double tap, swipe, and gestures.
- Your testing conditions should vary as well, with scenarios such as low storage, low battery, weak network, while charging, on WiFi, and more. A stable mobile version of your e-commerce should perform smoothly and without any issues in every scenario and on every device tested.
3. Tablet Optimization
For some people, desktops have a screen that is too large, whereas smartphones may not be that big for online shopping. Tablets with an average screen size of 10 inches fit perfectly between the two, giving them the comfort they’re looking for. With that in mind, your e-commerce website should be optimized for tablets so that they can shop from their preferred device.
Below are the actions you need to take to optimize and test your e-commerce for tablets.
- Initially, you need to ensure that your website does not feel clunky by testing its responsiveness. To test that, you need to use the responsive design mode of Chrome DevTools and evaluate how your site adapts between 768px and 1024px widths (the common resolution for iPads and Android tablets). Also, test both portrait and landscape orientations.
- Much like mobile testing, you need to test on tablets using real devices through BrowserStack or LambdaTest. Start by validating layout responsiveness using responsive design mode in Chrome DevTools or Firefox. Check how your site adapts between 768px to 1024px widths common for iPads and Android tablets across both portrait and landscape orientations. Key components like navigation menus, filters, and checkout flows should remain fully functional and comfortably tappable.
- Screen sizes of most tablets range between 7 inches and 13 inches, and you need to make sure that you cover every screen size on both Android and iPadOS, and the layout adapts to every screen size without cropping or stretching the content.
- Confirm that gestures, including pinch-to-zoom, horizontal scrolling, and swiping, work naturally. In addition, test with varying conditions, including split-screen modes, using keyboard and mouse, and in low battery mode, among others, to enhance test coverage.
4. Progressive Web Application (PWA) Testing
You’ve often seen the pop-up ‘Add to Desktop’ whenever you open a website. Rather than simply adding a website shortcut, these install a Progressive Web App on your device. Progressive web applications offer a native-app-like experience on a mobile or desktop device without installing an application. From push notifications to offline mode, PWAs offer almost every feature that an application provides. Such apps leverage Service Workers and other modern web technologies to offer such features.
Testing PWAs ensures that all the necessary features and performance are top-notch and without any compromises. With effective testing, your PWA will offer unmatched performance, cross-browser and device compatibility, high security, and uninterrupted services to the user.
- A progressive web app can only function when its installation mechanism is functioning perfectly. The testing process is made easier with browser DevTools. Here, you need to open the Manifest panel on the DevTools to identify the pivotal properties: short_name (name of app), start_url (start page URL), display (app’s display mode), and icons (icons that will be showcased on the device).
- To check installation, you need to check whether the website prompts the user to install the web app automatically, or you can head towards the browser menu to click on the ‘Add to Home Screen’ button. Ensure that the PWA is installed on the home screen after clicking on the button with the correct properties.
- Other features of PWAs that need to be tested are push notifications and offline mode. Testing these features involves opening the Application tab on DevTools and ensuring that the service worker is registered for your application.
- When the service worker is registered, it caches the application data, which you can check on the Cache Storage panel. Now, try to open the application without an internet connection, and the app should run the pages that are allowed to be available offline.
- All the other pages that are not part of offline mode should display a custom offline page rather than the default offline page.
- For real-device testing, you can use Appium, Testsigma, CloudQA, and Lighthouse by Google. Here, you need to determine the devices you need to test on and run test scripts for responsiveness, push notifications, and layout. Make sure to run tests on different platforms and screen sizes.
Many consumers begin their shopping journey on mobile phones to browse various products, but they transact on desktop or laptop devices, mainly for high-value products, due to their large screens and easy navigation. Due to this, fluid transition across channels is essential to maintain their cart, wishlist, recommended products, and other data. Omnichannel consistency testing ensures all that is possible, giving customers the desired experience.
- Omnichannel consistency testing begins by mapping the key user flows across every touchpoint, including the website, PWA (if any), and mobile version. Now, the testers should design test cases that simulate real-world scenarios. For instance, add the product to a cart on the desktop site, log in to the mobile version, and verify if the cart persists.
- Test cases, including testing language preference sync, loyalty points sync, promotional or discount code application on all platforms, and session continuity, should be tested for better coverage.
- In addition to frontend verification, ensure data consistency by testing the backend database. Test this by updating the address on a test account on the mobile app. Then, using SQL queries or API test tools to monitor if the data propagates to all channels, including customer service dashboards.
- Selenium, Appium, and TestProject can help simulate flows across web and mobile interfaces. These tools, especially when run via platforms like BrowserStack or Sauce Labs, help maintain coverage across devices and channels without the overhead of physical device testing.
Conclusion
Successful e-commerce testing eradicates bugs and issues from the platform, offering a clean, consistent, and reliable user experience, boosting sales, and generating revenue. From security and performance to integration and conversion rate optimization, this article explores all forms of testing necessary for a successful e-commerce platform.
Each test case contributes directly to customer satisfaction and ultimately, conversions. However, not every test case contributes equally. The goal is to prioritize testing efforts based on business impact, focusing on areas that contribute the highest towards conversion, such as product search, checkout, navigation, payment, and user login. Even small bugs here can lead to card abandonment and massive drop-offs by the user.
Back your testing strategy with data. Use Google Analytics, Hotjar, and CRM insights to identify user drop-off points and adjust your testing focus accordingly.
E-commerce testing is never truly done it evolves with your platform. Regularly review metrics like conversion rate, cart abandonment, and support ticket trends to keep your experience sharp.
And if you're struggling to stay ahead, ThinkSys' e-commerce testing experts can help. We specialize in catching the issues that drain revenue before your customers find them.
Share This Article:


