How to Develop Cross Platform Mobile Apps Development with Flutter?
Developed by Google, Flutter has become the go-to framework for creating cross-platform mobile applications due to its flexibility, high performance, and ease of use. Businesses aiming to reach both Android and iOS users without duplicating efforts find that Flutter’s single codebase simplifies the mobile app development process.
Flutter’s rich library of customizable widgets, hot reload feature, and native-like performance provide developers with tools to create high-quality cross-platform mobile apps faster. Here, we explore the benefits of using Flutter for seamless cross-platform app development, ensuring a smooth user experience and efficient workflow.
What Makes Flutter the Go-To Solution for Cross-Platform Mobile App Development?
Flutter is favored by developers and businesses alike for multiple reasons:
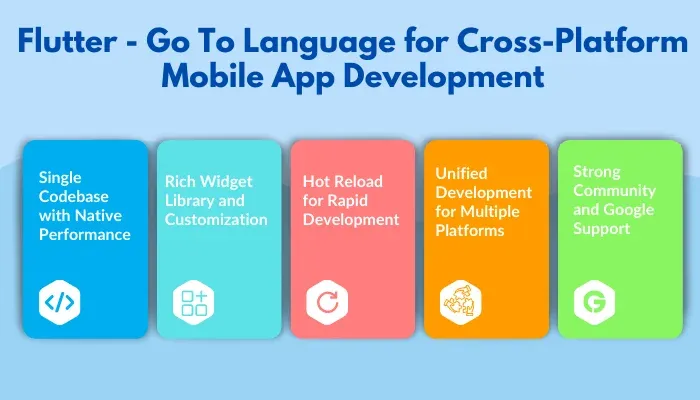
Single Codebase with Native Performance: With Flutter, you can use a single codebase to build apps for iOS, Android, and more, while maintaining native performance. Flutter compiles directly with native ARM code, enabling fast performance and smooth animations without the delays caused by bridging technologies.
Rich Widget Library and Customization: Flutter’s extensive collection of pre-built widgets lets you create a polished, native-like UI easily. Custom widgets can also be created to match your design needs.
Hot Reload for Rapid Development: The hot reload feature lets developers see changes instantly in the app without restarting it, facilitating rapid testing, debugging, and refinement.
Unified Development for Multiple Platforms: Beyond mobile, Flutter supports web, desktop, and embedded platforms using the same codebase, allowing for cross-platform development across a variety of devices.
Strong Community and Google Support: Backed by Google, Flutter enjoys consistent updates, a growing plugin ecosystem, and strong community support, all of which ensure it stays up-to-date with the latest development trends.
If these unique benefits haven’t convinced you yet, the following step-by-step guide on using Flutter for mobile application development should provide clarity.
Building Your Cross-Platform App Step-by-Step
This section will guide you through the cross-platform mobile app development process using Flutter. From setting up Flutter on your machine to launching your app, we cover each step in detail.
Step 1: Define Your App Idea
Before beginning development, it’s important to clearly define your app idea. Consider these questions:
What problem does your mobile app solve?
Who is your target audience?
What features will the app include?
Are there any platform-specific features?
Step 2: Install and Set Up the Flutter SDK
Once you have set the fundamentals in place, let’s get Flutter onto your machine.
Download Flutter SDK: Head over to the official Flutter website and grab the SDK that fits your operating system (Windows, macOS, or Linux). Here you will get all the tools needed to build cross-platform mobile apps.
Extract the SDK: On Windows, you need to extract the download file to the ‘flutter’ folder. However, make sure that you avoid storing this folder in any folder that requires admin privileges. On macOS and Linux, you need to use the following terminal command: tar -xzvf flutter_linux_2.x.x-stable.tar.xz
Easy, right? Now let’s move on to making sure your system knows where Flutter is.
Step 3: Add Flutter to Your System PATH
Adding Flutter to your system PATH lets your computer recognize the Flutter command. This step is crucial for smooth access when developing cross-platform apps.
Windows:
Right-click on ‘This PC’ or My Computer, select Properties.
Click on ‘Advanced System Settings’, then go to ‘Environment Variables’.
In the ‘System Variables’ section, find ‘Path, click ‘Edit’, and add the path to the ‘bin‘ folder where you extracted Flutter.
macOS/Linux:
Open the terminal and type:
nano ~/.bash_profile – For macOS using Bash
nano ~/.zshrc           –  For macOS using Zsh
Add the following line:
export PATH=”$PATH:/path_to_flutter/bin”Save and close the file, then run:
source ~/.bash_profile # Or ~/.zshrcStep 4: Verify Flutter Installation
To confirm installation, open a terminal or command prompt and type flutter --version. If it returns a version, Flutter is installed correctly, and you’re ready for cross-platform app development.
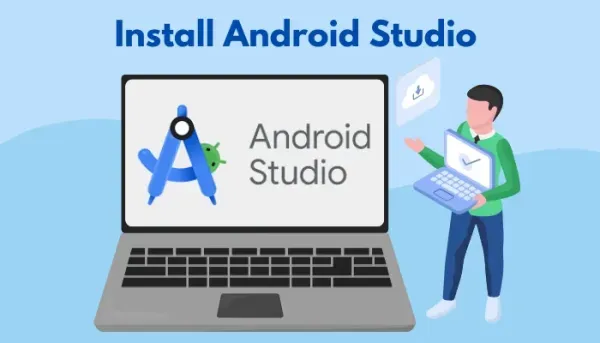
Step 5: Install an IDE: Android Studio or Visual Studio Code
To build your Flutter apps, you need an Integrated Development Environment (IDE). The majority of the developers prefer Android Studio due to its seamless integration with Android tooling and built-in emulator. However, if you prefer something lighter and more customization, Visual Studio Code is also an excellent alternative. You can choose the one that suits your workflow best.
Option 1: Install Android Studio:
Head towards the official Android Studio website and download the latest version for your operating system.
Follow the on-screen installation instructions provided for your OS to complete the installation.
Now you need to install the Flutter plugin. For Windows, you need to open Android Studio and go to File > Settings > Plugins. On macOS, it’s Android Studio > Preferences.
Search for Flutter and click install. Once the plugin is installed, you need to restart Android Studio to complete the installation process.
Option 2: Install Visual Studio Code: If you prefer a lightweight code editor, you can go with Visual Studio Code instead. It’s highly flexible, and you can customize it with extensions to enhance your coding experience. Here’s how to set it up.
Visit the official VS Code Website and download the latest version as per your OS.
Now you need to install Flutter and Dart Plugins. Open VS Code and click on the Extensions icon (on the left sidebar).
Search for Flutter and install the extension. Installing this plugin will also install the Dart plugin automatically.
Step 6: Set Up the Android SDK and Create an Emulator
To run your app on an Android device, you need the Android SDK and an emulator (basically, a virtual phone). Don’t worry, it’s easier than it sounds.
Install Android SDK:
Open Android Studio and go to Configure > SDK Manager.
Here, you need to select the latest Android SDK version and make sure SDK Platform tools and Android Virtual Device (AVD) are checked. If prompted, choose the Standard installation option.
The Android Studio will begin downloading and installing the necessary components.
Create an Emulator:
In Android Studio, you need to go to Tools > AVD Manager.
Now click on Create Virtual Device, pick a device like Google Pixel 7, and click Next.
Choose a system image and hit Next.
Review the setting and click on finish.
To start the emulator, just hit the play button next to your new virtual device in AVD Manager.
This virtual Android device is how you will see your app in action.
Step 7: Install Git (and Git Bash)
Git is a version control system that tracks changes to your code files. It’s essential for Flutter development to manage your project, collaborate with others, and maintain a history of your code changes and Git helps with that.
You can also install Git Bash, which is a command-line interface that emulates a Unix-style terminal, allowing you to run Git commands on Windows systems. It’s particularly useful for developers who prefer Unix-like commands or need to run certain scripts or commands that are easier in a Unix environment.
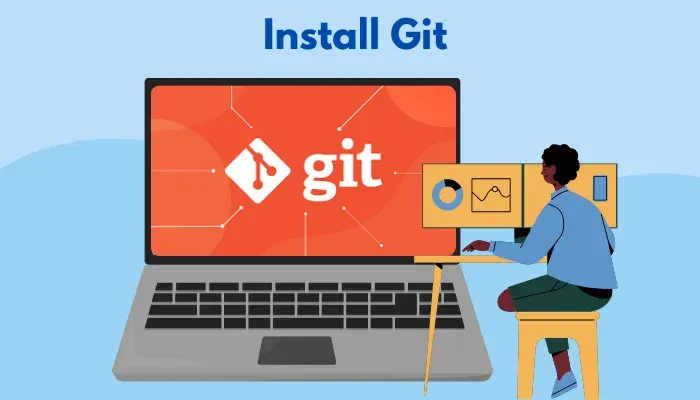
The first step is to go to the Git website and download the installer.
When running the installer, you will be prompted with various setup options. Make sure that you select Git Bash as one of the components to install.
You will also be asked how you want to use Git in your terminal. It’s recommended to choose the option that integrates Git with the Windows Command Prompt and allows the use of Git Bash.
Once installed, you should verify that Git is working by opening Git Bash and type
git –version
You should see the Git version number which confirms that Git and Git Bash are ready to use.
Step 8: Run Flutter Doctor
At this point, you’ve got all the tools in place. Let’s run Flutter Doctor, a tool that verifies whether everything is set up correctly and gives you a report based on that.
To run Flutter Doctor, you need to open a terminal or command prompt and enter the following:
flutter doctor
If anything is missing, Flutter Doctor will tell you how to fix it. All you have to do is follow the prompts, and you will be all set.
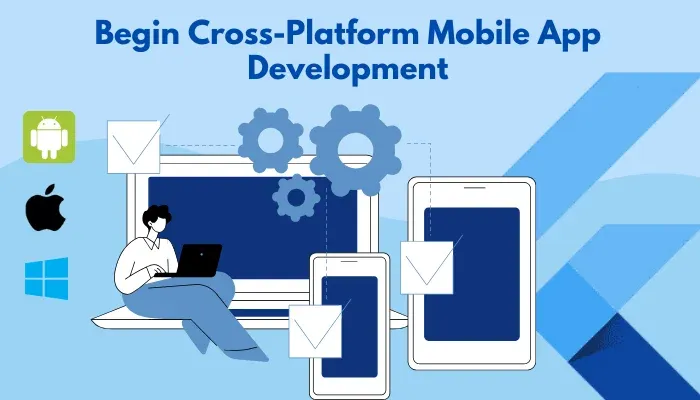
Step 9: Begin Cross-Platform Mobile App Development
Now that you’ve run Flutter Doctor and everything is set up, let’s start creating your application.
Open a Terminal or Command Prompt: The first thing you need to do is open a terminal or command prompt. In Android Studio, go to View > Tool Windows > Terminal. Here you will see a black screen where you can type commands. In VS Code, you need to press Ctrl + backtick (\) on Windows or Cmd + backtick (\) on Mac. This opens the terminal window at the bottom of the editor.
Choose a Folder for your Project: Now, tell Flutter where to put your new app by navigating to a folder on your computer. In the terminal, you have to type – ‘cd Documents/MyFlutterProjects’. This tells Flutter to look inside your Documents folder and create a new folder called “MyFlutterProjects” to store your app. Keep in mind that you can replace ‘Documents/MyFlutterProjects‘ with any location you prefer on your computer.
Create Your App: To create your application, you need to type the following command:
flutter create my_cross_platform_app
This command tells Flutter to create a new project called ‘my_cross_platform_app’ with all the basic files you’ll need to get started.
Open Your New Project: Now that your app is created, let’s open it so you can start coding. In Android Studio, click on File > Open, then find the folder ‘my_cross_platform_app’ and click on it. Hit OK to open the project. In VS Code, click on File > Open Folder, find the folder ‘my_cross_platform_app’, and click on it.
Find the Code: Inside your project, there’s a folder called ‘lib’ where your main app code resides. You need to open this folder and double-click on the ‘main.dart’ file. Here, you can write the code for your app.
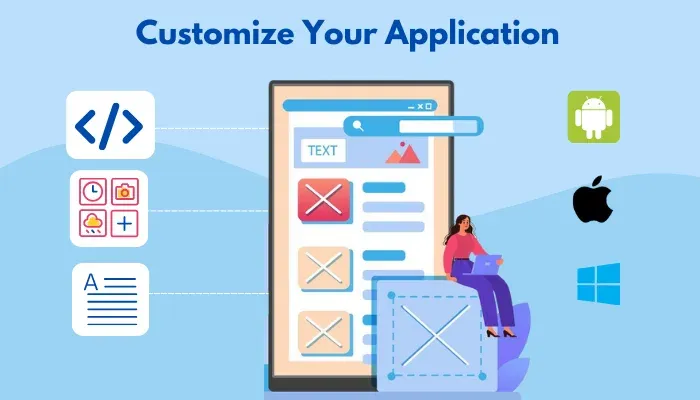
Step 10: Customize Your Application
Once you’ve set up your app, let’s make it your own by changing some elements in the code.
Understand the Code: In the main.dart file, you will see some starter code already there. Here’s a simple breakdown of what each part means:
void main() – This is the entry point of the app as this is the first thing Flutter runs when you run the app.
class: Class defines your app, and it tells Flutter how your app should look and behave. Currently, it’s a simple app with some text on the screen.
Widgets: In Flutter, everything you see on the screen is made up of widgets. Widgets are the building blocks of our app and you will use them to add buttons, text, images, and more.
Change the Text on the Screen: Let’s begin by changing the text that appears in your app. Right now, it probably says something like ‘Welcome to Flutter!’ or ‘Hello, World!’. You need to look for this line of code inside main.dart:
title: Text(‘Welcome to Flutter!’)
And change it to something else, like
Title: Text(‘My Flutter Application’)
This line is part of a widget that displays text on the screen. By changing the text inside the quotes, you can make it say whatever you want.
Add Application Logic: Now in the dart file, you can write and add your business logic as per your requirements. With features such as strong typing and first-class functions, you can easily add business logic.
Step 11: Testing Your Application
Testing is all about ensuring that your application works as anticipated. The testing phase involves testing your cross-platform app by running it on an emulator or a physical device, checking its functionality, and errors, and validating its responsiveness.
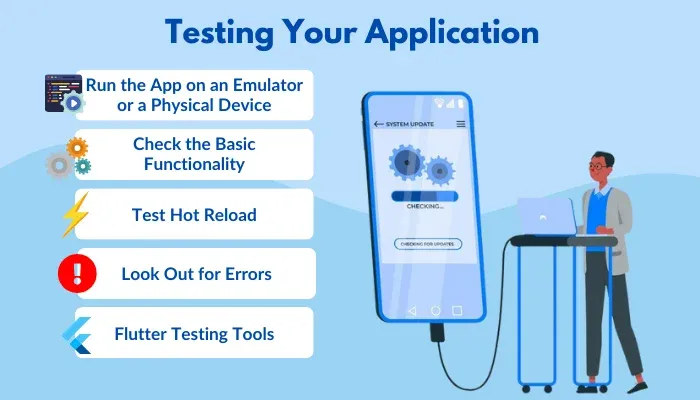
Run the App on an Emulator or a Physical Device: You’ve already set up an emulator, you can run your application on it. However, you can make your test more reliable by performing it on a real device. Connect your Android phone to your computer with a USB cable, and enable Developer Mode and USB Debugging on it. Your Device should appear as an option to run the app. To start the app on your chosen device:
In Android Studio, click on Run > Run App.
In VS Code, open the terminal and run – flutter run.
Check the Basic Functionality: Now that your app is running, check if it performs as expected. Try out all the different features that you added using the right test cases.
Test Hot Reload: If you want to make any further changes or adjustments, use the Hot Reload feature to see how the app responds in real time. This is a great way to quickly identify any issues with new code before fully running the app again.
Look Out for Errors: As you interact with your app, check for any error messages or warnings in the console. These might be printed automatically if something goes wrong, or you might notice unexpected behavior such as the app freezing or crashing.
Testing Tips for Future Apps: Once you become comfortable with Flutter, you may explore Flutter’s built-in testing tools for more advanced testing. Flutter supports unit testing, widget testing, and integration testing which allows you to automate and validate complex functionalities.
Step 12: Build and Deploy Your Application
Once you’ve customized and tested your cross-platform application, it’s time to build and deploy it. The final step will prepare your app for distribution so that you can share it with users.
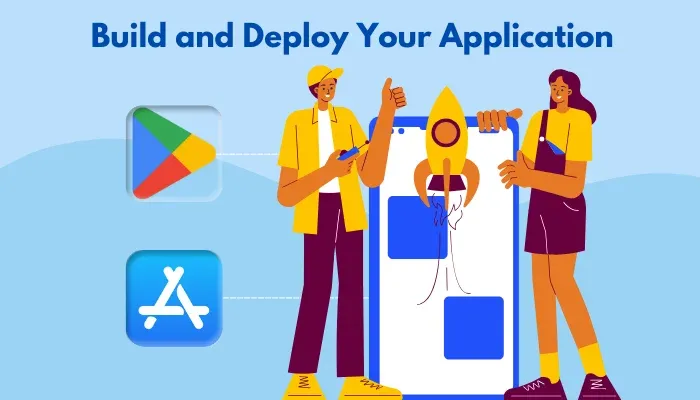
Build Your App: For Android, head towards the terminal and navigate to your app’s root director. Now, run the following command to build the app for Android.
flutter build apk –release
This command will create an APK file in the build/app/outputs/flutter-apk folder within your project director.
On the other hand, building for iOS requires a macOS environment as well as an Apple developer account. Open your project in Xcode by navigating to the iOS folder in your project director. From Xcode, you can configure your app’s settings. Once everything is configured, use the following command in your terminal to build the app:
flutter build ios –release
Prepare for Deployment: Before deploying, you may want to optimize your app by reducing its size or enabling other optimizations. You can do this by following Flutter’s official build documentation.
Deploy to App Stores: To deploy the app on the Google Play Store, you need to log in to the Google Play Console. Now create a new application and follow the prompts to upload your APK file, add app details, and submit it for review. For iOS, the first step is to log in to the App Store Connect portal. From here, you need to create a new app, upload the build from Xcode, and complete all necessary information for App Store submission.
How to Optimize Your Flutter Applications for Better Performance?
Mere deploying your app may attract users initially, but staying relevant in the long run requires ongoing optimization and updates. The following tips will help you boost performance, enhance user experience, and keep your cross-platform app running smoothly across platforms.
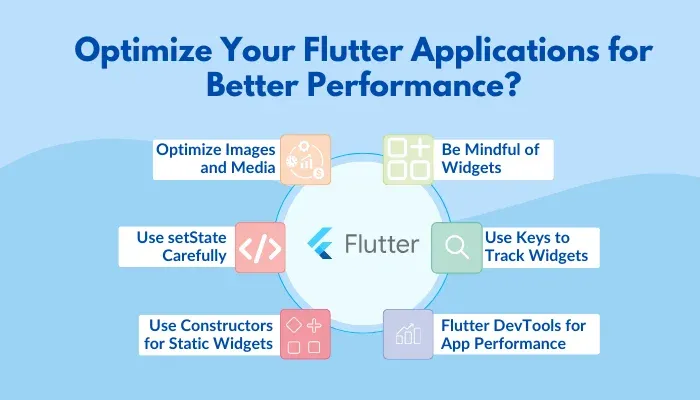
1. Be Mindful of Widgets
Widgets are the building blocks that make up your Flutter application. When you create too many complex pieces, your app tends to slow down. So, if you can use simpler widgets, it’s best to go for it. For instance, choosing ‘StatelessWidget’ (which doesn’t change) over ‘StatefulWidget’ (which can change) is a smarter choice when you don’t need something that updates.
2. Use Keys to Track Widgets
Flutter can track and manage specific widgets using keys, which are manually assigned identifiers. If you don’t use keys, Flutter may rebuild widgets more often than needed, slowing things down. By assigning unique keys to certain widgets, you can help Flutter reuse them instead of remaking them.
3. Try Flutter DevTools for App Performance
Flutter has an inbuilt toolset for checking your app’s performance called Flutter DevTools. It shows details about how your app runs, including frames per second (FPS) or how much memory it consumes. You can see if your app is lagging or using too much memory, which helps spot problems.
4. Optimize Images and Media
Images can make apps slow, especially if they’re big which is why it is always recommended to compress them before adding. Flutter comes with tools like ‘flutter_image_compress’ that shrink images without losing quality. In addition, ‘cached_network_image’ can store images on the device, so they load faster next time without needing the internet.
5. Use setState Carefully
The ‘setState’ function is excellent for updating the application. However, calling it too often, like inside a loop, can slow things down. If you need more control, consider using a state manager like Provider or Bloc to handle updates without overloading the application.
6. Use Constructors for Static Widgets
For widgets whose content remains constant, mark their constructors as ‘const’. This helps Flutter treat these widgets as immutable, meaning they don’t change and can be reused without being recreated. Using ‘const’ constructors for widgets like Text or icons that display static content reduces memory usage and speeds up app performance.
The Future of Flutter Application Development
As Flutter continues to evolve, we can expect to see even more exciting developments in the world of cross-platform mobile app development. With that in mind, the following are the key trends of Flutter app development in 2024.
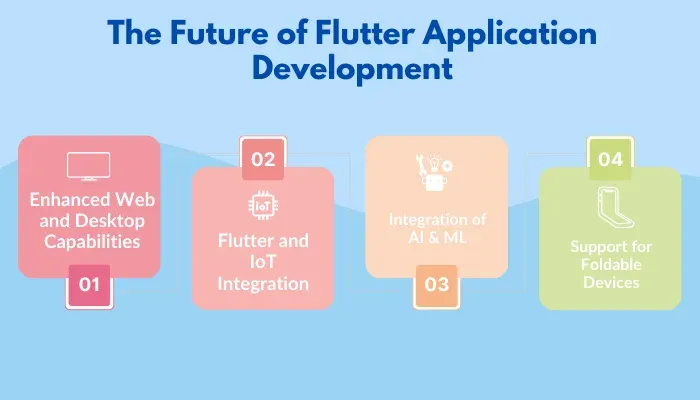
1. Enhanced Web and Desktop Capabilities
Flutter is no longer just for mobiles as its capabilities now extend to web and desktop platforms, enabling you to build apps for browsers, Windows, macOS, and Linux. As users expect consistent functionality across devices, Flutters offers the flexibility to create one application that works everywhere.
This reflects a shift towards seamless, multi-platform experiences. By building for web and desktop, you can save on development time and costs. Additionally, you can ensure a cohesive user experience, allowing you to reach a broader audience without the need for separate codebases.
2. Flutter and IoT Integration
With Flutter expanding its reach into the Internet of Things, you can now develop apps that connect with a variety of smart devices, from wearables to home automation systems. As IoT adoption grows, users seek apps that can control or sync with their devices. Flutter’s IoT support allows you to stay ahead by creating interconnected experiences that align with this trend.
You’ll be able to create innovative apps that interact with users’ everyday lives, enhancing convenience and offering a more integrated experience, all from within your app.
3. Integration of AI & ML
As AI and machine learning continue to transform tech, Flutter is embracing these technologies through frameworks like TensorFlow Lite and Firebase ML. These tools enable you to integrate sophisticated features like image recognition, natural language processing, and predictive analytics into your apps.
The rising demand for intelligent apps that can anticipate user needs and deliver personalized content is what drives this trend upwards. With Flutter’s AI capabilities, you can create smarter apps that stand out in a crowded marketplace by offering unique, data-driven experiences that feel tailored to each user.
4. Support for Foldable Devices
With the rise of foldable devices and wearables, there’s a need for apps that can adapt to various screen sizes and shapes. Flutter is keeping pace by supporting these emerging form factors, driven by the desire to provide flexibility and enhanced user experiences. By leveraging this trend, you can create apps that seamlessly adjust to different screen configurations.
Conclusion
Flutter offers an exquisite toolkit for building high-performing cross-platform applications that work across multiple platforms. By understanding the setup process, exploring customization options, and staying informed on future trends, you’re well-equipped to create an app that meets both present and future demands. The world of app development is evolving constantly, but Flutter’s versatility and growing community make it an excellent choice to help you stay ahead.
Connect with ThinkSys to build a cross-platform app that seamlessly adapts to every device and delivers exceptional performance at every turn.
Frequently Asked Questions (FAQs)
Will my Flutter app look and feel native on different devices?
Flutter allows for customizable widgets that can mimic native components, making your app feel native on any platform. With Flutter’s broad widget library, our team can create a user interface that looks polished and feels natural to each platform.
How does using Flutter affect the overall cost and timeline of my project?
Flutter’s single codebase significantly reduces both development time and cost. You won’t need separate teams for each platform, resulting in faster delivery and lower overall costs.
Is it easy to add new features or make changes to the Flutter app after launch?
With flexible architecture, Flutter allows for easy modifications and enhancements post-launch. As there is a common codebase for both Android and iOS platforms, our team can implement new features or adjustments quickly to meet your business goals.
Can you provide custom designs for my Flutter app?
At ThinkSys, we collaborate closely with your team to create custom designs that fit your preferences and requirements. Our design team will ensure your app not only functions well but also engages users with a beautiful interface.
Can you integrate third-party APIs into the Flutter app?
Our team is proficient in integrating a wide range of third-party APIs and services into your Flutter app including payment gateways, social media platforms, and analytic tools. With various API integrations, you can enhance your app’s functionalities and provide a better user experience.
Share This Article:


