How to Perform Load Testing for Web Applications: Step-by-Step Guide
In today's digital landscape, the true test of your web application's success lies in its ability to gracefully manage sudden traffic surges. This crucial capability is achieved through load testing. Yet, many developers shy away to perform load testing for web applications, often due to its perceived complexity and the time commitment it requires.
But don't worry—this guide is here to demystify the process and show you how to perform load testing for web applications effectively.

By the end of this step-by-step guide, you'll have a clear understanding of how to:
- Set up robust load tests.
- Accurately interpret the results.
- Leverage these insights to boost your web app's performance.
Let's dive in and get started!
1. How to Set Precise Load Testing Goals for Your Web Apps?
Defining clear load testing goals creates a roadmap for high-performing, reliable web applications. It helps you know exactly what you're testing for and why.
When you have well-defined objectives, you can pinpoint potential issues before they impact real users. You'll also save time and resources by focusing on the metrics that truly matter for your application's success. Plus, you'll gain the confidence that your app can handle whatever traffic comes its way.
For many teams, setting specific, measurable goals seems a challenge. They often fall into the trap of vague objectives or focus on the wrong metrics. It all leads to ineffective testing and missed performance issues.
Here's you should do to define load testing objectives:
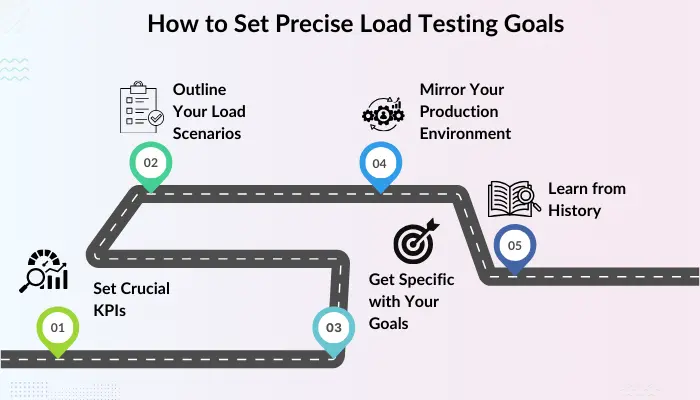
- Set Crucial KPIs: Start by identifying the metrics that impact your app's performance. Response time, throughput, and error rates will give you a good start. Write down the things like:
- That could push away your users the most.
- Slow loading times.
- Errors emerging everywhere.
That's where you need to focus.
- Outline Your Load Scenarios: While planning your load scenarios, don't just test for the average day. Include everything like:
- Peak Load: When everyone decides to use your app at once.
- Average Load: Your typical Tuesday afternoon.
- Stress Load: Push it to the limit and see what breaks (better now than during a big sale).
- Get Specific with Your Goals: Avoid vague objectives like "the app should be fast." Instead, set specific targets, such as response times under 2 seconds during peak load or error rates below 1%.
- Mirror Your Production Environment: Your testing setup should replicate your production environment to avoid discrepancies between testing and real-world performance.
- Learn from History: Look at past performance data or industry benchmarks. They'll give you a solid starting point for setting realistic goals. By nailing down these objectives, you're building a roadmap to a web app that doesn't just work, but works brilliantly under pressure. Now that we've established the importance of defining load testing goals and the common roadblocks, let's move on to choosing the right tools for the job. Selecting the appropriate load testing tools is crucial for obtaining accurate and actionable results.
2.How to Choose the Right Load Testing Tool?
The right tool will align with your specific needs and seamlessly integrate with your existing tech setup.
With the ideal tool in your arsenal, you'll glide through test creation, easily simulate real-world scenarios, and gain deep insights into your web application's performance. Plus, you'll save time and resources by avoiding the headaches of using a tool that's not the right fit.
Here's where many teams stumble:
They get overwhelmed by many options out there or fancy features they don't really need. It's easy to end up with a tool that's either too complex or doesn't quite hit the mark.
Here's your game plan to nail this:
- Know Your Needs: Before you start shopping around, get crystal clear on what you're looking for.
- What protocols does your app use?
- How many users do you need to simulate?
- Do you need detailed reports or just the basics?
- Search the Market: Now, let's check out some popular tools:
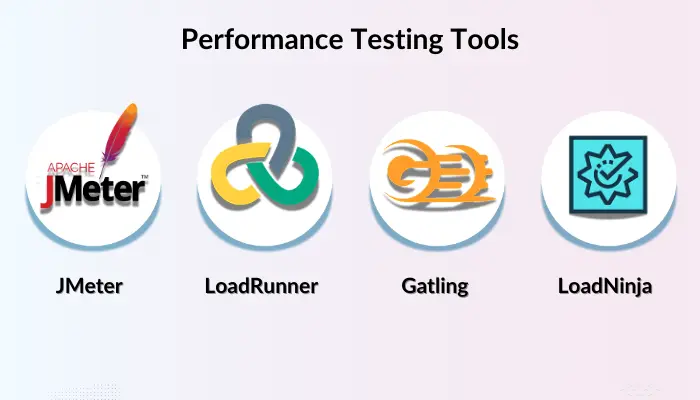
- Weigh Your Options: Now, let's understand how to pick the right tool for your team. For that you need to consider:
- Ease of use: Can your team pick it up quickly, or will you need to budget for training?
- Scalability: Can it handle your growth plans, or will you outgrow it soon?
- Cost: Does it fit your budget? Watch out for hidden costs!
- Protocol support: Does it play nice with all your app's technologies?
- Use It Before You Buy: Whatever tool you think is good for your team, don't just buy it straight away. Most tools offer free trials or demos. See firsthand how these tools feel in action. There's no one-size-fits-all here. The "best" tool is the one that fits your unique needs like a glove. Take your time, do your homework, and you'll find your perfect load testing tool. Once you've got your tool locked in, you'll be all set to create some seriously robust and insightful load tests.
Now that you've got your tool, let's talk about setting up a testing environment.
3. How to Achieve Flawless Performance Results Using Mirror-Perfect Testing Techniques?
Setting up a testing environment that's an exact replica of your production setup is essential for getting reliable test results. This ensures that what you see in testing is what you'll get in the real world.
With a mirror-perfect testing environment, you'll catch performance issues before they hit production, saving you time, money, and potential headaches. You'll also gain confidence in your web application's ability to handle real-world scenarios, leading to smoother launches and updates.
Here's where most teams struggle:
They don't know how to create and maintain a testing environment that truly reflects their production setup. As a result, the environments become disconnected over time, leading to unexpected issues when code moves to production.
Here's how you can ensure you don't repeat that mistake:
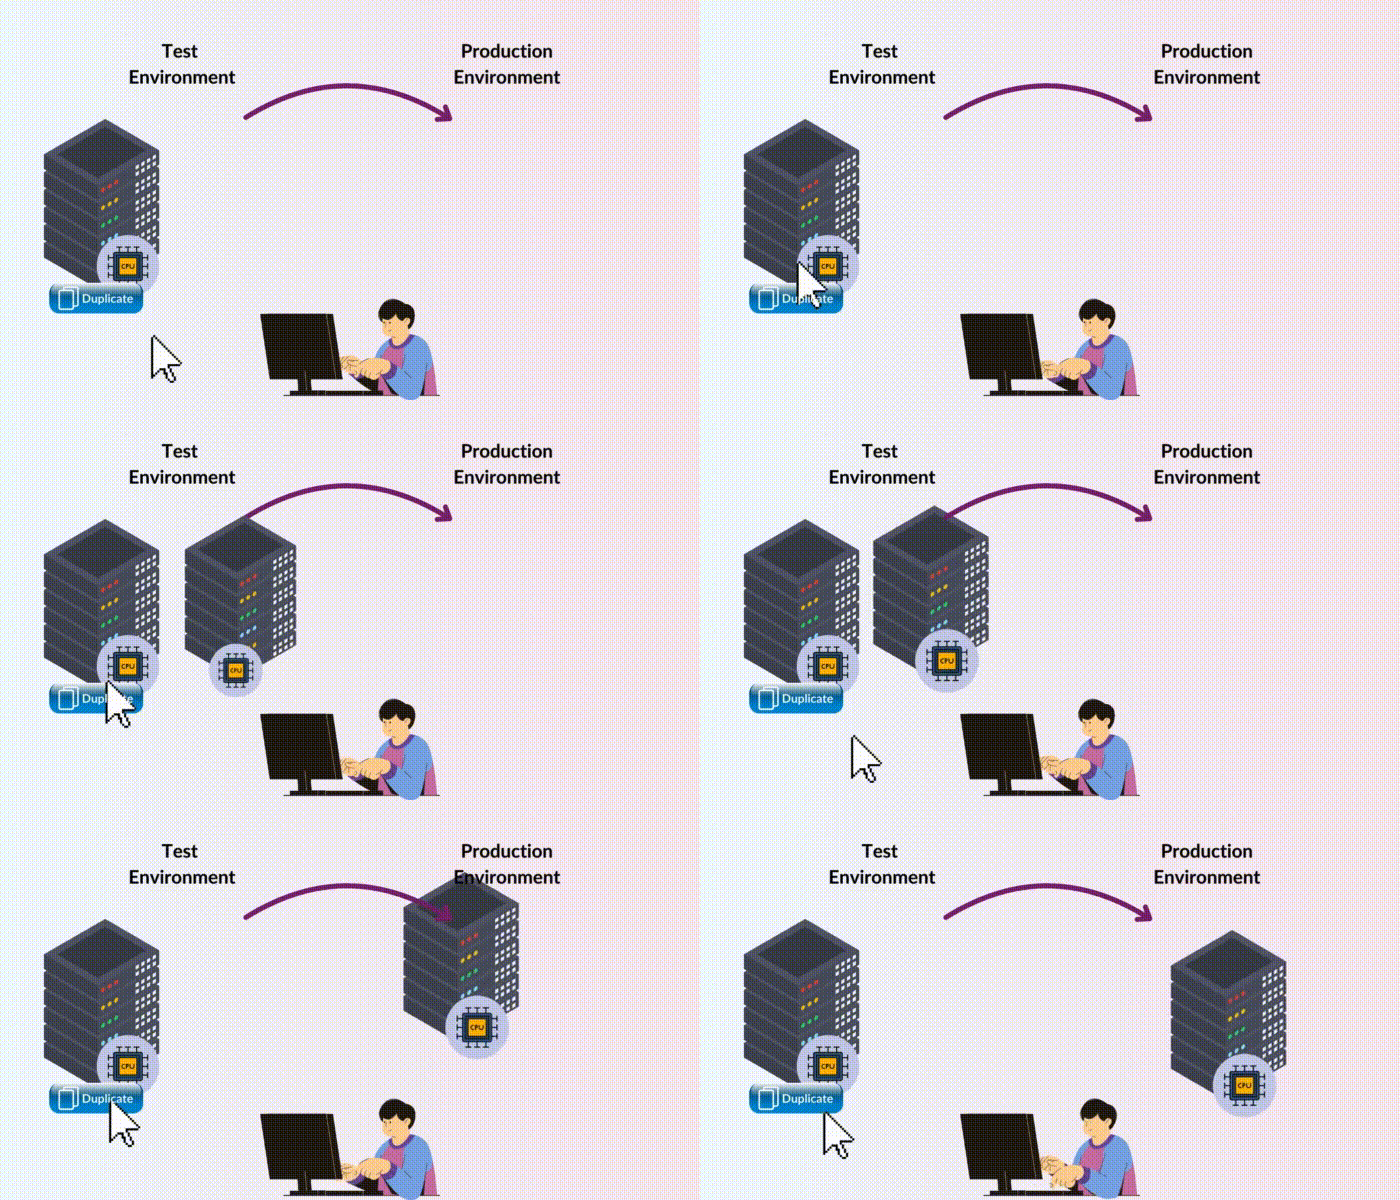
- Match Your Hardware: Start with the basics. Make sure your testing environment has the same or very similar hardware specs as production. We're talking CPU, memory, and storage. If you're running on cloud infrastructure, use the same instance types and configurations.
- Clone Your Software Setup: Ensure all your software versions match up - from the operating system to databases, middleware, and web application servers. Don't forget about those little configuration files and settings. Even small differences can lead to big headaches later.
- Replicate Your Network: Network conditions can significantly impact your app's performance. Use tools to simulate your production network's bandwidth, latency, and topology in your testing environment. This helps you spot potential issues that might only show up under specific network conditions.
- Embrace the Cloud: Consider using cloud services like AWS, Azure, or Google Cloud for your testing environment. They offer incredible flexibility and scalability, allowing you to simulate larger loads and within your budget. Plus, you can easily adjust your setup to mirror different aspects of your production environment.
- Keep Your Data Real (But Safe): Use production-like data in your testing environment. If you can't use actual production data (which is often the case due to privacy concerns), create synthetic data that closely mimics the real thing. Just make sure to anonymize any sensitive information.
- Don't Cut Corners on Security: It's tempting to relax security measures in a testing environment but resist that urge. Implement the same security configurations you use in production. This helps you catch any security-related performance issues early on.
- Automate: Use configuration management tools like Ansible, Puppet, or Chef to keep your environments in sync. This reduces human error and makes it easier to maintain consistency over time.
- Regular Check-ups: Schedule regular audits to compare your testing and production environments. Look for any discrepancies that might have moved in and address them promptly.
The effort you put in creating a mirror-perfect testing environment will pay off tenfold when your application performs flawlessly under real-world conditions.
After setting up your testing environment, work on crafting those test scenarios that'll make your web app overcome any kind of performance challenges.
4. How Lifelike Test Scenarios Can Expose Hidden Performance Issues?
When you create detailed, realistic test scenarios, you can accurately predict how your web application will perform under real-world conditions.
By simulating genuine user behavior, you'll uncover potential bottlenecks and performance issues before they impact your customers. This proactive approach saves time, money, and reputation by ensuring your application can handle real-world traffic patterns and user actions.
But if your team is unable to create scenarios that truly reflect their users' behavior, chances are they might be missing critical actions or relying on outdated data.
With the following process, you can overcome this hurdle:
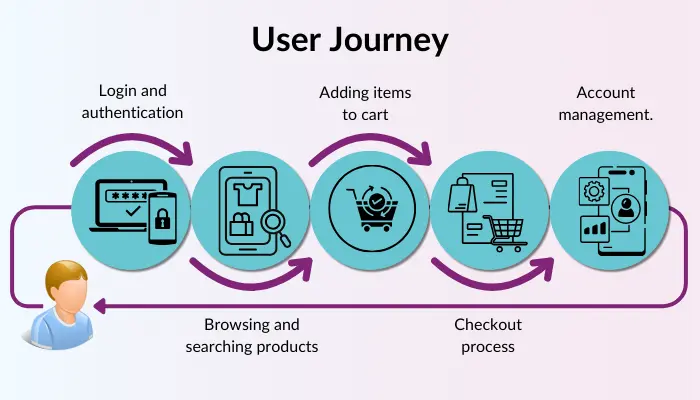
- Map Out User Journeys: Start by putting yourself in your users' shoes. What are the most common paths they take through your app?
Besides focusing on the happy path, consider edge cases too. For example:- Login and authentication.
- Browsing and searching products.
- Adding items to cart.
- Checkout process.
- Account management.
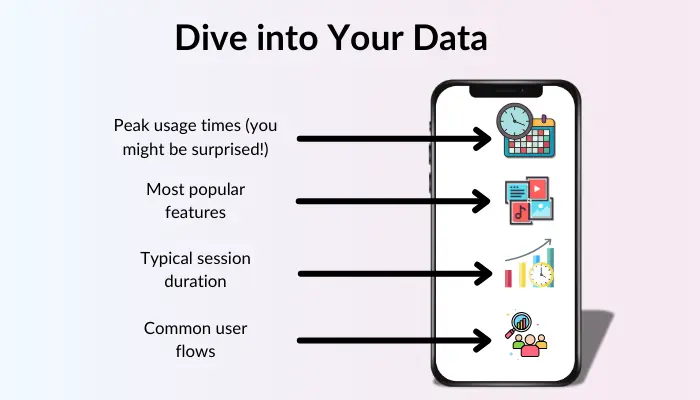
- Dive into Your Data: Make use of your analytics reports. They provide information about how people actually use your web app. Look for:
- Peak usage times (you might be surprised!).
- Most popular features.
- Typical session duration.
- Common user flows.
- Mix it Up: Don't think of average, predictable users. Real people are unpredictable, so your test scenarios should be too. Include a mix of:
- Power users who know your app inside out.
- Newbies who might take longer to complete actions.
- Users on different devices and connection speeds.
- Handle the Unexpected: Your app probably has some tricky parts like dynamic content, session management, or complex workflows. Don't overlook these. Work with your dev team to figure out how to simulate these accurately.
- Validate and Iterate: Before you go all-in with your load test, do a dry run of your scenarios. Are they behaving like real users would? Tweak and refine until they feel authentic. By following these steps, you'll craft test scenarios that give you confidence in your web app's real-world performance.
Once you have detailed test scenarios in place, the next step is to set up data and test scripts that will simulate these user actions and generate the necessary load for your tests. Let's explore how to do this effectively.

5. How to Create Test Scripts That Give Accurate Performance Insights?
Accurate, data-driven test scripts are key to meaningful load testing results.
They reveal genuine performance bottlenecks and user experience issues. They allow you to confidently optimize your web application, ensuring it can handle peak loads while delivering a smooth user experience.
Testers struggle to create scripts that accurately reflect diverse user behaviors and real-world scenarios. They often end up with oversimplified scripts that miss critical performance issues.
Here's a step-by-step guide to make test scripts:
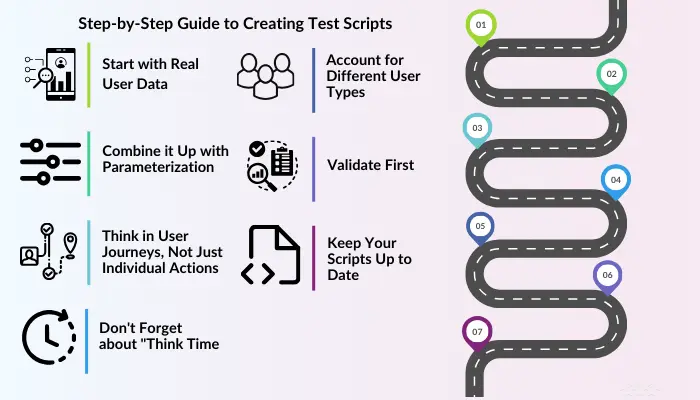
- Start with Real User Data: Dive into your analytics and user feedback. What are the most common paths through your application? What actions do users perform most frequently? Use this information as the foundation for your scripts.
- Combine it Up with Parameterization: Don't just use the same username and password for every simulated user. Create variables for things like login credentials, search terms, and product selections. This variety is crucial for uncovering issues that might only appear with certain data combinations.
- Think in User Journeys, Not Just Individual Actions: You want to test logging in or adding items to a cart. But real users don't do these things in isolation. String actions together into realistic flows — browse, search, add to cart, checkout. This approach uncovers performance issues that might only crop up in specific sequences of actions.
- Don't Forget about "Think Time.": Real users pause between actions. They read product descriptions, compare options, or get distracted by a notification. Build these pauses into your scripts to create a more authentic load pattern.
- Account for Different User Types: New visitors interact differently than loyal customers. Mobile users have different patterns than desktop users. Create separate scripts (or script variations) to represent these different segments of your user base.
- Validate First: Before you use your scripts in a full load test, run them with a small number of users. Watch the results closely. Are all the actions being performed correctly? Is the data being passed through as expected? Fix any issues you spot at this stage.
- Keep Your Scripts Up to Date: Your web application is constantly evolving, and your test scripts need to match this pace. Set up a regular review process to ensure your scripts still accurately reflect how users interact with your latest version.
Once your test scripts are set up and validated, the next step is to execute the load tests. This is where you will simulate user load and measure your application's performance under various conditions. Let's move on to understand how to effectively execute these load tests.
6. How to Strategically Put Your Web Application Under Immense Load Tests?
This critical step helps you identify and address potential bottlenecks before they impact your users.
By conducting thorough load tests, you'll gain confidence in your application's ability to handle high traffic volumes. You'll also be able to optimize resource allocation, improve user experience, and prevent costly downtime during peak usage periods.
So why do most people find it challenging to create realistic test scenarios and interpret the results accurately?
Because they often overlook crucial performance metrics or fail to account for real-world variables, leading to false confidence in their web application's capabilities.
Here's your roadmap to successful load testing:

- Start Small and Scale Up: Don't jump straight into peak load scenarios. Begin with a modest user count and gradually increase it. This approach helps you catch issues early and prevents unexpected system crashes.
- Keep Monitoring Metrics: While the test is running, monitor these key performance indicators like a hawk:
- Response times: How quickly is your web app responding to requests?
- Server utilization: Are your CPU, memory, and network resources holding up?
- Error rates: Any red flags popping up as the load increases?
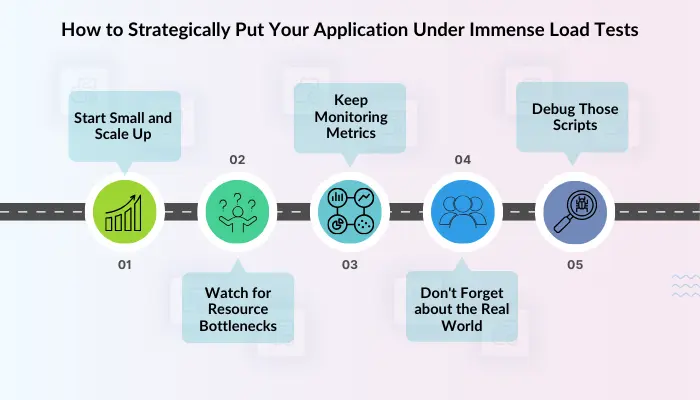
- Debug Those Scripts: Poorly written test scripts give you misleading results. Double-check and validate your scripts before the main event.
- Watch for Resource Bottlenecks: Keep a close eye on your system resources during the test. If you spot any chokepoints, it might be time to consider scaling up your infrastructure or optimizing those resource-hungry processes.
- Don't Forget about the Real World: Network latency can disrupt your results, especially if you're running distributed tests. Use network simulation tools like Cisco Packet Tracer, Cloonix, Opnet, etc. to mimic real-world conditions.
Once you've completed your tests, the next exciting step is diving into those results to uncover insights and areas for improvement.
7. Test Result Analysis to Maximize Your Web App's Performance?
Analyzing load test results is your secret weapon for uncovering performance issues and optimizing your web application. By diving deep into the data, you'll pinpoint exactly where your app needs improvement.
This step helps you confidently handle high traffic loads, ensuring a smooth user experience even during peak times. As a result, you provide increased user satisfaction, reduced bounce rates, and potentially higher conversion rates. Plus, you'll save time and resources by focusing your optimization efforts where they're needed most.
Many developers struggle with interpreting the vast amount of data generated during load tests. It's easy to get overwhelmed or miss critical insights if you don't have a structured approach to analysis.
Let's break down how you can become a pro at analyzing your test results:
- Pinpoint Your Key KPIs: Start by aiming for the metrics that matter most: response time, throughput, and error rates. They help you understand how your web app performs under pressure. Compare these numbers to your predefined thresholds. If you're seeing red flags here, you know it's time to dig deeper.
- Make Your Data Come Alive: Staring at rows of numbers is boring and not even beneficial. That's where visualization tools come in handy. Use tools like:
| Tool | Known For |
| Grafana. | Flexibility. |
| Kibana. | Elasticsearch integration. |
| JMeter. | Built-in dashboard for its simplicity. |
Find out which tool works for you and stick with it. By using these tools you can create some graphs and charts that'll make those numbers form a complete picture.
- Observe Patterns: Look for recurring themes in your data. Is there a particular action that's always slow? Does your error rate spike under specific conditions? These patterns are gold — they're pointing you straight to your bottlenecks.
- Tackle Common Pitfalls Directly: Watch out for these deceptive issues:
- Inconsistent results: Make sure your test environment mirrors production as closely as possible.
- Not enough data: Run longer tests and mix up your user scenarios for a more comprehensive view.
- False alarms: Double-check those anomalies before sounding the alarm. Run additional tests to confirm.
- Data overload: Focus on key metrics and use tools to help manage large datasets.
In the next section, we'll dive into how to turn these insights into action and make your app faster than ever.
8. How to Enhance Your Web App's Speed With Smart Optimization Techniques?
Fine-tune your application based on load test results and validate improvements through iterative testing. This process ensures your system can handle increasing demands while maintaining peak performance.
By optimizing and retesting, you'll see tangible improvements in your app's speed and responsiveness. Users will enjoy a smoother experience, leading to increased satisfaction and potentially higher conversion rates. Plus, you'll be able to handle more traffic easily.
For many teams, pinpointing the exact causes of performance issues is complex. Besides this, they worry that optimizations might introduce new problems. It's also challenging to balance performance improvements with budget constraints.
Here's your complete process to optimize your test results:
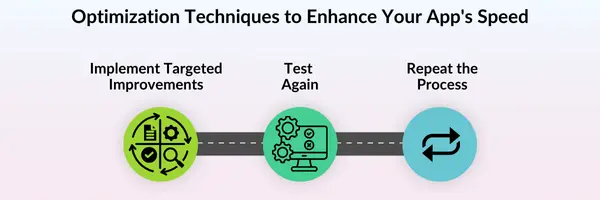
- Implement Targeted Improvements: Look at your code - are there any inefficient algorithms or unnecessary processes? Clean them. Then, turn your attention to your database. Adding indexes to frequently queried fields can work well. Don't forget about your infrastructure - consider scaling up your servers or using load balancers to distribute traffic more evenly.
- Test Again: Once you've made these changes, it's to see if they've worked. Run those load tests again. Are things running smoother? Faster? If not, don't worry - optimization is often a process of trial and error.
- FRepeat the Process: Keep tweaking and testing until you hit your performance goals. It might take a few rounds, but trust us, it's worth it.

Now, let's talk about integrating load testing into your CI/CD pipeline. It's easier than you might think, and it'll help you catch performance issues before they become real headaches.
9. Accelerate Your Development Cycle with Automated Performance Checks
Integrating load testing into your CI/CD pipeline ensures that performance testing becomes an automatic, ongoing part of your development process.
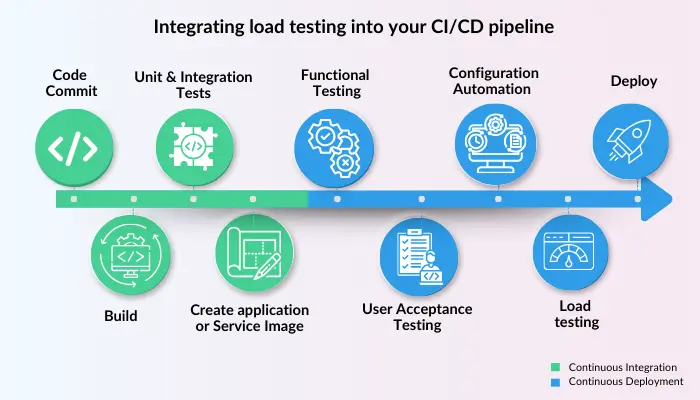
By automating load testing, you'll catch performance regressions early, saving time and resources in the long run. You'll also build confidence in your releases, knowing that each version has passed rigorous performance checks. Research shows this approach can reduce production performance issues by up to 40%.
However, the initial setup and maintenance of automated load testing can be complex. Even it can be time-consuming, especially when you're already juggling multiple development tasks.
Here's a step-by-step guide to get you started:
- Choose Your Tools: Pick a load testing tool that integrates well with your existing CI/CD platform. Popular choices include Apache JMeter, Gatling, or cloud-based solutions like BlazeMeter.
- Start Small: Don't try to test everything at once. Begin with your most critical user journeys or API endpoints. You can expand your test coverage over time.
- Set Up Your First Automated Test: Create a basic load test script for your chosen scenario. It doesn't need to be perfect — you'll refine it later.
- Integrate with Your CI/CD Pipeline: Add a step in your pipeline to trigger the load test. This might involve writing a simple shell script or using a plugin for your CI/CD tool.
- Define Performance Thresholds: Decide what "good" performance looks like for your web application. Set these as pass/fail criteria in your tests.
- Schedule Regular Runs: Configure your pipeline to run these tests automatically, perhaps after each significant code change or before every deployment.
- Monitor and Refine: Keep an eye on your test results. Are they catching issues? Are they running smoothly? Adjust your tests and thresholds as needed.
- Gradually Increase Complexity: As you get comfortable with the process, add more test scenarios and increase the load to more closely mimic real-world conditions.
Remember, this is a journey. You don't need to have a perfect setup from day one. The key is to start incorporating performance testing into your regular workflow. As you do, you'll build a more robust, performant application that your users will love.
10. Keep Your App Running Smoothly 24/7 with Proactive Monitoring
Implement a robust continuous monitoring and maintenance strategy to ensure your web app performs optimally at all times.
By staying on top of your app's performance, you'll gain valuable insights into user behavior and app usage patterns, allowing you to make data-driven decisions for future improvements.
The process of setting up effective monitoring systems, managing alert fatigue, and finding time for regular maintenance is challenging for many teams.
Let's dive into how you can handle it with ease:
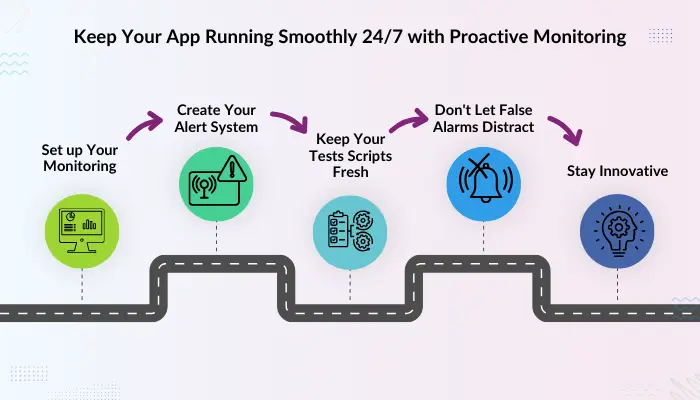
- Set up Your Monitoring: You need to monitor your app 24/7. Tools like New Relic, Dynatrace, or Datadog help you with that. They'll keep check on everything from response times to CPU usage, giving you a bird's-eye view of your app's health.
- Create Your Alert System: You don't want to be glued to those dashboards all day. That's where alerts come in. Set up notifications for when things start going in wrong directions. Maybe your response times are increasing, or your error rates are spiking. Your alert system will give you a push so you can jump in before users start noticing.
- Keep Your Tests Scripts Fresh: Your app's evolving, and so should your tests. Every few months, take a look at your load testing scripts. Are they still mimicking real user behavior? Have you added new features that need testing? Keeping your tests up-to-date ensures you're always prepared for the real world.
- Don't Let False Alarms Distract: Here's a common problem: false positives. Take some time to fine-tune your alert thresholds. Use your app's history as a guide. What's normal for your web app? Set your alerts just above that so you're only getting pinged when there's a real issue.
- Stay Innovative: Apps can slow down over time, like a car that needs a tune-up. Keep an eye on those performance trends. Is your app getting sluggish? Don't wait for it to become a problem. Schedule regular maintenance checks, like refactoring code or optimizing your database.
It might seem like a lot of work upfront, but it's worth it. Your users will praise you with their loyalty, and you'll sleep better at night knowing your web app is capable of handling any kind of load.
Conclusion: Ensuring Peak Performance with Effective Load Testing
And that sums up the step-by-step guide on how to perform load testing for web applications. We've covered everything from setting up your test environment to analyzing results and implementing improvements. You're now armed with the knowledge to ensure your web app can
handle whatever traffic comes its way. So go ahead, put these techniques into practice. Your users will reward you for your proactive approach.
If you're feeling confused by the technical details or short on time to implement these strategies, don't worry. It's a common challenge for many developers and businesses. In such cases, you might want to consider reaching out to experts like Thinksys for your web application development and testing needs.
Frequently Asked Questions (FAQs)
How much does professional Load Testing typically Cost, and what factors influence the Price?
What qualifications should I look for in a Load Testing Service Provider?
How long does a typical Load Testing Project take from Start to Finish?
Can Load Testing Services integrate with my existing Development and Deployment processes?
Share This Article:


