How to Implement CI/CD Pipeline?
Implementing Continuous Integration and Continuous Delivery (CI/CD) pipeline is crucial for modern software development. CI/CD streamlines the process, enabling faster delivery of high-quality software with fewer errors. By implementing CI/CD pipline, organizations can achieve faster time-to-market, improved code quality, and enhanced collaboration among team members.
This article will be your comprehensive guide on implementing CI/CD pipeline, helping you leverage the full potential of these powerful practices in your software development workflow.
Implementing CI/CD Pipeline
When it comes to implementing the CI/CD pipeline into your organization, you need to know that the process involves several steps. To make it easier to understand, the implementation process is divided into two parts: forming the fundamentals and building CI/CD pipelines. Let's begin with the fundamentals.
Forming the Fundamentals
Building a solid foundation is critical for the success of your CI/CD pipelines. This section outlines the essential elements that form the backbone of your CI/CD process to ensure a seamless and efficient development lifecycle.
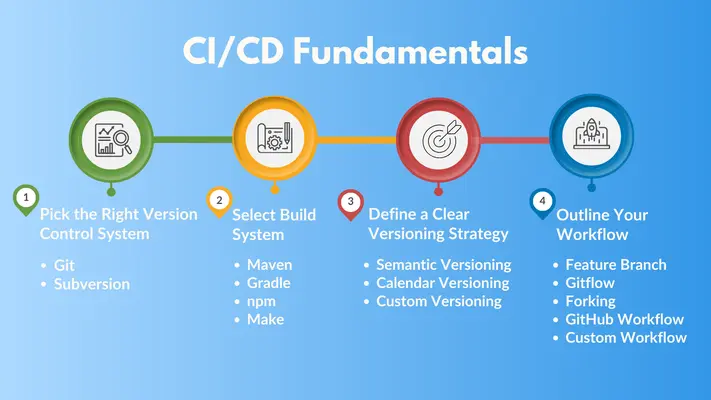
1. Pick the Right Version Control System:
Version control is vital in software development, enabling developers to track changes, collaborate, and maintain a complete project history. The two most popular VCS options are Git and Subversion (SVN).
- Git: A distributed VCS allowing every developer to have a complete copy of the repository. It's great for collaborative and open-source projects.
- Subversion: SVN is a centralized system where all project files and history are stored in a single repository. It is known for its robustness and has been widely used in enterprise environments for many years. SVN is often used in larger enterprises with established workflows and centralized control requirements.
For most modern development teams, Git is preferred due to its flexibility, widespread adoption, and powerful features. Consider SVN if your organization has specific needs for centralized control and simpler administration.
Managing version control can be challenging, especially as your team grows. If not managed well, it can lead to code conflicts, lost work, or difficulties in reverting to previous versions when something goes wrong. Make sure everyone on your team is on the same page by setting up clear guidelines and providing training for your version control system. You can also use hooks and automation scripts to enforce best practices, like requiring code reviews before any merges happen.
2. Select Build System:
Build systems are pivotal tools in software development that automate the process of converting source code into executable programs. Converting source code into executable programs through automation ensures consistency across environments. Popular build systems include:
- Maven: This build system is famed for its compatibility with Java projects. It uses a Project Object Model file to manage project dependencies and build processes and plugins.
- Gradle: A versatile build system that supports multiple languages and uses Groovy or Kotlin-based domain-specific language (DSL) for configuration.
- npm: The default package manager for Node.js, npm handles dependency management and provides scripts for automating tasks like building and testing.
- Make: A build automation tool that uses Makefiles to define build rules and dependencies. This tool is preferred for working on C/C++ projects.
While selecting a build system, consider how well it fits your language, ease of use, and plugin support needs. However, integrating multiple build systems across different projects can lead to inconsistencies and increase maintenance overhead. It's best to standardize on a single-build system where possible or create cross-platform scripts that ensure consistency.
3. Define a Clear Versioning Strategy:
Versioning is the process of assigning unique version numbers to distinctive states of software. These version numbers are used to track the evolution of software, identify specific releases, manage dependencies, and ensure compatibility.
A versioning strategy is a systematic approach to assigning version numbers to software versions, ensuring consistency, predictability, and effective communication among team members and stakeholders. A versioning strategy establishes rules and guidelines on how and when to increment version numbers based on the nature of changes. The following are some of the most common versioning strategy that you can implement.
- Semantic Versioning (SemVer): SemVer is the most widely used strategy, which breaks down version numbers into three parts: MAJOR.MINOR.PATCH. For changes that are not backwards-compatible, you need to bump the MAJOR version. Adding a new backwards-compatible feature would involve increasing MINOR versions. And small bug fixes that don't affect anything else involve incrementing the PATCH version.
- Calendar Versioning (CalVer): CalVer uses the release date as the version number, typically in the format YEAR.MONTH. For instance, if you release an update in July 2024, the version would be 2024.07.
- Custom Versioning: Sometimes, your project's demands are unique and may not be fulfilled through any other versioning strategy. In that case, customer versioning is the one for you. This could be a combination of different strategies or an entirely new approach.
Inconsistent application of versioning rules can lead to confusion, dependency issues, and difficulties in tracking the evolution of your software, especially when working with multiple teams or products.
Document your versioning strategy clearly and ensure all team members understand and follow it. Also, automate versioning within your CI/CD pipeline to ensure consistency and use tags or branches to clearly mark different versions.
4. Outline Your Workflow:
A well-defined workflow ensures that code changes are consistently and reliably integrated, tested, and deployed. You can adopt various workflows depending on your team's size, project complexity, and specific needs.
- Feature Branch: You create a new branch for each feature or bug fix, then merge it back into the main branch after reviews and tests.
- Gitflow: This structured workflow uses main, develop, feature, release, and hotfix branches, making it suitable for complex projects. The 'main' branch holds your production-ready code, while 'develop' is for integrating features. You create 'feature' branches from 'develop' and 'release' branches to prepare for new releases. If something urgent comes up, you use hotfix branches.
- Forking: Each developer works in their own fork of the main repository, then submits pull requests to merge changes. This approach keeps your work isolated, reduces conflicts, and allows for thorough code reviews.
- GitHub Workflow: It provides various tools to streamline your workflow, integrating features like pull requests, issues, and GitHub Actions. You can use branches to manage features and fixes and pull requests to review and merge code.
- Custom Workflow: Tailored to fit your project's needs, this workflow combines elements from different workflows or creates new rules.
As projects grow in size and complexity, it can take time to maintain a consistent workflow across all teams and stages of development. Inconsistencies can lead to delays, integration issues, and reduced productivity.
You can define clear guidelines for your workflow and ensure they are consistently applied across your team. Make sure to regularly review and update these guidelines to reflect changes in project requirements.
Building the CI/CD Pipeline
Now that you know the fundamentals and components of the CI/CD pipeline, it is time to build it.
1. Setting Up Version Control
Establishing a robust version control system is a foundational step in implementing the CI/CD pipeline. It ensures that all code changes are tracked, managed, and easily recoverable.
- Create Repositories: Repositories are where your codebase is stored and managed.
- Use Git commands to create a new repository. For instance, 'git init' initializes a local Git repository.
- Host your repositories on platforms like GitHub, GitLab, or Bitbucket. These platforms provide additional features such as issue tracking, pull request management, and collaboration tools.
- Organize repositories logically. You might have separate repositories for different projects, microservices, or components. Ensure each repository has a clear README.md file describing the project and its setup instructions.
- Branching Strategy: A branching strategy helps manage the development workflow by isolating changes in different branches. GitFlow, GitHub Flow, and GitLab flow are among the most popular branching strategies. Example of Git commands:
a. Create a new feature branch
git checkout -b feature/new-feature develop
b. Work on the feature and commit changes
git add .
git commit -m "Add new feature"
c. Merge the feature branch back into the 'develop'
git checkout develop
git merge feature/new-feature
d. Delete the feature branch
git branch -d feature/new-feature
- Pull Requests (PR): Pull requests are a mechanism for code review and collaboration. To use them effectively, you need to:
- Create a PR: Submit a pull request to merge changes from the feature branch into 'develop' or 'master'.
- Code Review: Reviewers check the code for quality and standards, providing feedback, approval, or requesting changes.
- Merge Conditions: Merge PRs only after they pass automated tests and receive required approvals, ensuring high-quality code integration.
2. Configuring the CI/CD Server
Setting up a CI/CD server is a critical step in automating your software development process. Being one of the most widely used tools, Jenkins is a preferred choice for this. Here's a detailed guide on how to configure Jenkins as your CI/CD server:
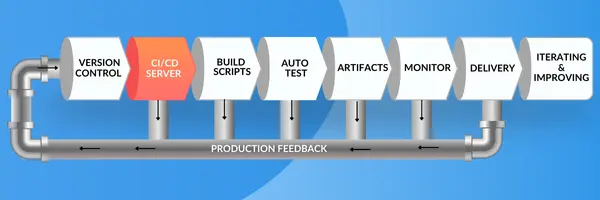
- Install Jenkins: First, you'll need to install Jenkins which you can either download and install on your own server or use a cloud-based solution like AWS or Azure.
- Install Plugins: Jenkins' functionality can be extended with plugins. After the initial setup, you need to install the necessary plugins for version control, build tools, and deployment. Some popular plugins include:
- Git Pluginfor integrating with Git repositories.
- Pipeline Plugin for defining build pipelines.
- Docker Plugin if you are using Docker for builds.
- Connect to VCS: Integrate Jenkins with your VCS to automate builds whenever code changes are pushed to the repository.
- Add Credentials: You need to navigate to 'Manage Jenkins' >> 'Manage Credentials' and add credentials for your Git repository.
- Configure a job or pipeline.
- Set up source code management by selecting 'Git' under the 'Source Code Management' section in the job configuration. Here, you need to enter the repository URL and choose the credentials you added earlier.
- Define the branches you want Jenkins to build. Typically, you might want to build the 'develop and 'master branches.
- Create Pipelines: Jenkins Pipelines allow you to define the stages of your CI/CD process in code, using a Jenkinsfile. This file is stored in your repository and defines the entire build lifecycle.
- In your project repository, create a file named 'Jenkinsfile'.
- Use the Jenkins Pipeline DSL (domain-specific language) to define stages such as 'Build', 'Test', and 'Deploy'.
- Now, you need to configure the pipeline job. To do that, choose 'Pipelinescript from SCM' under the Pipeline section, select 'Git', and provide the repository URL and credentials. Make sure to specify the 'Jenkinsfile' path if it's not in the root directory.
3. Creating Build Scripts
Creating build scripts is an essential part of setting up a CI/CD pipeline. These scripts automate the process of fetching code, installing dependencies, compiling code, and running static code analysis.
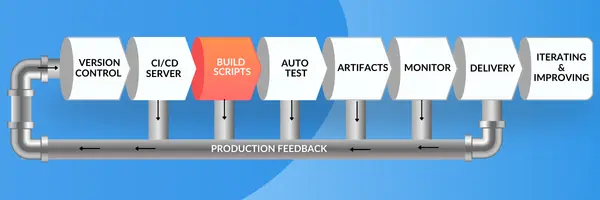
- Fetch Code: The first step in your build script is to fetch the latest version of your code from the repository. This ensures that your build is working with the most recent changes.
- Use Git commands to clone the repository or pull the latest changes.
- Ensure that your script handles authentication, either through stored credentials or SSH keys.
- Install Dependencies: The next step is to install the necessary dependencies for your project. This varies depending on the build tool and package manager you are using.
- Maven: This tool is suitable for Java projects, as well as downloading and managing dependencies.
- Gradle: Gradle is another popular build tool for Java projects.
- npm: Use npm to install the package for Node.js projects.
- Compile Code: After installing dependencies, the next step is to compile your code. This step transforms your source code into executable files or packages.
- Static Code Analysis: Static code analysis helps ensure code quality and security by detecting potential issues early in development. Tools like SonarQube can be integrated into your build scripts to perform these checks.
- SonarQube: A popular tool for static code analysis. It can be integrated with Maven, Gradle, and other build tools.
- Other Tools: Depending on your tech stack, you might use ESLint for JavaScript, Checkstyle for Java, or other similar tools.
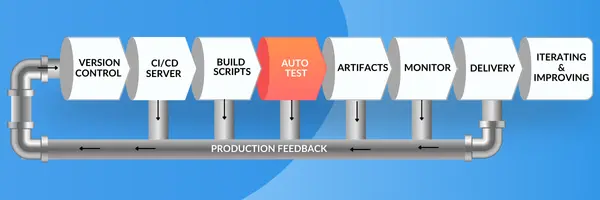
4. Implementing Automated Testing
Automated testing is a critical component of a CI/CD pipeline. It ensures that your code is reliable, maintainable, and free of major defects before it reaches production. Implementing automated testing involves a structured approach that integrates testing at various stages of your development process.
- Identify Test Requirements and Goals: Before diving into automation, it's essential to define what you want to achieve with automated testing.
- Determine the areas of your codebase that need automated testing. In most cases, it involves unit tests, integration tests, and end-to-end tests.
- You need to decide how often each type of test should run.
- Choose appropriate testing tools like Selenium, Appium, and Cypress and frameworks based on your programming language, technology stack, and project needs.
- Set Up the Testing Environment: A consistent and reliable testing environment is necessary for automated tests.
- Make sure that your testing environment closely mirrors your production environment, including databases, APIs, and other dependencies.
- Integrate your testing environment with a CI/CD service like Jenkins, GitLab CI, or CircleCI to automate the execution of tests.
- Write and Organize Tests: The next step is to write tests and organize them based on their type and purpose.
- Unit Tests: Write unit tests to test individual components in isolation. Moreover, mocking and stubbing can be used to simulate external dependencies.
- Integration Tests: You need to develop integration tests to verify interactions between different components and ensure that they cover real scenarios such as database queries, API calls, and service communication.
- End-to-End Tests: Create these tests to simulate user workflows and validate the entire system. Ensure that you include scenarios that cover critical paths in the application.
- Automate Test Execution: Automating the execution of tests is a key part of implementing automated testing.
- CI/CD Pipeline Integration: Start by integrating your tests into the CI/CD pipeline so they run automatically at the appropriate stages. Now, configure your CI/CD server to trigger test runs on code commits, pull requests, or scheduled intervals.
- Parallel Test Execution: Here, you need to optimize test execution by running tests in parallel, especially for large test suites, reducing the overall time required for testing. You can use tools like Jenkins and CircleCI that support parallel test execution across multiple agents.
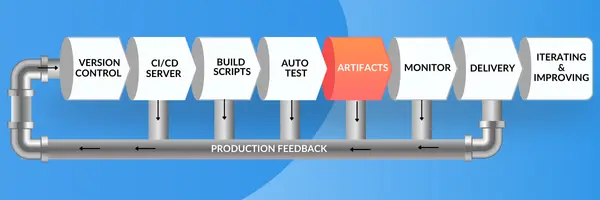
5. Artifacts and Artifacts Management
Artifacts are the products of your build process. Managing these artifacts effectively is crucial for consistent and reliable deployments.
- Generate Artifacts: During the build process, generate artifacts such as binaries, libraries, or Docker images. These artifacts are the outputs of your build process and are necessary for deployment as they ensure your deployments are repeatable and predictable.
- Store Artifacts: An artifact repository provides versioning, security, and access control for your build outputs. Use an artifact repository like JFrog Artifactory, Nexus Repository, or GitHub Packages to store and manage these artifacts. This central storage simplifies artifact retrieval and management.
- Version Artifacts: Ensure artifacts are versioned to maintain a clear history and facilitate rollbacks when necessary. This is crucial for tracking changes and ensuring that deployments are reproducible.
- Retrieve Artifacts for Deployment: Configure your deployment process to fetch the correct artifacts from the repository, ensuring consistency across environments. Automated retrieval reduces manual errors and speeds up the deployment process.
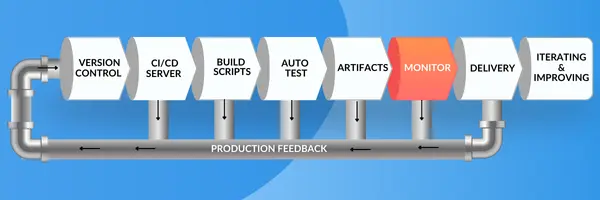
6. Implementing Continuous Monitoring
Continuous monitoring is a key aspect of maintaining the health and performance of apps in a CI/CD pipeline. This process involves setting up systems to track important metrics, collect and analyze logs, and configure alerts to identify and respond to issues quickly.
- Metrics: Monitoring key performance indicators provides insights into your application's performance and helps identify potential issues early.
- Identify KPIs: You need to measure KPIs, including response time, which measures how quickly your app responds to user requests; error rates, which track the frequency of errors occurring in your app; and resource usage, where you need to monitor CPU, memory, disk, and network usage to efficient resource utilization.
- Monitoring Tools: The two most popular monitoring tools are Prometheus and Grafana.
- Logging: Logs provide detailed information about application behavior, helping you diagnose issues and understand trends over time.
- Logging Tools: For logging, you can use Elasticsearch, Logstash, and Kibana (ELK), a suite of tools for searching, analyzing, and visualizing log data. Also, the EFK Stack (Elasticsearch, Fluentd, Kibana) uses Fluentd for log collection.
- Setting Up Logging: Start by setting up Elasticsearch to store and index log data and use either Logstash or Fluentd to collect logs from your app and send them to Elasticsearch. Afterward, connect Kibana to Elasticsearch to create visualizations and dashboards for your logs.
- Alerts: Alerts notify your team of anomalies or critical issues in real time, enabling quick responses to problems.
- Alerting Tools: The Prometheus Alertmanager and PagerDuty are the two popular alerting tools that can integrate with monitoring systems.
- Customize Alerts: By customizing the alerts to suit your team's needs, you ensure that notifications are relevant and timely. Tailored alerts prevent notification fatigue and ensure that important information is communicated effectively.
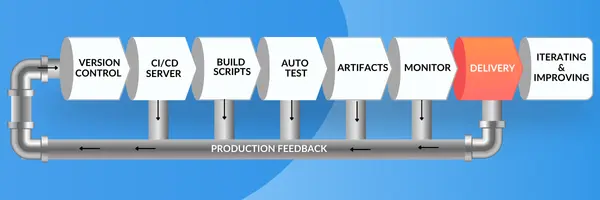
7. Continuous Delivery
This step involves automating the deployment of code to various environments, ensuring that your app is reliably and efficiently delivered from development through to production. Here's a detailed breakdown of each component in this step.
- Staging Environment: The staging environment is a replica of your production environment where you can deploy and test your code before it goes live.
- Ensure that the staging environment mirrors the production environment in terms of hardware, software, and configurations.
- Use this environment for final integration testing, performance testing, and user acceptance testing.
- Deployment Strategies: Utilize the right deployment strategy to deploy code changes to production while minimizing risk and downtime.
- Blue-Green Deployment: Maintain two identical production environments. At any time, one environment is live, while the other is idle. Deploy the new version to the idle version and then switch traffic to it.
- Rolling Update: Gradually replace instances of the old version with new ones, minimizing downtime by ensuring that parts of the app remain operational throughout the update process.
- Canary Release: Deploy the new version of the app to a small subset of users or servers before rolling it out to the entire production environment.
- Configuration Management: Configuration management ensures that the deployment process is consistent and repeatable across different environments.
- Use tools such as Ansible, Chef, and Puppet to automate the setup and management of configurations across environments.
- Keep configuration files under version control to track changes and ensure that the correct configurations are used in each environment.
- Deployment Tools: Deployment tools facilitate the automation and management of the deployment process.
- Choose deployment tools that integrate well with your CI/CD pipeline and support your deployment strategies. Popular tools include Jenkins for orchestration, Docker for containerization, and Kubernetes for container orchestration and management.
- Use these tools to automate the deployment process, including deploying code, managing environments, and rolling back changes if necessary.
8. Iterating and Improving the CI/CD Pipeline
Continuous improvement is vital to maintaining an efficient, and reliable CI/CD pipeline. This process involves regular reviews, gathering feedback, and seeking automation opportunities to ensure the pipeline evolves alongside the development team's needs.
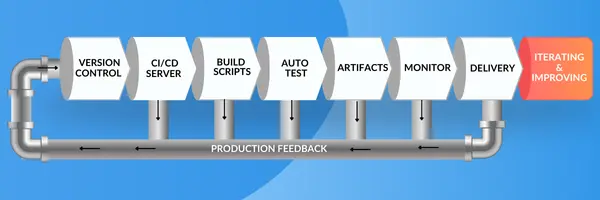
- Feedback Loop: Regularly collect and analyze feedback from developers and stakeholders to identify and address inefficiencies in the CI/CD pipeline.
- Collecting Feedback: Regularly obtain feedback from developers and stakeholders to highlight inefficiencies, and suggest improvements.
- Analyzing Feedback: Look for recurring problems in the feedback and make incremental improvements, focusing on high-impact areas. After changes are implemented, seek further feedback to assess their effectiveness.
- Automation: Continuously identify manual or repetitive tasks and automate them to enhance efficiency, reduce errors, and speed up the pipeline.
- Identify Automation Opportunities: Identify and automate tasks that are performed manually such as code reviews, testing, or deployments.
- Implementing Automation: Start with the most time-consuming or error-prone tasks, implementing automation gradually. Utilize tools like Jenkins and Selenium.
- Seek Continuous Automation: Stay updated with the new tools and techniques in CI/CD to identify further automation opportunities. As your pipeline evolves, continuously review new tasks for automation potential to maintain efficiency.
As you implement a CI/CD pipeline, it's essential to focus on best practices to maximize efficiency.
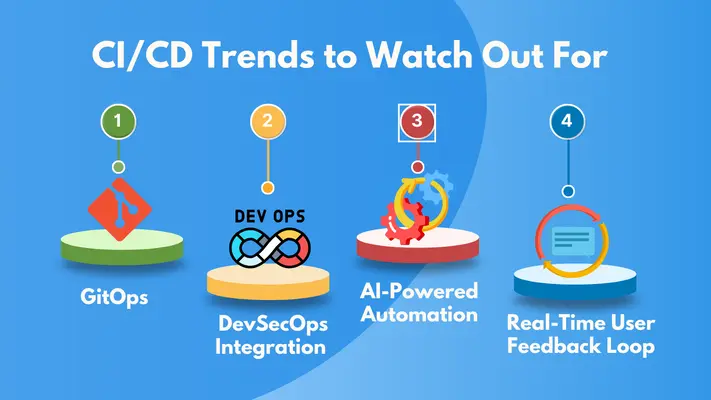
CI/CD Trends to Watch Out For
As we move further into 2024, CI/CD is evolving with new trends and technologies shaping the way we develop and deliver software. The following are the emerging CI/CD trends to watch out for this year.
1. GitOps
GitOps is a methodology that uses Git as the single source of truth for declarative infrastructure and application configurations. It utilizes Git repositories to manage and automate infrastructure operations.
- Infrastructure-as-Code: GitOps uses IaC tools like Terraform and Kubernetes to manage infrastructure declaratively, ensuring consistency and version control.
- Operational Consistency: Ensures that infrastructure and applications stay in sync with the codebase, reducing configuration drift and enhancing reliability.
- Adoption: 60% of DevOps teams are now implementing GitOps practices (Cloud Native Computing Foundation).
2. DevSecOps Integration
When security is integrated with DevOps practices, it becomes DevSecOps. This approach emphasizes the importance of making security a shared responsibility throughout the SDLC. According to a report by Red Hat, the adoption of DevSecOps has grown, with over 70% of organizations incorporating security into their CI/CD pipelines.
- Security Testing in CI/CD: Integrating security checks during the CI phase catches vulnerabilities early, leading to a 40% reduction in security incidents.
- Zero Trust Architecture: Incorporating a zero trust architecture within CI/CD pipelines ensures that every component is continuously verified, reducing the risk of security breaches.
3. AI-Powered Automation
AI and ML are increasingly being integrated into CI/CD pipelines to optimize processes, enhance decision-making, and predict potential issues before they occur. As per Gartner, 37% of organizations are already using AI in their CI/CD pipelines, and this number is expected to rise significantly.
- Predictive Analysis: AI and ML analyze historical data to predict build failures, test flakiness, and deployment risks, reducing downtime by nearly 30%.
- Automated Code Reviews: AI tools perform code reviews, suggest improvements, and identify vulnerabilities, cutting down manual workload.
4. Real-Time User Feedback Loop
A real-time feedback loop in CI/CD refers to the integration of continuous user feedback mechanisms within the development and deployment processes. This involves capturing user experiences and feedback instantly to inform and enhance ongoing development.
- Continuous Feedback Integration: Incorporating tools like Sentry, UserVoice, and Hotjar capture real-time user feedback, allowing teams to address issues and make improvements based on immediate feedback.
- Feedback-Driven Development: Directly incorporating user feedback into the CI/CD pipeline helps refine new features and updates based on real-user interactions.
How Can ThinkSys Help You Implement CI/CD Pipelines?
- Creating customized pipeline blueprints for your operational requirements.
- Our dedicated DevOps architects provide expert guidance for a smooth transition to your new CI/CD practices.
- Reducing the risk of manual errors with advanced automation frameworks.
- Industry-leading reporting tools for real-time analytics to help you make informed decisions.
- Seamless integration of CI/CD pipeline with legacy systems.

Conclusion
Adopting a CI/CD pipeline enhances efficiency, reliability, and agility in software development. By setting up the pipeline effectively and following best practices, teams can streamline processes, reduce errors, and speed up delivery. Embracing CI/CD prepares your team to adapt to changing demands and improve continuously. For those seeking guidance, leveraging the expertise of experienced partners can further facilitate a smooth and successful implementation.
Need Help Building Your CI/CD Pipeline? Let ThinkSys' Experts Guide You!
Frequently Asked Questions (FAQs)
How can I ensure my CI/CD Pipeline is scalable?
How do I choose the right CI/CD tools for my organization?
-Compatibility with your VCS.
-Support for your technology stack.
-Ease of integration with other tools.
-Scalability and performance.
-Community support and documentation.
What are the challenges of implementing CI/CD in legacy systems?
How does ThinkSys Manage Sensitive Data in a CI/CD pipeline?
-Secure Storage: To store and manage sensitive data, use secret management tools like HashiCorp Vault, AWS Secrets Manager, or Azure Key Vault.
-Environment Variables: Inject secrets as environment variables at runtime rather than hardcoding them in the source code.
-Access Control: Limit access to sensitive information using role-based access controls and audit logs.
Share This Article:


