How to Use Docker for Containerization?
Docker offers a powerful way to package, distribute, and run applications in isolated environments called containers. It's like giving your app space to run comfortably without any glitches.
But that also involves some complexities:
While Docker promises to simplify deployment and scaling, many developers need help navigating a sea of new concepts and commands. The learning curve can be steep, and missteps can lead to security vulnerabilities or performance issues.
Now, don't surrender yet.
This guide simplifies Docker for you and walks you through the containerization process step by step.
You'll learn things like:
- How to set up Docker?
- How to create your first container?
- And even how to orchestrate multi-container applications.
By the end of this article, you'll know how to containerize your applications with confidence, streamline your development workflow, and say goodbye to environment inconsistencies.
Let's begin with setting up Docker first.
How to Set Up Docker Quickly and Easily for Better Development?
Installing Docker is your gateway to the world of containerization. It's the crucial first step that sets the foundation for all your future container-based projects.
With Docker installed, you can create, deploy, and run applications. It's easy and will help you run your application across different environments without a hitch. Plus, you'll join the 85% of companies that choose Docker as their go-to containerization solution.
But here's the roadblock:
Many users stumble right at this step. Because firewall settings can be a real pain, older operating systems might interrupt the work.
You can overcome such Docker installation challenges by following the roadmap given below:
- Download and Install Docker: First, visit Docker's official website. You'll find the right version for your operating system, whether it's Windows, macOS, or Linux. Once you've got the installer, run it and follow the prompts. It's pretty straightforward, but pay attention to any system-specific instructions.
- Verify the Installation: After the installation, it's time for a quick health check. Open your terminal or command prompt. Type in docker --version and hit enter. If you see the Docker version info pop up, congratulations! You've successfully installed Docker.
- Troubleshoot Common Issues: Don't worry if you hit any roadblocks. It happens to the best of us. First, check your firewall settings. Sometimes they can be overprotective and block Docker from doing its thing. Also, make sure your operating system is up to date. Docker can be a bit picky about the company it keeps, so older OS versions might not work. If you're still stuck, Docker's official documentation is a goldmine of troubleshooting tips.
By following these steps, you'll have Docker up and running in no time.
Don't get discouraged if it takes a few tries. Before you know it, you'll be containerizing applications like an expert. Not let's learn about the next step - Dockerization.
How to Make Your App Portable and Flexible with Dockerization?
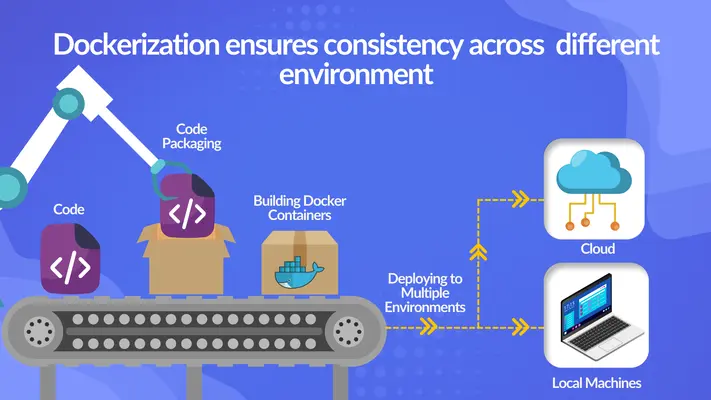
Dockerizing your application is like giving it magical powers. It ensures your app runs consistently across any environment, eliminating the "it works on my machine" syndrome.
By containerizing your app, you're packaging it with all its dependencies, making deployment a seamless and efficient task. Companies have reported significant reductions in deployment time after Dockerizing their applications, a promising sign for your own projects.
Before you start, we have to warn you about something:
Many developers stumble when writing their first Dockerfile. Syntax errors can be tricky; missing dependencies can make your containerization efforts a nightmare.
That's why you need the blueprint for Dockerization success:
- Craft Your Dockerfile: Start by creating a Dockerfile in your project root. This is your recipe for containerization. Begin with the FROM instruction to specify your base image. Then, use RUN to execute commands in your container, and COPY to add your application code. Finally, set an ENTRYPOINT to specify the command that runs when your container starts. Remember, each instruction creates a new layer in your image, so organize them wisely to optimize build times.
- Build Your Docker Image: Once your Dockerfile is ready, it's time to build. Open your terminal, navigate to your project directory, and run docker build -t my-app. This command tells Docker to build an image based on your Dockerfile and tag it as 'my-app'. Watch how Docker creates layers and builds your image.
- Run Your Containerized App: Now for the moment of truth. Run your container with docker run -d -p 5000:5000 my-app. This command starts a container from your image, running in detached mode (-d) and mapping port 5000 of the container to port 5000 on your host. If all goes well, your app should now be running in a container.
This way, you will successfully Dockerize your application. Now, let's understand how to manage multiple-container applications in Docker.
How Docker Compose Can Simplify Your Complex App Management?
Docker Compose is your master tool for multi-container applications. It allows you to easily define and run multi-container Docker applications.
With Docker Compose, you can describe your entire app's environment in a single file, making it simple to reproduce and share. This is also a way to reduce your infrastructure costs. Ataccama Corporation, a famous software company highlights the fact it showed a 40% reduction in infrastructure costs by efficiently managing its microservices architecture through Docker Compose.
There is only one issue:

YAML syntax can be tricky, and incorrect service configurations can lead to unexpected behaviors. Many developers scratch their heads when their services don't work together.
Here's your step-by-step process manage multi-container apps:
- Install Docker Compose: Make sure Docker Compose is part of your toolkit. Run docker-compose --version in your terminal. If it's not installed, follow the official Docker documentation to get it set up.
- Create Your Docker Compose: .yml This file is the blueprint for your multi-container app. Here's a basic example:

This defines two services: a web app and a database. You can add more services, set environment variables, specify volumes, and more in this file. - Launch Your Multi-container App: With your docker-compose.yml in place, starting your app is as simple as running docker-compose up -d in your terminal. Docker Compose will pull the necessary images, create your services, and start your containers.
- Scale Your Services: Do you need more instances of a service? No problem. Use docker-compose scale web=3 to spin up three instances of your web service. It's that easy to handle the increased load.
Once you master Docker Compose, you can easily handle complex, multi-container applications. All you need to do is understand how to optimize your Docker images, which we will learn in the next section.
Improve Docker Performance by Optimizing Your Images
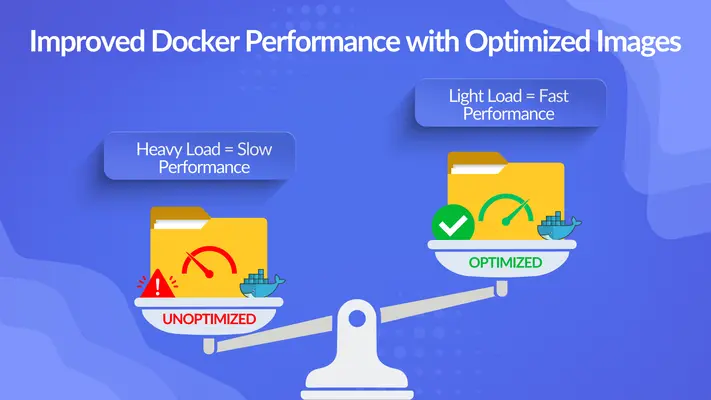
Optimizing your Docker images is like fine-tuning a complex machine. It's all about reducing size and improving build times for peak performance.
Lean images mean faster builds, quicker deployments, and more efficient resource utilization. Optimized Docker images can reduce build times, significantly enhancing your CI/CD pipeline efficiency.
However, this is not as easy as it sounds.
You might end up with bloated images, stuffed with unnecessary files and dependencies.
Here's how you can optimize your Docker images efficiently:
- Leverage .dockerignore: Create a .dockerignore file in your project root. This tells Docker which files to ignore when building your image. Include things like node_modules, .git, and any other files not needed in your container. It's like decluttering your house before a move.
- Choose Lightweight Base Images: Opt for minimal base images like alpine versions. Instead of FROM ubuntu:latest, try FROM alpine:latest. This brings additional build efficiency to your images.
- Optimize Layer Caching: Arrange your Dockerfile instructions strategically to make the most of layer caching. Put instructions that change frequently (like COPY . /app) towards the end of your Dockerfile. This way, Docker can reuse cached layers for unchanged parts of your image, speeding up builds.
- Clean Up As You Go: After installing packages, clean up unnecessary files. For example:

This installs bash and then removes gcc to keep your image slim. These optimization techniques will help you create lean, mean Docker images that build faster and run more efficiently. Now, let's understand how to accelerate your deployments.
How to Speed Up Deployments Using Docker with CI/CD?
Integrating Docker with your CI/CD pipeline is like adding more power to your development workflow. It ensures consistent, reliable deployments across your entire pipeline.
This integration streamlines your development process, from commit to production. This company witnessed an increase in deployment frequency after integrating Docker with their CI/CD pipelines, significantly enhancing their go-to-market speed up to 75% faster deployments.
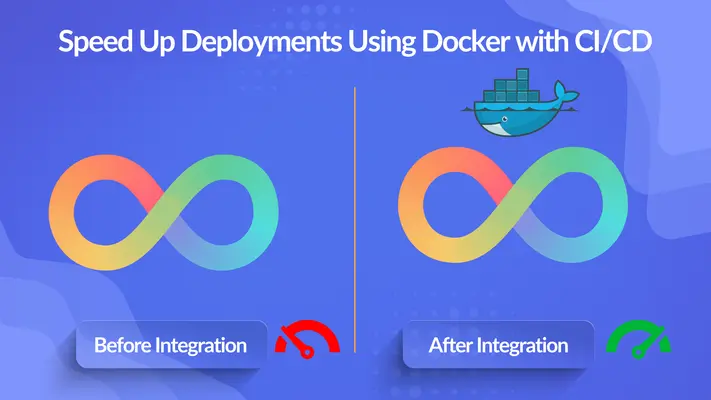
It may be complex if you are unfamiliar with pipeline errors and integration challenges.
In that case, follow these steps:
- Choose Your CI/CD Tool: Start by selecting a CI/CD tool that plays well with Docker. Popular choices include GitHub Actions, GitLab CI, and Jenkins. Each has its strengths, so choose based on your team's needs and existing infrastructure.
- Define Your Pipeline Stages: Structure your pipeline into clear stages: build, test, and deploy. Here's a simple example using GitHub Actions:

- Incorporate Docker commands: Use Docker commands like docker build, docker push, and docker run within your pipeline. This ensures your app is built, tested, and deployed consistently in containerized environments.
- Monitor and Refine: Keep a close eye on your pipeline execution. Use the monitoring tools provided by your CI/CD platform to catch and address any issues quickly. Continuously refine your pipeline based on performance metrics and team feedback.
When you integrate Docker with your CI/CD pipeline, you set the stage for faster, more reliable deployments. But don't forget to add security. Next, we'll talk about how to integrate security into your Docker setup.
Secure Your Docker Containers Against Threats
Securing your Docker containers is like building secured walls around your applications. It's crucial for maintaining the integrity and reliability of your containerized environment.
Robust security measures protect your applications from vulnerabilities and potential attacks. Red Hat, in a recent study, found out that 67% of companies had to delay or slow down application deployment because of container-based security issues in their applications.
That clearly shows that you can't overlook container security and leave your applications exposed.
Is there any way to secure your Docker containers?
Definitely.
Here's your blueprint to container security:
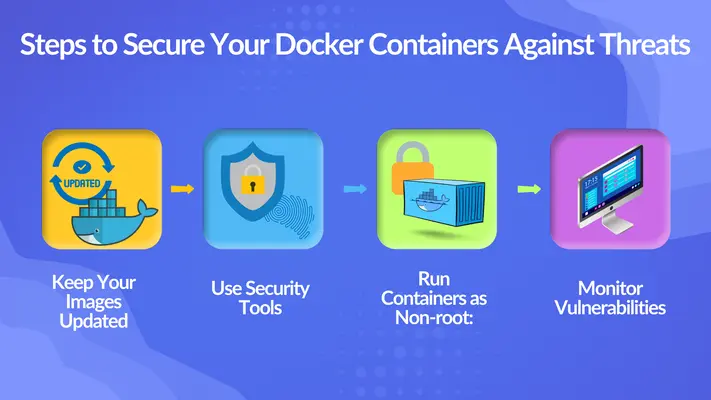
- Keep Your Images Updated: Regularly update your base images to ensure they include the latest security patches. It's like keeping your antivirus software up-to-date. Use commands like docker pull to fetch the latest versions of your base images.
- Use Security Tools: Employ tools like Aqua Security or Twistlock to identify and rectify vulnerabilities in your containers. These tools can scan your images, detect misconfigurations, and even prevent unauthorized access attempts.
- Run Containers as Non-root: Configure your Dockerfile to run applications as non-root users. This limits the potential damage if a container is compromised. Add this to your Dockerfile:
USER nonroot - Monitor Vulnerabilities: Regularly scan your Docker images for vulnerabilities using tools like Clair or Trivy. It's like having a security member constantly checking for issues. Set up automated scans as part of your CI/CD pipeline to catch vulnerabilities early.
All these security measures will build a robust defense for your containerized applications. Also, there is one more way to take your container security to the next level, which we will cover in the next section.
How to Gain Clear Insights into Your Containers with Effective Monitoring?
Effective monitoring and logging of your Docker containers is like having x-ray vision into your applications. It provides crucial insights into performance, helps troubleshoot issues, and ensures smooth operations.
With proper monitoring and logging, you can proactively address issues before they impact users.
Many teams struggle with performance overhead from excessive monitoring and dispersed logs that make troubleshooting a nightmare.
To encounter that, follow these steps:
- Choose Your Monitoring Tools: Start by selecting monitoring tools that fit your needs. Prometheus and Grafana are popular choices for metrics collection and visualization. For logging, consider the ELK Stack (Elasticsearch, Logstash, Kibana) or Fluentd. These tools provide comprehensive insights into your container performance and logs.
- Implement Health Checks: Define HEALTHCHECK instructions in your Dockerfiles. This allows Docker to automatically monitor the health of your containers. Here's an example:
HEALTHCHECK CMD curl --fail http://localhost:5000 || exit 1
This checks if your application is responding on port 5000. - Centralize Your Logs: Set up a centralized logging solution to aggregate logs from all your containers. This makes troubleshooting much easier. Use tools like Fluentd or Logstash to collect and forward logs to a central repository.
- Analyze Your Metrics: Regularly review key metrics like CPU usage, memory consumption, and network I/O. Set up dashboards in Grafana to visualize these metrics, making it easy to spot trends and potential issues.
When you implement these monitoring and logging practices, you give yourself a clear window into your containerized applications' performance and health. After all this, you want to scale your app.
But how do you do that?
Kubernetes is the answer. We'll now understand the role of Kubernetes in application growth.
How Kubernetes Can Help You Scale Your App Efficiently?
Kubernetes is your go-to tool for scaling and orchestrating containerized applications. It automates the deployment, scaling, and management of your Docker containers, allowing your applications to reach new heights.
With Kubernetes, you can efficiently manage complex, multi-container applications at scale. Companies transitioning to Kubernetes have reported improved service reliability, especially during traffic spikes, and more efficient resource utilization. For example, Pinterest was struggling to cater to its over 250 million users. Later they moved to Kubernetes, which resulted in less resource utilization and faster deployments.
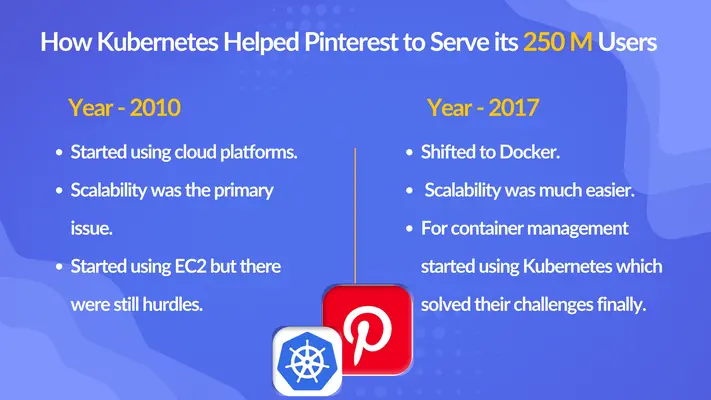
Kubernetes is a useful tool to manage containers but it has a steep learning curve. Its complex configurations can be overwhelming. This tool is so vast that you might need experts to implement it effectively in your organization.
However, here's a simple process to get started with Kubernetes:
- Set Up Your Kubernetes Environment: Start by installing a local Kubernetes environment like Minikube. This gives you a playground to experiment with Kubernetes without affecting production systems. Follow the official Kubernetes documentation for installation instructions specific to your operating system.
- Deploy Your Docker Containers: Create Kubernetes deployment files to define how your containers should run. Here's a simple example:

Use kubectl apply -f to deploy your applications based on these configuration files. - Manage Your Configurations: Use Kubernetes ConfigMaps and Secrets to manage your application configurations and sensitive data. This allows you to keep your container images generic and inject environment-specific configurations at runtime.
- Implement Auto-scaling: Set up Horizontal Pod Autoscaler (HPA) to automatically scale your applications based on metrics like CPU utilization. This ensures your application can handle traffic spikes efficiently.
By mastering Kubernetes, you're equipping yourself with a powerful tool to manage and scale your containerized applications effectively.
Conclusion
And that's it for today. We've covered Docker, from installation to orchestration. You're now equipped with the knowledge to containerize your applications like an expert.
We've covered a lot, diving deep into each step of the Docker workflow. From crafting Dockerfiles to optimizing images, and even touching Kubernetes, we've explored the crucial aspects of containerization.
But let's be real for a moment:
If you're working on a complex project or facing tight deadlines, implementing Docker might still feel complex. If that's the case, don't hesitate to reach out to our experts at Thinksys for your containerization needs. We can help ensure your transition to Docker is smooth and effective.
Frequently Asked Questions (FAQs)
How long does it typically take to Containerize an existing application using Docker?
What kind of performance improvements can we expect after Containerizing our application?
How do you ensure the security of our application during and after the containerization process?
Can you help with the transition to Container Orchestration platforms like Kubernetes after Containerizing our application?
Share This Article:


