Build Mobile Apps with React Native: Step-by-Step Guide
In this guide, we will walk you through the entire process to build mobile apps with React Native. React Native has become a go-to framework for building mobile apps. It allows you to create stunning, high-performance apps for both iOS and Android using a single codebase. That means less time, less effort, and better ROI.
While React Native development promises to simplify mobile development, many developers are lost in a maze of new concepts, tools, and best practices. Finding skilled React Native developers poses challenges for most businesses.
You'll learn:
- How to set up your development environment.
- Structure your project for success.
- Build core functionalities, optimize performance, and even maintain your app post-launch.
Let's start building your React Native applications.
React Native Mobile App Development: Setting the Foundation
Preliminary research and planning lay the foundation for your app's success. It's like creating a detailed map before starting the journey.
Investing time in this crucial step can save countless hours and resources in the future. A well-thought-out plan can reduce development time and increase the chances of your app's success. It can also help you avoid costly mistakes and revisions later in the React Native app development process.
That's why skipping this process might lead to problems later for developers. They might end up with a faulty structure that needs constant repairs.
Here's what your development process should look like:
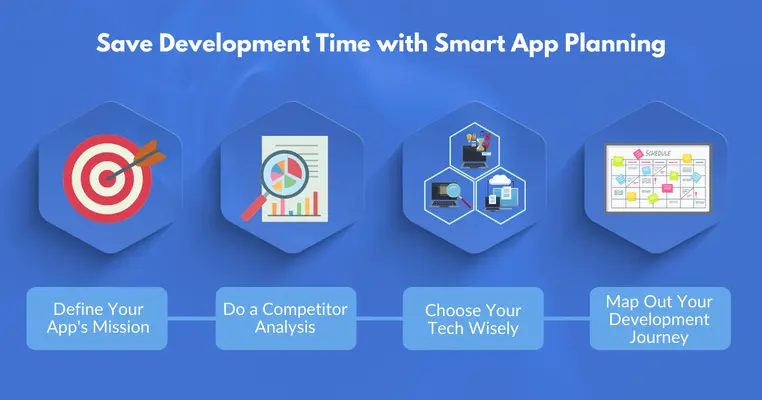
- Define Your App's Mission: Start by asking yourself: What problem does your app solve? Who's your target audience? It's like finding your app's "why." Note down the key features that will make your app stand out. Remember to consider your budget and timeline. These will be your guiding principles throughout the React Native mobile app development process.
- Do a Competitor Analysis: Dive into the app stores and see what similar apps are out there. What are they doing well? Where are they falling short? You don't have to copy anything, but this step is crucial to finding your unique angle.
- Choose Your Tech Wisely: React Native is great, but is it the best fit for your app? Compare it with alternatives like Flutter or native development. Consider factors like performance, community support, and your team's expertise in React Native development.

- Map Out Your Development Journey: Break down your React Native app development into manageable steps. Create a timeline with clear milestones. Don't forget to factor in time for testing and potential roadblocks.
While planning, you also need to consider whether your in-house team can handle it or if you want to outsource React Native development services for faster delivery. Once you have a plan, you can move towards giving it shape.
Let's go to the next step to discuss coding practices and setting up the development environment.
Increase Your Coding Speed with a Well-Set React Native Development Environment
Setting up your React Native development environment is essential for improving productivity. It minimizes errors, helps you focus on building your app, and ensures consistency across your team.
Here's how to set up a productive React Native development environment:
- Get the Essentials in Place: Start by installing Node.js, npm, Android Studio for Android development, and Xcode for iOS (if you're on a Mac). These are your vital tools, so ensure you have the latest versions.
- Set Up Your React Native Playground: Install React Native CLI with the command
npm install -g react-native-cli. This global installation ensures you can create React Native projects anywhere on your machine. - Configure Your Emulators: In Android Studio, create a new virtual device via the AVD Manager. For iOS, Xcode comes with built-in simulators. This step ensures your app looks and feels the same across devices.
- Start with Test Project: Create a test project using react-native init TestProject. Go to the project folder and run react-native run-android or react-native run-ios. If you see the welcome screen on your emulator, you've just successfully set up your React Native environment.
As you can see, setting up an environment is relatively easy. Just follow the steps to prepare it for your project. However, some essential steps must be kept in mind, which we will cover in the next section.
React Native Project Structure: Ensuring Code Maintainability
By creating a new React Native project, you build the foundation for the complete application. It sets the stage for everything that follows so ensuring your app is built on solid ground is a must.
This way, React Native project can reduce development time and make your codebase easier to maintain. The goal is to write scalable, maintainable, and team-friendly code.
A poorly organized project can lead to confusion and hours of wasted time.
Here's how to structure your React Native mobile application for success:
- Initialize Your Project: Run
react-native init YourAwesomeAppto set up a basic project structure. - Organize Your Project Files: Create folders for components, screens, utils, and assets. Think of this as creating segments with a specific purpose. Your components folder is for reusable UI elements, screens for full-page components, utils for helper functions, and assets for images and fonts. This organization will save you countless hours of "Where did I put that file?" frustration.
- Set Up Version Control: Initialize a Git repository with git init. Then, create a .gitignore file to exclude unnecessary files from version control. This way, you can always go back if something goes wrong. After doing all this, make your first code commit.
- Install Essential Dependencies: Use npm or yarn to install the packages you'll need. Start with the basics like react-navigation for routing and axios for API calls. Remember, adding as you go is easier than removing unnecessary packages later.
Now you have all the things you need to build your app. If you have an existing business, go ahead and start building your app. But if you're just starting out, build an MVP before a complete app. The following section will help you understand what to remember when creating an MVP with React Native.
Now you have all the things you need to build your app. If you have an existing business then go ahead and start building your app. But if you're just starting then build an MVP before a complete app. The next section will help you understand what you need to keep in mind when building an MVP with React Native.
Building an MVP with React Native: Focus on Core Features
When creating an MVP (Minimum Viable Product) using React Native, focusing on the core features is essential. It helps you get to market faster, gather user feedback early, and avoid building unnecessary features. This keeps your app lean and mean, improving performance and user satisfaction.
While doing this, it's easy to get lost in a sea of features, trying to build everything at once. It may sound like a good thought but is likely to end up moving in the wrong direction.
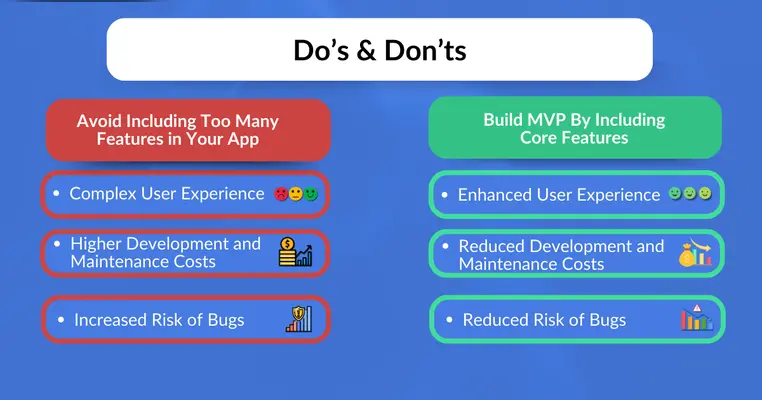
Here's how you can prioritize and build your features efficiently:
- Prioritize Features Using MoSCoW: List all potential features and prioritize them using the MoSCoW method (Must have, Should have, Could have, Won't have). Focus on the 'Must haves' for your MVP. You can always add more later.
- Build Your UI Components: Create reusable components for common UI elements like buttons, forms, and lists. Think of these as Lego blocks that you can use to build different parts of your app. Use a component library like React Native Elements to speed up this process. It has pre-made building blocks of your app.
- Implement Navigation: Set up your app's navigation using React Navigation. Users should be able to move between screens seamlessly. Create an intuitive navigation structure because if users get lost, they'll likely get frustrated and leave.
- Integrate with APIs: Connect your app to backend services using Axios or Fetch. This gives your app a brain and memory. Your app can now remember things and make smart decisions. Start with basic CRUD operations, then add more complex interactions as needed.
- Add Authentication: Implement user authentication using a service like Firebase Authentication. It's like adding a security system to your app. It keeps the potential threats out. Make sure to follow best practices for storing user data securely.
Your React Native app is getting its shape. But it would help if you also considered that it should be bug-free and users should enjoy interacting with it.
But how will you ensure that?
Let's address it in the next section.
Thorough Testing in React Native: Reducing Post-Release Bugs
Thorough testing is your secret weapon for delivering a high-quality app, whether using React Native or any other technology.
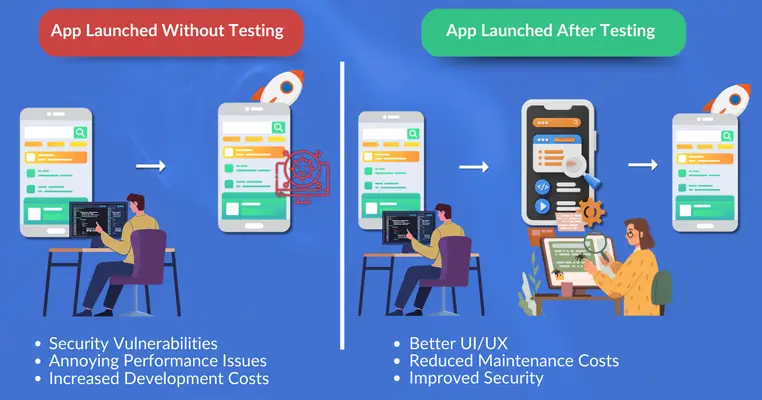
Rigorous testing can reduce post-release bugs. It not only prevents embarrassing glitches but also cuts down on costly fixes after launch. A well-tested React Native mobile app ensures better performance and user satisfaction.
Developers view testing as a burden. Sometimes, they rush through it or skip it altogether. This strategy can backfire if users find bugs in it.
Here's how to approach testing in React Native development:
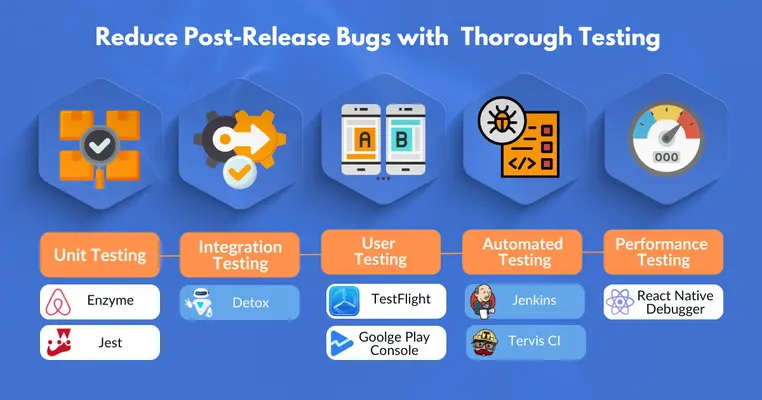
- Embrace Unit Testing: Start with Jest and Enzyme to write unit tests for your components and function. Test each component in isolation to ensure it behaves correctly. Aim for at least 80% code coverage. This way you'll be able to catch as many bugs as possible.
- Level Up with Integration Testing: Use a tool like Detox to test how different app parts work together. This exercise ensures that all the components are working properly together. Create scenarios that mimic real user behavior. In this step, you need to think like your users and try to anticipate their behavior in your tests.
- Don't Forget about User Testing: Release a beta version to a group of testers. These testers provide real feedback, and you can debug the issues before launching your application. Use tools like TestFlight for iOS and Google Play Console for Android to distribute your beta. Encourage honest feedback because it's better to hear about issues now than after the launch.
- Automate Your Testing Process: Set up continuous integration (CI) using tools like Jenkins or Travis CI. When you integrate CI tools into your testing process, you can cover more tests in less time. Next, automate as much of the testing process as possible because it saves time and catches errors that humans might miss.
- Implement Performance Testing: Use tools like React Native Debugger to check your app's performance. Look for memory leaks, slow rendering, and excessive re-renders. This will allow you to fine-tune optimization, which can lead to big performance gains.
Every bug you catch before release is a potential negative review avoided. And as soon as you launch your application, you receive positive reviews and multiple word-of-mouth recommendations.
But before that, you need to ensure that your app loads faster. Let's discuss its importance in the following section.
React Native Performance Optimization: Ensuring Your App Loads Faster
Optimizing your React Native app's performance is like giving it extra wings to rank top of the app store. It's the difference between a sluggish app that users abandon and a fast one they can't stop using.
A properly optimized app can load faster and use less battery. This improves user satisfaction and can raise your app store ratings. A smooth-running app also means fewer frustration-induced uninstalls.
But it's the phase where most businesses make mistakes:
They overlook performance optimization and focus solely on features. As a result, your app looks good in terms of design and features but lacks the power to satisfy users' expectations.
Here's how you can ensure your application meets all the optimization standards:
- Identify Performance Bottlenecks: Use React Native Debugger and Flipper to analyze your app's performance. These are like x-ray machines for your app, showing you exactly where the slowdowns are happening. Look for excessive re-renders, memory leaks, and slow API calls. This way, you can measure and fix things on time.
- Optimize Your Renders: Use React's PureComponent and memo to prevent unnecessary re-renders. This cuts out all the unnecessary work. Be mindful of your component structure and prop passing. Sometimes, a small restructure can lead to big performance gains.
- Manage Your App's Memory: Keep an eye on memory usage, especially with image-heavy apps. Use tools like react-native-fast-image for efficient image loading. Implement list virtualization for long scrolling lists to keep memory usage in check.
- Improve Load Times: Perceived performance is just as important as actual performance. That's why you need to keep your users engaged while content loads. To make that possible, implement code splitting and lazy loading to reduce initial load times. This is like serving your app in bite-sized pieces instead of one large chunk. Use asset preloading for critical resources.
- Optimize API Calls: Use efficient data fetching techniques like pagination and caching. Using this strategy will enable your app to interact with what you need when you need it. Implement retry logic for failed API calls and show loading states to keep users informed.
By now you have understood the fundamentals of building a reliable React Native application. But that's still the half work unless you know how to list it on the App Store quickly.
App Store Deployment Tips for React Native Applications
If you know how to prepare the React Native mobile app submission, you can reduce approval time significantly. It also minimizes the risk of rejection, saving you time and frustration. Besides that, a smooth launch can increase initial downloads by giving your app the strong start it deserves.
Honestly, you don't want to underestimate the complexity of the submission process like most developers do. When you take shortcuts to deploy your application without understanding the complications, you're setting yourself up for failure.
But you can address it using this step-by-step deployment guide:
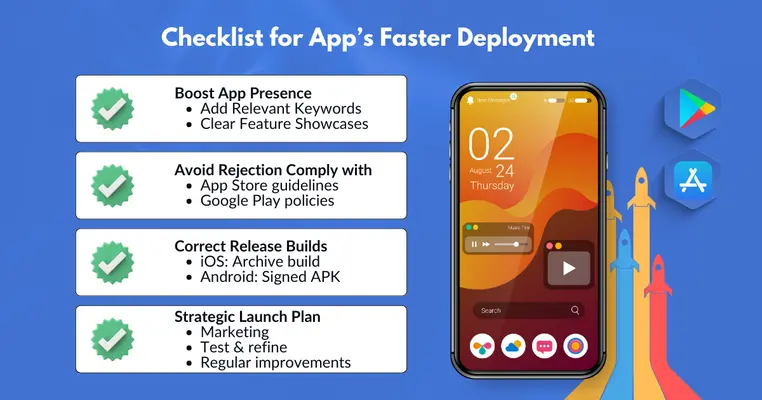
- Improve Your App Store Presence: Start by crafting compelling app store listings. Your app's title, description, and screenshots are like your storefront. They need to grab attention and showcase your app's best features. Use keywords strategically to improve discoverability. List the things that your app does and how it helps users.
- Ensure Platform Compliance: Carefully review the guidelines for both the App Store and Google Play Store. You must pay attention to this to be able to list your app. Consider privacy policies, content ratings, and data handling practices. Non-compliance is the fastest route to rejection.
- Prepare Your Builds: Generate release builds for both iOS and Android. This involves code signing and configuring your build settings correctly. Double-check all your configurations. A small mistake here can lead to big headaches later.
- Plan Your Launch Strategy: Develop a launch plan that includes marketing activities and a schedule for updates. This will help you get exposure for your React Native app and keep the momentum going. Consider a soft launch in select markets to gather initial data and reviews before a full-scale release.
The app stores are crowded places. The only way to stand out is to plan each submission step carefully. Sometimes, this means double-checking everything before introducing your app to the world.
After this, the real test rolls out updates consistently to enhance the user experience.
Regular Updates and Maintenance for React Native Apps: Enhancing User Retention
Ongoing maintenance is the secret that keeps your React Native mobile app relevant and loved long after its initial launch.
Regular updates can increase user retention and engagement. They show users that you're committed to improving their experience, which can lead to better reviews and more organic downloads. Also, staying on top of maintenance reduces the risk of critical issues.
At this stage, don't make the mistakes that many developers do.
They assume that launch is the finish line and neglect ongoing maintenance. Imagine you have done all the hard work to this point, and because of a slight negligence, you could ruin all your efforts.
- Establish a Regular Update Schedule: Aim for updates every 2-4 weeks. This keeps your app fresh in users' minds and allows you to continuously improve based on feedback. Mix bug fixes with new features to keep things interesting. Here, consistency is key, as users should come to expect and look forward to your updates.
- Monitor and Act on User Feedback: Keep a close eye on app store reviews and ratings. Use tools like AppFollow to aggregate and analyze feedback across platforms. Respond to reviews promptly. It shows you're listening and care about user experiences. While sometimes hard to hear, negative feedback is gold for improving your app.
- Stay on Top of Platform Changes: Keep up with iOS and Android updates, as well as changes to React Native. It prevents bigger problems from occurring later. Allocate time to test your app on beta versions of new OS releases. This way, you're ready when the updates go live, rather than trying to fix compatibility issues.
- Implement Analytics and Crash Reporting: Use tools like Firebase Analytics and Crashlytics to gain insights into user behavior and app performance. This way, you can continuously monitor your app's performance 24/7 and, based on the issues, improve your app.
Conclusion:
That's it! We've covered the entire React Native app development process, from planning and setting up the development environment to performance optimization and app store submission.
If you find the process complex or need assistance, ThinkSys is here to help. With our extensive expertise, commitment to quality, and customer-first approach, we ensure your app not only meets but exceeds your expectations.
Let's bring your vision to life.

Frequently Asked Questions (FAQs)
How long does it typically take to develop a React Native App from start to finish?
What advantages does React Native offer over Native App Development?
How do you Ensure the App performs well on iOS and Android platforms?
What kind of Ongoing Support do you provide after the app is launched?
Share This Article:


